D-0112389-I – 2022/04
Sera™ - Instructions for Use - EN
Page
13
3.4.1 Battery charging
The printer is powered by a Lithium-ion battery.
To charge the battery, you must insert the plug of the charger into the
laterally placed socket and plug the power supply into a power outlet
or connect the printer to a PC. Alternatively, the printer can be placed
in its cradle while the cradle is connected to a power outlet. The
green light on the front side of the printer will flash to indicate
charging is occurring. Should the battery be fully charged, the green
light will be constant.
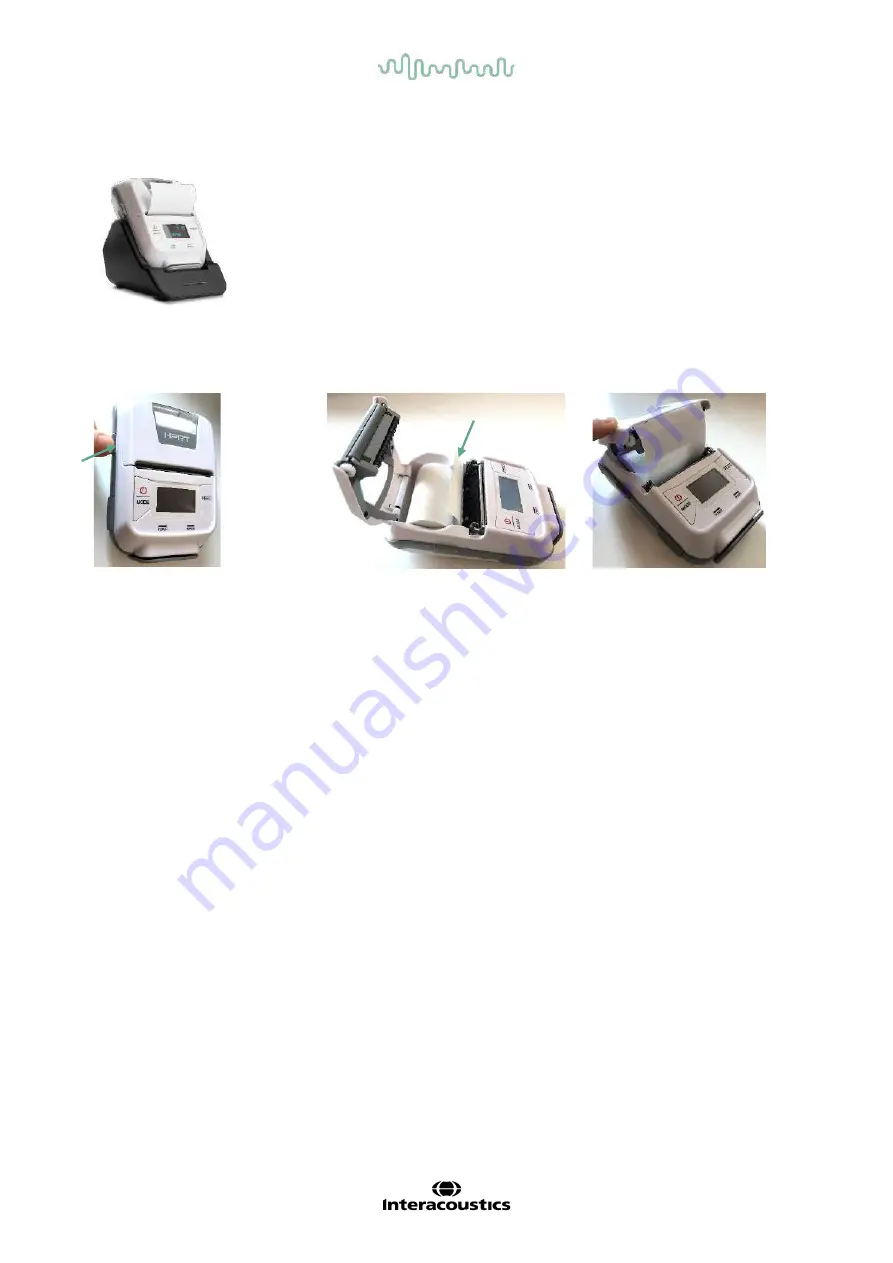
3.4.2 Installing label paper in the printer
To insert a new label roll into the
label printer, open the printer by
sliding the button on the left side
of the printer downwards.
Insert the label roll into the printer
with the paper end placed facing
the printer display.
Once the label roll is in place,
close the cover.
Turn the printer on and press
the feed button on the left side
so that the printer can properly
align the labels with the print
head.
Optionally, thermal paper can be used with the HM-E200 thermal printer. Refer to the HM-E200 printer user
manual for setup instructions.
3.4.3 Turning the printer on and off
Push the POWER BUTTON for two seconds to power ON or OFF.
The Green Power Indicator is lit while the printer is on. Once the printer goes into standby, the green Power
Indicator will flash, while the display turns black. Push the power button shortly to get the printer out of
standby mode.
3.4.4 Connecting the wireless printer to the Sera
TM
Pairing the printer to the Sera
TM
is necessary before wireless printing is possible.
Follow these instructions to pair the printer:
1. Turn the printer on by holding down the power button for 2 seconds
2. On the Sera
TM
hand-held unit, go to
Setup | Printer
and press
Search
3. Let the instrument search for wireless devices. This may take up to 1 minute
4. A device called HM-E200 should appear in the list of devices
5. Press
Select
to finish pairing


