background image


6


4

B

XXXX

      Brightness value, range: -2048-+2048. This function is only effective when the auto 

imaging  mode  setup  is 

Auto  0

.  In 

Auto  1

  or 

Auto  2

  modes,  brightness  is 

automatically adjusted. When trigger

Aperture- off

, cursor will skip brightness 

setup option. 

5

P

X

            White/black hot display mode 

0: black hot      1: white hot 

6

Z

          Zoom status 

                                  1: No zoom        2: 2 

7

FOV:X

          FOV mode display 

                                    N: narrow                W: wide 

8

E: X           

NC 

9

C

X

            Cross cursor display 

Y: on                  N: off 

10

Setting:

      use

near focus

and 

far focus

to go to internal menu. 

11

Exit

XXX

        use

near focus

and 

far focus

to exit the menu 

Note:

  When  exiting  the  main  menu,  all  change  will  be  saved  automatically  and  will  be  taken 

effect when restarting next time. 

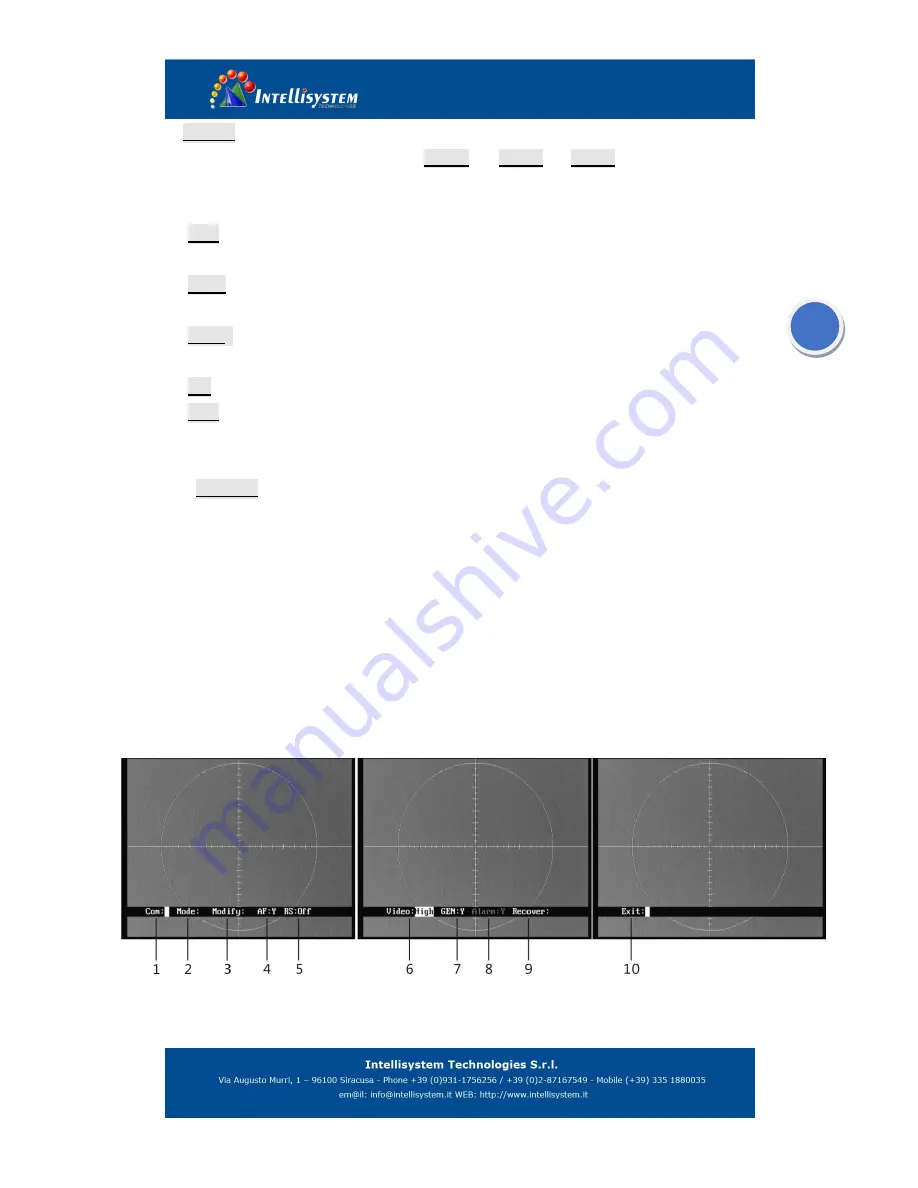
5.2 System menu 

In the main menu, move the cursor to “setting”, and use

near focus

or

far focus

  to go 

to system menu. 

You need to input password when go to system menu, the password is

Aperture-on

』『

Far 

Focus

Aperture-on

Near Focus

Aperture-on

Aperture-on

. With the correct password, 

you will come to the system menu shown as Fig. 7


Fig. 7 

        Trigger

Aperture- off

and move the cursor, use

near focus

and 

far focus

to modify 

the values or options. When you exit the menu, parameters will automatically be saved. 

Summary of Contents for ThermalTronix TT-1100B-UTCM

Page 1: ...ThermalTronix TT 1100B UTCM Thermal Imaging Module User Manual...

Page 2: ...mp rain is likely to incur module performance reduction even damage the module Make sure that the power control connection is reliable If the power control wire is in bad connection when switch on the...

Page 3: ...TIONS 1 3 1 Detector 1 3 2 Module 1 4 INTERFACE 2 5 OPERATION GUIDE 2 5 1 Operation process 2 5 2 Control Key function explanations 3 4 CONTROL KEY CHART 4 5 OPERATING INTERFACE 5 5 1 Main menu 5 5 2...

Page 4: ...black hot 9 Crosshair display movement save 10 Standard PAL video output 11 Standard RS 485 interface 12 Viewer switch function 13 Auto focus function 14 Prevention of lightning Product Informations...

Page 5: ...t 6s it is normal with this product that the screen keeps stable with no changes Camera start working after another 15s 5 1 2 Image Adjustment Open lens cap Adjust lens focus to reach clearest IR imag...

Page 6: ...em is not active press the key to focus motor backwards KEY3 C Press it to activate image calibration KEY4 M Press it to activate or conceal the menu select the operation function use KEY1 KEY2 to adj...

Page 7: ...e order is FF 01 00 00 00 00 02 1 Near Focus if not in the menu manually adjust lens to near focusing if press key in menu Change the value of choose items if press this key address is 1 and PELCO D p...

Page 8: ...djust brightness according to the observed object Auto 2 auto gain auto brightness 2 Mode X Display the current image mode Module has ten configuration setups under Auto2 mode Mode 0 and Mode 1 are fi...

Page 9: ...rnal menu 11 Exit XXX use near focus and far focus to exit the menu Note When exiting the main menu all change will be saved automatically and will be taken effect when restarting next time 5 2 System...

Page 10: ...e every 20 minutes above 1 hour Short short means boot to calibration one time and correct once every 1 minute within 10 minutes correct once every 2 minutes within 10 to 30 minutes correct once every...

Page 11: ...press near focus and far focus to change the value of choose items auto save after exit 1 ID X Address set 2 Baud Rate XX baud set 3 Protocol XXX protocol set 4 Exit XXX press key near focus or far fo...

Page 12: ...ight XXXX Brightness value range 0 255 4 E XXX Image enhancement status range 1 255 Effective only in Mode1 or Mode 2 The bigger the value is the clearer the object is 5 Save XXX use near focus or far...

Reviews: