background image

2

 ENGLISH

PoE+ Desktop Switch • User Manual 

English

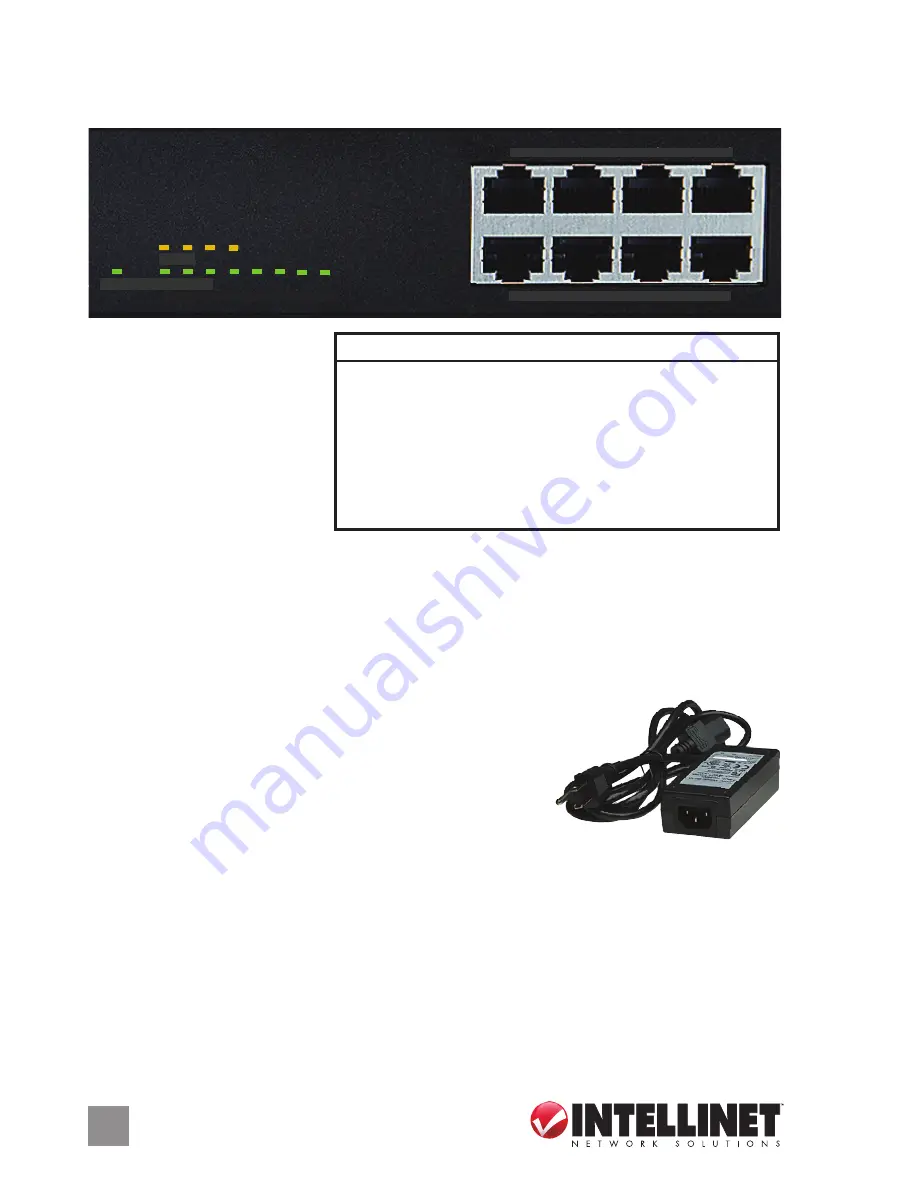
CONNECTIONS & INDICATORS 

LEDs 

The LED indicators — Power,  

PoE, Link/Activity — make it  

easier to monitor the switch  

and its connections. 

NOTE:


On Model


560757 (above,  

with just four PoE LEDs), only  

Ports 1-4 can provide power  

to a connected device; all powered devices should also comply with IEEE 802.3af.  
Ports

All ports on the switch support Auto-MDI/MDI-X functionality, so crossover cables and uplink 

ports are not needed for connections to PCs, routers, hubs, other switches, etc. Cat5/5e/6 

UTP/STP cables provide optimal performance; if a status LED doesn’t indicate a link or activity, 

check the corresponding device for proper setup and operation.
Power

Use the power cord to connect the power adapter (both included)  

to the DC 48V power jack on the rear panel. Then plug the  

adapter into an AC outlet and confirm that the power LED is  

lit. 

NOTE: 

For proper operation, use only the included power 

adapter.


INSTALLATION 

Prior to use, it is recommended that the switch be placed/positioned: 

• on a level surface with at least 25 mm (approx. 1”) of clearance for ventilation; 

• away from sources of electrical noise: radios, transmitters, broadband amplifiers, etc.; 

• within 100 m (approx. 328’) of network devices it’s to be connected to.

LED  Status Operation
PWR 

On 

Power on


Off 

Check the AC connection; turn the power on

PoE 

On 

Port is linked to a PSE/PoE device


Off 

No PSE/PoE device is linked 

LNK/ACT  On 

Valid port connection


Blinking 

Valid port connection; data transmitted/received


Off 

No link established

8 RJ45 10/100M ports

1                            3                          5                           7

2                            4                          6                           8

1        2        3        4        5        6        7        8

POWER        LINK / ACT

PoE

Summary of Contents for 560757

Page 1: ...PoE DESKTOP SWITCH USER MANUAL MODELS 560757 560764 INT 560757 560764 UM ML1 1012 01 ENGLISH DEUTSCH ESPAÑOL FRANÇAIS POLSKI ITALIANO Model 560757 ...

Page 2: ...on Power Use the power cord to connect the power adapter both included to the DC 48V power jack on the rear panel Then plug the adapter into an AC outlet and confirm that the power LED is lit NOTE For proper operation use only the included power adapter INSTALLATION Prior to use it is recommended that the switch be placed positioned on a level surface with at least 25 mm approx 1 of clearance for ...

Page 3: ...tzen Auto MDI MDI X Funktionalität daher werden Crosskabel und Uplink Ports fürVerbindungen zu PCs Routern Hubs anderen Switchen etc nicht benötigt Cat5 5e 6 UTP STP Kabel bieten die beste Performance Wenn eine LED keineVerbindung Aktivität anzeigt überprüfen Sie das verbundene Gerät Strom Schließen Sie das Netzteil per Stromkabel beides im Lieferumfang an die DC 48 Buchse auf der Rückseite an dan...

Page 4: ...tar el adaptador de corriente ambos incluidos a la toma de CC 48V en el panel trasero Luego enchufe el adaptador a una toma de CA y confirme que el LED esta encendido NOTA Para un funcionamiento correcto utilice solo el adaptador de corriente incluido INSTALACIÓN Antes de utilizarlo se recomienda que el switch sea ubicado fijado sobre una superficie plana con al menos 25 mm de espacio libre para v...

Page 5: ...ur Connectez l adaptateur secteur à la prise femelle de l appareil et à une prise courante Assurez vous que le DEL est allumé REMARQUE Utilisez uniquement l adaptateur secteur et le câble fournis avec ce commutateur pour un service optimal INSTALLATION Avant d utiliser le commutateur il est recommandé de le placer sur une surface plane avec un écartement de 25 mm d autres objets pour la ventilatio...

Page 6: ...ilania kabel i adapter w zestawie a następnie adapter podłącz do gniazda jack DC 48V na tylnym panelu urządzenia Kabel zasilający podłącz do gniazda sieciowego oraz sprawdź status diod UWAGA Dla prawidłowego funkcjonowania urządzenia należy używać tylko zasilacza z zestawu INSTALACJA Zaleca się aby urządzenie w trakcie użytkowania było umiejscowione dla zapewnienia dobrej wentylacji w odległości c...

Page 7: ...mentazione per collegare l alimentatore entrambi inclusi alla presa di alimentazione DC 48V sul pannello posteriore Quindi inserire la spina dell alimentatore nella presa di corrente AC e verificare che il LED dell alimentazione è illuminato NOTA Per un corretto funzionamento utilizzare solamente l alimentatore incluso INSTALLAZIONE Prima dell uso si raccomanda che lo switch venga posizionato su u...

Page 8: ...o o su embalaje indica que el producto no debe tratarse como residuo doméstico De conformidad con la Directiva 2002 96 CE de la UE sobre residuos de aparatos eléctricos y electrónicos RAEE este producto eléctrico no puede desecharse con el resto de residuos no clasificados Deshágase de este producto devolviéndolo a su punto de venta o a un punto de recolección municipal para su reciclaje FRANÇAIS ...

Page 9: ...equipo adicional o cualesquiera que hayan sido adicionados almismoporelusuarioodistribuidor Para hacer efectiva esta garantía bastarácon presentar el producto al distribuidor en el domicilio donde fueadquiridooeneldomiciliodeICIntracomMéxico S A P I deC V juntoconlosaccesorioscontenidos en su empaque acompañado de su póliza debidamente llenada y sellada por la casa vendedora indispensable el sello...

Page 10: ...ould result in the product not meeting the Class A limits in which case the FCC could void the user s authority to operate the equipment CE R TTE ENGLISH This device complies with the requirements of R TTE Directive 1999 5 EC The Declaration of Conformity for this product is available at DEUTSCH Dieses Gerät enspricht der Direktive R TTE Direktive 1999 5 EC Die Konformitätserklärung für dieses Pro...

Page 11: ......

Page 12: ... IC Intracom All rights reserved Intellinet is a trademark of IC Intracom registered in the U S and other countries ...

Reviews: