Intel® Server System M20NTP1UR - System Integration and Service Guide
60
3.
Locate and unpack the replacement power supply.
4.
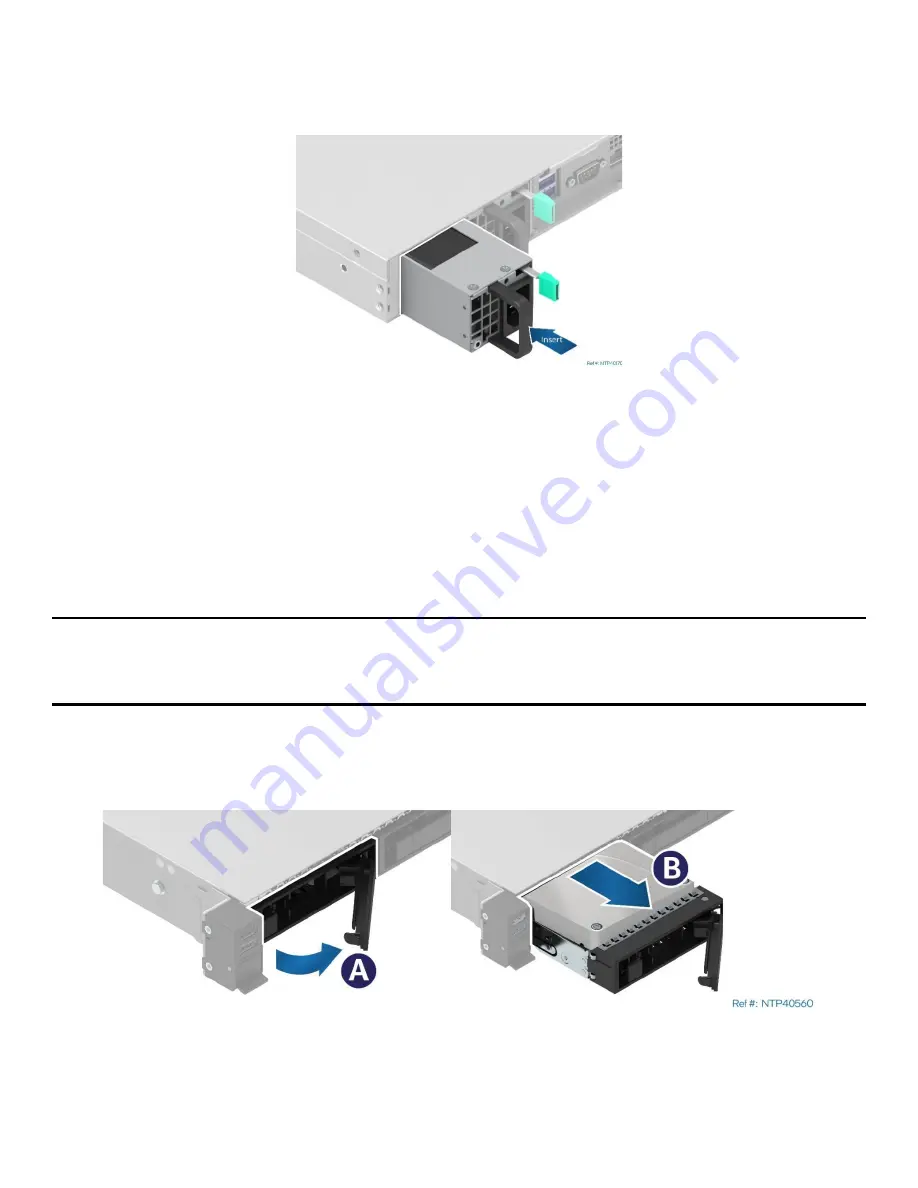
Install power supply into the system (See
Figure 65. Power Supply Installation
•
Slide the power supply into the power supply bay until it clicks and locks in place
5.
Re-connect the AC power cord
6.6
Front Drive Replacement
Required Tools and Supplies
•
Replacement 3.5” hard disk drive (HDD) or 3.5” solid state drive (SSD), or 2.5” solid state drive (SSD)
•
Anti-static wrist strap and conductive workbench pad (recommended)
•
Phillips* head screwdriver (for installing 2.5” SSDs)
Note:
To ensure proper system airflow requirements, all drive bays must be populated, and all drive carriers
must be populated with either a drive or supplied drive blank.
Drives can only be hot-swapped if they are configured within a fault tolerant RAID configuration – 1, 5, 10
6.6.1
Drive Carrier Extraction
1.
Remove the selected drive from the front drive bay (See
Figure 66. Extracting Drive Carrier from Chassis
•
Press the button on the drive carrier face plate to release the lever (see Letter “A”).
•
Using the lever, pull the drive from the drive bay (see Letter “B”).
Summary of Contents for M20NTP1UR
Page 2: ...2 This page intentionally left blank...
Page 101: ...Intel Server System M20NTP1UR System Integration and Service Guide 101 1 2 3 4 5...
Page 102: ...Intel Server System M20NTP1UR System Integration and Service Guide 102 1 2 3 4 5 6 1 2 3...
Page 103: ...Intel Server System M20NTP1UR System Integration and Service Guide 103 1 2 3 4 5...
Page 112: ...Intel Server System M20NTP1UR System Integration and Service Guide 112 1 2 3 4 5 ESD 6 1 2 3...
Page 113: ...Intel Server System M20NTP1UR System Integration and Service Guide 113 1 2 3 4 5...


