


10
NUC11TNK
User Guide
–
January 2021
4.0
Install an M.2 SSD
Intel® NUC 11 Pro Kits NUC11TNK support 80mm and 42mm SSDs.
Find compatible M.2 SSDs at the Intel® Product Compatibility Tool:
•
Intel® NUC 11 Pro Kit NUC11TNKi3
•
Intel® NUC 11 Pro Kit NUC11TNKi5
•
Intel® NUC 11 Pro Kit NUC11TNKv5
•
Intel® NUC 11 Pro Kit NUC11TNKi7
•
Intel® NUC 11 Pro Kit NUC11TNKv7
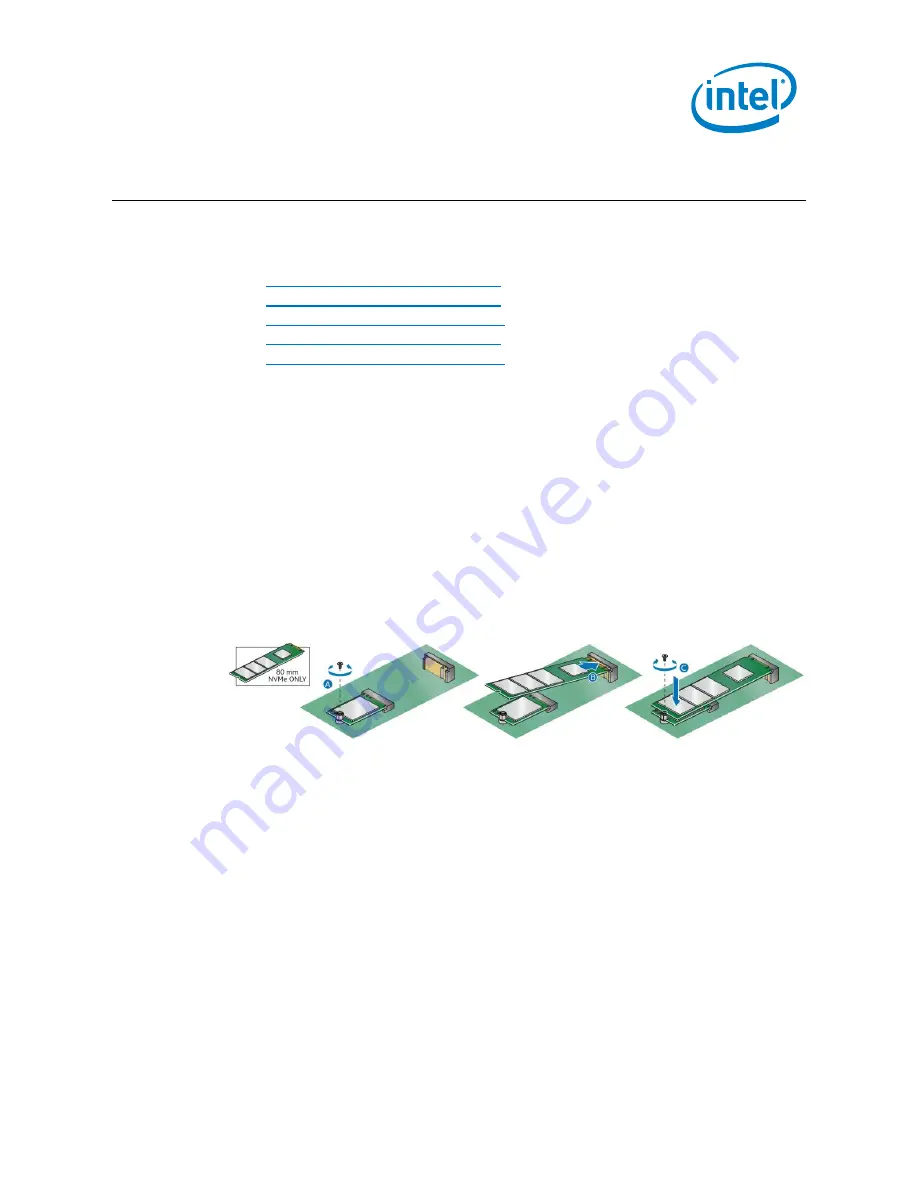
If you’re installing an 80mm M.2 SSD:
1.
Remove the small silver screw from the 80mm metal standoff on the
motherboard (A).
2.
Align the small notch at the bottom edge of the M.2 card with the key in the
connector.
3.
Insert the bottom edge of the M.2 card into the connector (B).
4.
Secure the card to the standoff with the small silver screw (C).
If you’re installing a 42mm M.2 SSD:
1.
Remove the small silver screw from the metal standoff on the motherboard (A).
2.
Move the standoff (B) from the 80mm position to the 42mm position (C).
3.
Align the small notch at the bottom edge of the M.2 card with the key in the
connector.
4.
Insert the bottom edge of the M.2 card into the connector (D).
5.
Secure the card to the standoff with the small silver screw (E).


