B
W
FLASH
STROBE
FADE
SMOOTH
G
R
OFF ON
B
W
FLASH
STROBE
FADE
SMOOTH
G
R
OFF ON
B
W
FLASH
STROBE
FADE
SMOOTH
G
R
OFF ON
B
W
FLASH
STROBE
FADE
SMOOTH
G
R
OFF ON
B
W
FLASH
STROBE
FADE
SMOOTH
G
R
OFF ON
B
W
FLASH
STROBE
FADE
SMOOTH
G
R
OFF ON
B
W
FLASH
STROBE
FADE
SMOOTH
G
R
OFF ON
DO NOT POWER
the strip in the packaging reel
Installation Guide
PLEASE NOTE:
Ensure power is NOT connected before proceeding
1. Choose a suitable indoor, dry, clean, solid and smooth surface for the strip. Avoid sandy, rough and flexible surfaces. Ensure the temperature
of the strip is at least 10°C before installation. Remove any dust and wipe the surface line with the provided alcohol pad
(Fig. 1). If the strip requires cutting, only cut the strip with a suitable tool at the cuttings points with the power off.
2. Once you have checked the position of the strip and power connection, with the power OFF, carefully apply the strip to the surface
by continuously removing a portion of the adhesive backing tape as required (Fig. 2).
3. Stick the strip and carefully press down on the strip for about 10secs (avoid pressing on the LEDs) (Fig. 3).
4. For a durable and secure installation, add the provided clips and screws approx. 1m apart (Fig. 4).
Alternative screw fittings may be required depending on the surface.
5. Connect the receiver module of the strip to the supplied plug (Fig. 5). Do NOT use a different plug. Then connect the plug to the mains. Now the
strip is ready to operate.
IP20
Install indoor
only
- Keep dry
WITH THE POWER DISCONNECTED
only cut the strip at cutting points
10cm
Make a temporary installation (without removing the adhesive backing tape) before installing permanently
by holding the strip in place with removable tape. Check the position, light effect, required length,
remote control and power connection of the LED strip.
Fig. 1
Fig. 2
Fig. 3
Fig. 4
Fig. 5
B
W
FLASH
STROBE
FADE
SMOOTH
G
R
OFF ON
2
1
3
4
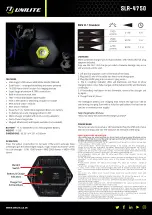
Remote Control
Remove the tab at the bottom
of the remote to power the battery
1. Switch ON/OFF
2. Dimming and Speed Change
(of colour changing functions)
3. Select colours
4. Colour changing functions
ONLY FOR
INDOOR USE
WARNING:
BUTTON BATTERY INCLUDED
KEEP AWAY FROM CHILDREN


