background image

5

STEP 3. Attaching the roof panel

Assembly (continued)

3.1 Attach the Louvre roof panel side connector I to the one end of Louvre roof panel F with bolt (M6*15) L. 

      Please just assemble the Louvre roof panel side connector I on one end as show in Fig.4!

      Repeat this step until all Louvre roof panel has Louvre roof panel side connector I on one end.

3.2 Lift the Louvre roof panel F and fit one end with Louvre roof panel side connector I into the hole of 

      Beam C as show in Fig.5A. And pick up one Louvre roof panel side connector I and put into the hole 

      of Beam C as show in Fig.5B, then attach to the Louvre roof panel F with bolt (M6*15) L as show in 

      Fig.5C. Repeat this step until all Louvre roof panels on roof.

3.3 Insert the Louvre control handle G into Louvre control outer tube E. Attach the Louvre control outer 

      tube E to Leg post B with bolt (M6*15) L as show in Fig.6.

Fig.4

Fig.6

I

L

F

L

E

G

Fig.5

C

F

F

I

L

Fig.5A

Fig.5B

Fig.5C

C

B

Summary of Contents for 6414-286

Page 1: ...SKU 6414 286 10 x10 Louvre Sunshade Structure Instruction Manual ...

Page 2: ...l wires or washing lines You must assemble your gazebo on a level ground or platform The unit must be anchored to either wood stone tiles or concrete using appropriate screws for that flooring or anchored into the earth or grass with proper camp nails or anchors Your gazebo has been designed to be a non permanent structure Do not use this gazebo in storms cyclones or very strong winds We recommend...

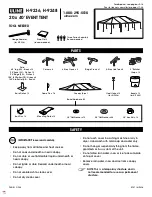
Page 3: ... 2 1 7 1 1 14 1 4 P 24 8 8 1 Leg post A Stake Louvre roof panel Louvre roof panel side connector Foot plate Louvre control handle Bolt M6x15mm Louvre roof panel connector Louvre control outer tube Louvre control connector bar Bolt M6x15mm Wrench Bolt M6x30mm Allen key Nut Leg post B Beam C Beam D Pre Assembly PLANNING ASSEMBLY ...

Page 4: ...ease align the hole postioin when use the Bolt as show in Fig 1 1 2 Attach the one Beam C to the Leg post A A with bolt M6 30 N and attach the another Beam C to the Leg post A B with bolt M6 30 N as show in Fig 2 Note do not tighten bolts until all parts are connected Fig 1 Fig 2 A B M K M K K A B C C A A N ...

Page 5: ...continued STEP 2 Attaching the roof beam 2 1 Attach the one Beam D to the Leg post A A with bolt M6 30 N and attach the another Beam D to the Leg post A B with bolt M6 30 N as show in Fig 3 Fig 3 D D N A A A B C C ...

Page 6: ...oof panel F and fit one end with Louvre roof panel side connector I into the hole of Beam C as show in Fig 5A And pick up one Louvre roof panel side connector I and put into the hole of Beam C as show in Fig 5B then attach to the Louvre roof panel F with bolt M6 15 L as show in Fig 5C Repeat this step until all Louvre roof panels on roof 3 3 Insert the Louvre control handle G into Louvre control o...

Page 7: ...ut O 4 4 After assembly move the Louvre control handle G up and down to open and close the Louvre roof panels F Check and adjust all the connection points for smooth operation In case some Louvre roof panels are stuck or scratching the beam please try adjust leg post s position slightly to square the frame and tweak the Louvre panels to find the best position Note Over time the bolts and nuts may ...

Page 8: ... to stablize the gazebo Fig 8 K P Assembly continued Finally please check and tighten all the bolts and nuts before you use it Congratulations you have done the gazebo set up SKU 6414 286 Code 20HF50080403 Email service casualwayusa com Home Hardware Stores Limited 34 Henry Street West St Jacobs Ontario Canada N0B 2N0 ...

Reviews: