USER MANUAL
– EN
IN 22977 Treadmill inSPORTline Tyrion
Page 1: ...USER MANUAL EN IN 22977 Treadmill inSPORTline Tyrion ...
Page 2: ...5 PARAMETERS AND DISPLAYS 5 BUTTONS 5 MANUAL PROGRAM 6 POWER SAVING MODE 6 BLUETOOTH 6 GETTING START 6 WARM UP EXERCISE 7 IMPORTANT NOTICE 8 DIAGRAM 10 PARTS LIST 11 ERRORS 13 ENVIRONMENT PROTECTION 13 TERMS AND CONDITIONS OF WARRANTY WARRANTY CLAIMS 13 ...
Page 3: ...thing that could get caught in the treadmill Keep out of reach of children and pets There must be at least 0 6 m of free space around the treadmill Do not exercise 40 minutes after a meal For adults only teenagers may only use the treadmill under the supervision of an adult When starting for the first time grasp the handles until you are sure of the speed For indoor use only Use the treadmill only...
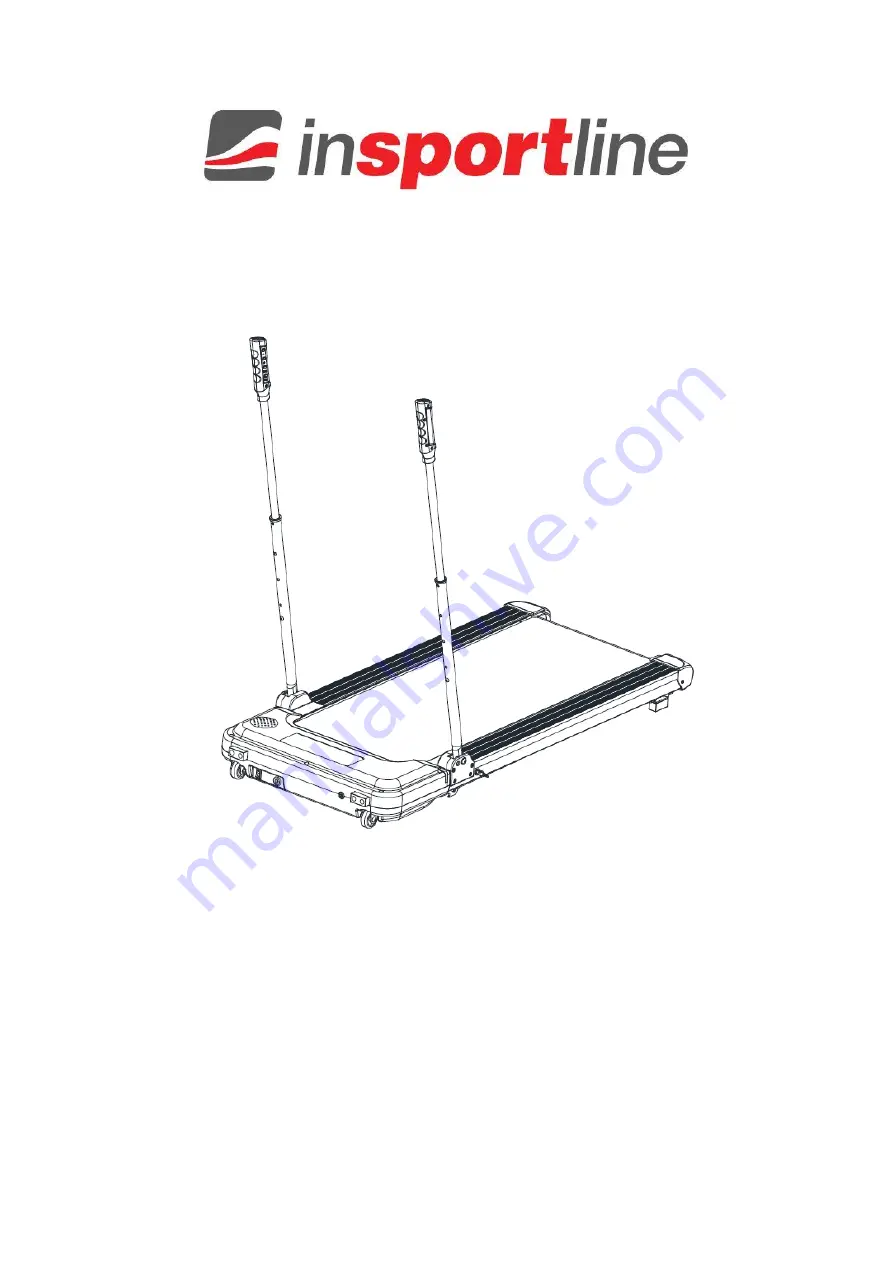
Page 4: ... Do not plug in the treadmill until it is assembled STEP 1 Pull the pins 11 out of the main frame 1 Then place the pins 11 in the plastic frame 68 Lift the handles 3 STEP 2 Press the pins 32 on the bars 3 and pull the handles 4 to the required height ...
Page 5: ...ain frame 1 Lift the running board and secure with the rear stabilizer 5 CONSOLE PARAMETERS AND DISPLAYS The console displays SPEED from 1 km h to 8 km h DISTANCE DIS TIME and CALORIES CAL BUTTONS The handles contain buttons START STOP and ...
Page 6: ... 1 6 3 2 km h stand straight look forward and try to step onto the running belt a few times with one foot Then step onto the running belt and start exercising After you are adapted you can slowly increase the speed to 3 5 km h and maintain this speed for about 10 minutes After that stop the treadmill slowly EXERCISE Stand aside to learn how to operate the machine adjusting the speed and inclinatio...
Page 7: ...on t stick to foreign matters under your shoe s soles so that you do not carry dirt onto the running belt and running board The dirt and other foreign matter could damage them both You should wear comfortable clothes WARM UP EXERCISE It is better to do some warm up exercises before running Warmed muscles are easy to stretch so take the time to do 5 10 minute warm up Repeat each exercise shown in t...
Page 8: ...arefully read the following tips and exercises If you experience pain nausea breathing or other health problems during exercise immediately stop the exercise If the pain persists contact your doctor immediately This treadmill is not suitable as a professional or medical purpose It can also not be used for healing purposes The heart rate monitor is not a medical device It provides only approximate ...
Page 9: ...he above steps until the running belt is in the middle Picture A If the running belt drifts to the left pull off the safety key and unplug the treadmill from power Turn the left adjusting bolt clockwise by 1 4 turn then plug in the power cord and the safety key The belt starts running Watch if the belt still drifts to the side Repeat the above steps until the running belt is centred Picture B Afte...
Page 10: ...10 DIAGRAM ...
Page 11: ...t t1 4 390 2060 1 15 Belt 1 16 Top motor cover 846 308 556 21 67 618 450 g 1 17 Bottom motor cover 550 003 245 005 64 346 1 18 Rear left cover 131 645 80 286 70 506 70 g 1 19 Rear right cover 131 645 80 286 70 506 70 g 1 20 End cap 25 79 910 1070 g 2 21 Castors 54 8 5 22 2 22 Washer 30 40 5 6 23 Clip 1 24 Sleeves 2 25 Post base 2 26 Control buttons 1 27 Front sleeves 46 22 22 4 28 Outer right post...
Page 12: ...ng washer 4 48 Bolt M5 12 4 49 Bolt M6 25 4 50 Bolt M6 35 2 51 Bolt M8 25 1 52 Bolt M8 12 2 53 Bolt M6 35 2 54 Bolt ST4 2 12 8 55 Bolt ST3 0 8 2 56 Bolt ST3 0 12 6 57 Bolt M4 25 2 58 Nut M4 S7 2 59 Washer 9 16 t1 5 8 60 Right inner handle cover 1 61 Right outer handle cover 1 62 Left inner handle cover 1 63 Left outer handle cover 1 64 Bolt ST4 2 16 9 13 65 Adhesive straps 1 20 2 910 4 66 Adhesive...
Page 13: ...orrectly Replace Treadmill doesn t work No current Plug in Damage to the security key Insert the security key Short circuit Check sensors and cables The switch is in the wrong position Turn on Operation is not smooth The belt is not properly lubricated Lubricate The belt is not tightened correctly Tighten The belt slips The belt is too loose Tighten The engine belt is loose Replace ENVIRONMENT PRO...
Page 14: ...tees that the delivered Goods shall be for a certain period of time suitable for regular or contracted use and that the Goods shall maintain its regular or contracted features The Warranty does not cover defects resulting from if applicable User s fault i e product damage caused by unqualified repair work improper assembly insufficient insertion of seat post into frame insufficient tightening of p...
Page 15: ...een agreed upon The day when the repaired or exchanged Goods is handed over to the Buyer is considered to be the day of the Warranty Claim settlement When the Seller is not able to settle the Warranty Claim within the agreed period due to the specific nature of the Goods defect he and the Buyer shall make an agreement about an alternative solution In case such agreement is not made the Seller is o...