background image

USER-MAINTENANCE INSTRUCTIONS

This warranty covers all replacement parts and repair labor to correct 
defects in disposer material and workmanship for the full warranty period 
from the date of installation in your home. If warranty service is required 
during the warranty period, contact an authorized InSinkErator® service 
center to replace or repair the unit in your home at no cost to you. If you have
questions concerning your disposer or determining when service is needed,
please call the toll free InSinkErator® 

AnswerLine®

to obtain the name of 

the authorized service center nearest you. The toll free number is 
1 (800) 558-5700, or visit our website at www.insinkerator.com.

This warranty gives you specific legal rights and you may also have other
rights which vary from state to state. If the manufacturer determines 
the unit should be replaced rather than repaired, the warranty on the 
replacement unit will be limited to the unexpired term of the original 
warranty. No other express warranty, written or oral, applies.

If your disposer does not operate, follow these steps in order:
1.  Check the things you can do yourself. Be sure the disposer is connected 

to the electric power and the fuses or circuit breakers are in working 
order. Reread the instruction book to ensure that you are operating the 
disposer correctly.

2. Call InSinkErator®, or visit our website for information or for the

location of the authorized service center nearest you. The toll free 
number is 1 (800) 558-5700, or visit our website at www.insinkerator.com.

3. Write to us if a satisfactory solution is not reached in steps 1 and 2. 

Our address is:

InSinkErator®
Service Department
4700 21st Street
Racine, Wisconsin 53406  USA

When writing or calling, supply the following information: date, your name, 
your address, and your phone number. Describe the product by model number,
serial number, date purchased, place purchased, and service history (including
name and address of service agent). Clearly describe the problem and service 
required.

NOTE:  Warranty is determined by unit serial number and date of installation.
Purchase or installation receipt may be required to verify warranty status.

The foregoing warranty does not apply to damage or inoperation resulting 
from accident, alteration, misuse, abuse, improper installation, installation not 
in accordance with these instructions or local electrical and plumbing codes.
Warranty will be voided if installed in a commercial or industrial application.  

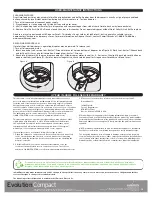
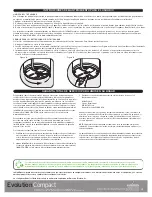
Figure A

Figure B

CLEANING DISPOSER
Over time, food particles may accumulate in the grind chamber and baffle. An odor from the disposer is usually a sign of grease and food
buildup, caused by insufficient water flow during and after disposer use. To clean disposer: 
1. Turn off disposer and disconnect power supply. 
2. Place stopper in sink opening and fill sink halfway with warm water. 
3. Mix 1/4 cup baking soda with water. Turn disposer on and remove stopper from sink at same time to wash away loose particles. 
4. Remove Quiet Collar® Sink Baffle and clean by hand or in dishwasher. Do not operate disposer without Quiet Collar® Sink Baffle in place. 

Disposers may also be cleaned with Disposer Care®. This product is not sold by InSinkErator®, but is generally available in major 
home centers, hardware, and grocery stores. For more information on Disposer Care®, contact Summit Brands at 1-888-476-6688 or 
www.summitbrands.com.

RELEASING DISPOSER JAM
If motor stops while disposer is operating, disposer may be jammed. To release jam:
1. Turn off disposer and water. 
2. Insert one end of self-service Jam-Buster™ Wrench into center hole on bottom of disposer (see Figure A). Work Jam-Buster™ Wrench back

and forth until it turns one full revolution. Remove Jam-Buster™ Wrench.

3. Reach into disposer with tongs and remove object(s). Allow disposer motor to cool for 3 - 5 minutes, then lightly push red reset button on

disposer bottom (see Figure B). (If motor remains inoperative, check service panel for tripped circuit breakers or blown fuses.)

4 YEAR IN-HOME FULL SERVICE WARRANTY

Evolution 

Compact

®

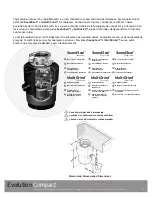
Compact Size Food Waste Disposer

/Triturador de Desperdicios 

de Alimentos de Tamaño Compacto/Broyeur de Déchets de Taille Compacte

The Emerson logo is a trademark and service mark of Emerson Electric Co.

Printed in the U.S.A. © 2008 InSinkErator, InSinkErator® is a division of Emerson Electric Co.

All Rights Reserved.

10

Food waste disposers are an environmentally responsible alternative to transporting food waste to landfills. And they can help reduce 
greenhouse gas emissions. Food waste converts to bio-solids at the waste treatment plant and can be recycled and applied as fertilizer. 
Biogases can be captured and recycled as an energy source.

InSinkErator® may make improvements and/or changes in the specifications at any time, in its sole discretion, without notice or obligation and further 
reserves the right to change or discontinue models.

The mounting collar configuration is a trademark of Emerson Electric Co. 

Summary of Contents for Evolution Compact

Page 1: ... Desperdicios de Alimentos de Tamaño Compacto Broyeur de Déchets de Taille Compacte 1 EVOLUTION COMPACT COMPACT SIZE FOOD WASTE DISPOSER TRITURADOR DE DESPERDICIOS DE ALIMENTOS DE TAMAÑO COMPACTO BROYEUR DE DÉCHETS DE TAILLE COMPACTE www insinkerator com 75495 Rev A ...

Page 2: ...Mount Isolation SoundLimiter GrindShear Ring Outil de montage Quick Lock Composants de broyage en acier inoxydable Moteur 3 4 ch robuste Dura Drive MultiGrind TM Technologie Tecnología The Evolution Series by InSinkErator is a new standard in sound and grind performance Featuring exclusive patented SoundSeal and MultiGrind technologies no food waste disposer grinds more with less noise Evolution S...

Page 3: ...Lower Mounting Ring Anillo de montaje inferior Anneau de montage inférieur Anti Vibration Mount Anti Vibration Mount Anti Vibration Mount Dishwasher Inlet Entrada del lavavajillas Avaloir du lave vaisselle Anti Vibration Tailpipe Mount Anti Vibration Tailpipe Mount Anti Vibration Tailpipe Mount Plumbers putty Masilla de plomería Mastic de plomberie Wire Nuts Tuercas para conectores Serre fils Cabl...

Page 4: ...cas contraire déconnecter le drain de l évier et passer à l étape 10 1 5 Peligro de caída Danger de chute Falling Hazard WARNING 3 K 4 Support disposer insert end of Jam Buster Wrench K into right side of mounting lug and turn Disposer will fall free Apoye el triturador inserte el extremo de la Llave Jam Buster K en el lado derecho de uno de los salientes de montaje y gire El triturador se liberar...

Page 5: ... Paso 14 Si le nouveau broyeur est similaire au broyeur usagé pas ser à l étape 15 Note Pour les éviers de plus de 3 8 po d épaisseur il faut remplacer les vis de 1 1 2 po existantes par des vis de 1 1 8 po H Voir l étape 14 6 7 Using a screwdriver remove the snap ring Retire el anillo de cierre con un destornillador Au moyen d un tournevis retirer le jonc de blocage Loosen the 3 screws on the mou...

Page 6: ...gadero para mantenerla en su lugar Utilice una toalla para evitar que se raye el fregadero Abra el anillo de cierre y presione firmemente hasta que se coloque en el lugar Placer un poids tel que le broyeur sur le collet de l évier pour le maintenir en place Utiliser une serviette pour éviter d égratigner l évier Ouvrir le jonc de blocage et appuyer fermement jusqu à ce qu il s enclenche 3 8 1 1 8 ...

Page 7: ...isposer to hot black red wire from power source with wire nuts not included ground wire to green grounding screw Unit must be grounded for safe and proper installation ADVERTENCIA PELIGRO DE DESCARGA ELÉCTRICA Conecte el cable blanco del triturador al cable neutro blanco de la fuente de energía y el cable negro del triturador al cable vivo negro rojo de la fuente de energía use para ello tuercas p...

Page 8: ...tar el tubo para una colocación adecuada Reconecte la plomería y la conexión del lavavajillas si utiliza uno Asegúrese de que el Anti Vibration Tailpipe Mount esté derecho Le tuyau devra peut être être coupé pour s ajuster proprement Reconnecter la plomberie et le lavevaisselle s il y a lieu S assurer que le dispositif Anti Vibration Tailpipe Mount est bien droit 05081500028 05081500028 Model Evol...

Page 9: ...followed including W A R N I N G Electric Shock Improper connection of the equipment grounding conductor can result in a risk of electric shock Check with a qualified electrician or serviceman if you are in doubt as to whether the appliance is properly grounded Do not modify the plug provided with the appliance if it will not fit the outlet have a proper outlet installed by a qualified electrician...

Page 10: ...g codes Warranty will be voided if installed in a commercial or industrial application Figure A Figure B CLEANING DISPOSER Over time food particles may accumulate in the grind chamber and baffle An odor from the disposer is usually a sign of grease and food buildup caused by insufficient water flow during and after disposer use To clean disposer 1 Turn off disposer and disconnect power supply 2 Pl...

Page 11: ...a del conductor de conexión a tierra del equipo puede representar un riesgo de descarga eléctrica Consulte a un electricista calificado o especialista en reparaciones si tiene dudas sobre la conexión a tierra del aparato No cambie el enchufe que viene con el aparato Si no coincide con el tipo de tomacorriente pídale a un electricista calificado que instale un tomacorriente adecuado El triturador d...

Page 12: ...acumular en la cámara de trituración y el deflector Los malos olores provenientes del triturador son generalmente un signo de acumulación de grasa y comida causada por el flujo de agua insuficiente durante y después del uso del triturador Para limpiar el triturador 1 Apague el triturador y desconecte la corriente eléctrica 2 Coloque el tapón en la abertura del fregadero y llénelo con agua tibia ha...

Page 13: ...ques de choc électrique Vérifier avec un électricien ou un réparateur qualifié en cas de doute sur la mise à la terre adéquate de l appareil Ne pas modifier la fiche fournie avec l appareil Si la fiche ne s adapte pas à la prise de courant faire poser une prise adéquate par un électricien Ce broyeur doit être correctement mis à la terre Ne pas fixer de fil de mise à la terre au tuyau d alimentatio...

Page 14: ...nstallé pour une application commerciale ou industrielle Figure A Figure B NETTOYAGE DU BROYEUR À la longue des particules d aliments peuvent s accumuler dans la chambre de broyage et l écran Une odeur nauséabonde provenant du broyeur est généralement le signe d une accumulation de graisse et d aliments causée par un écoulement insuffisant d eau pendant et après l utilisation du broyeur Pour netto...

Reviews: