


29
19" 720p LED HDTV/ 22" 1080p LED HDTV
www.insigniaproducts.com
4
Press
or
to
highlight
Option
, then press
or to open the
Option
menu.
5
Press or to select a style, then press
or
to adjust the setting. You can select:
•
Style
—You can select
Automatic
or
Custom
.
If you select
Automatic
, the other settings are
not available.
•
Size
—Selects the font size. You can select
Small
,
Normal
(Default) or
Large
.
•
Font
—Selects the font style.
•
Text Color
—You can select
Black
,
White
(Default),
Red
,
Blue
,
Green
,
Yellow
,
Magenta
,
or
Cyan
.
•
Text Opacity
—You can select
Solid
(Default),
Flashing
,
Translucent
, or
Transparent
.
•
Background Color
—You can select
Black
(Default),
White
,
Red
,
Blue
,
Green
,
Yellow
,
Magenta
, or
Cyan
.
•
Background Opacity
—You can select
Solid
(Default),
Flashing
,
Translucent
, or
Transparent
.
•
Edge Effect
—You can select
None
(Default),
Raised
,
Depressed
,
Uniform
,
Left Shadow
,
or
Right Shadow
.
•
Edge Color
—You can select
Black
(Default),
White
,
Red
,
Blue
,
Green
,
Yellow
,
Magenta
, or
Cyan
.
6
Press
MENU
one or more times to return to the
previous menu.
7
Press
EXIT
to close the menu.
Adjusting time settings
To adjust time settings:
1
Press
MENU
, then press or to highlight the
Settings
icon. The
Settings
menu appears.
2
Press to access the
Settings
menu.
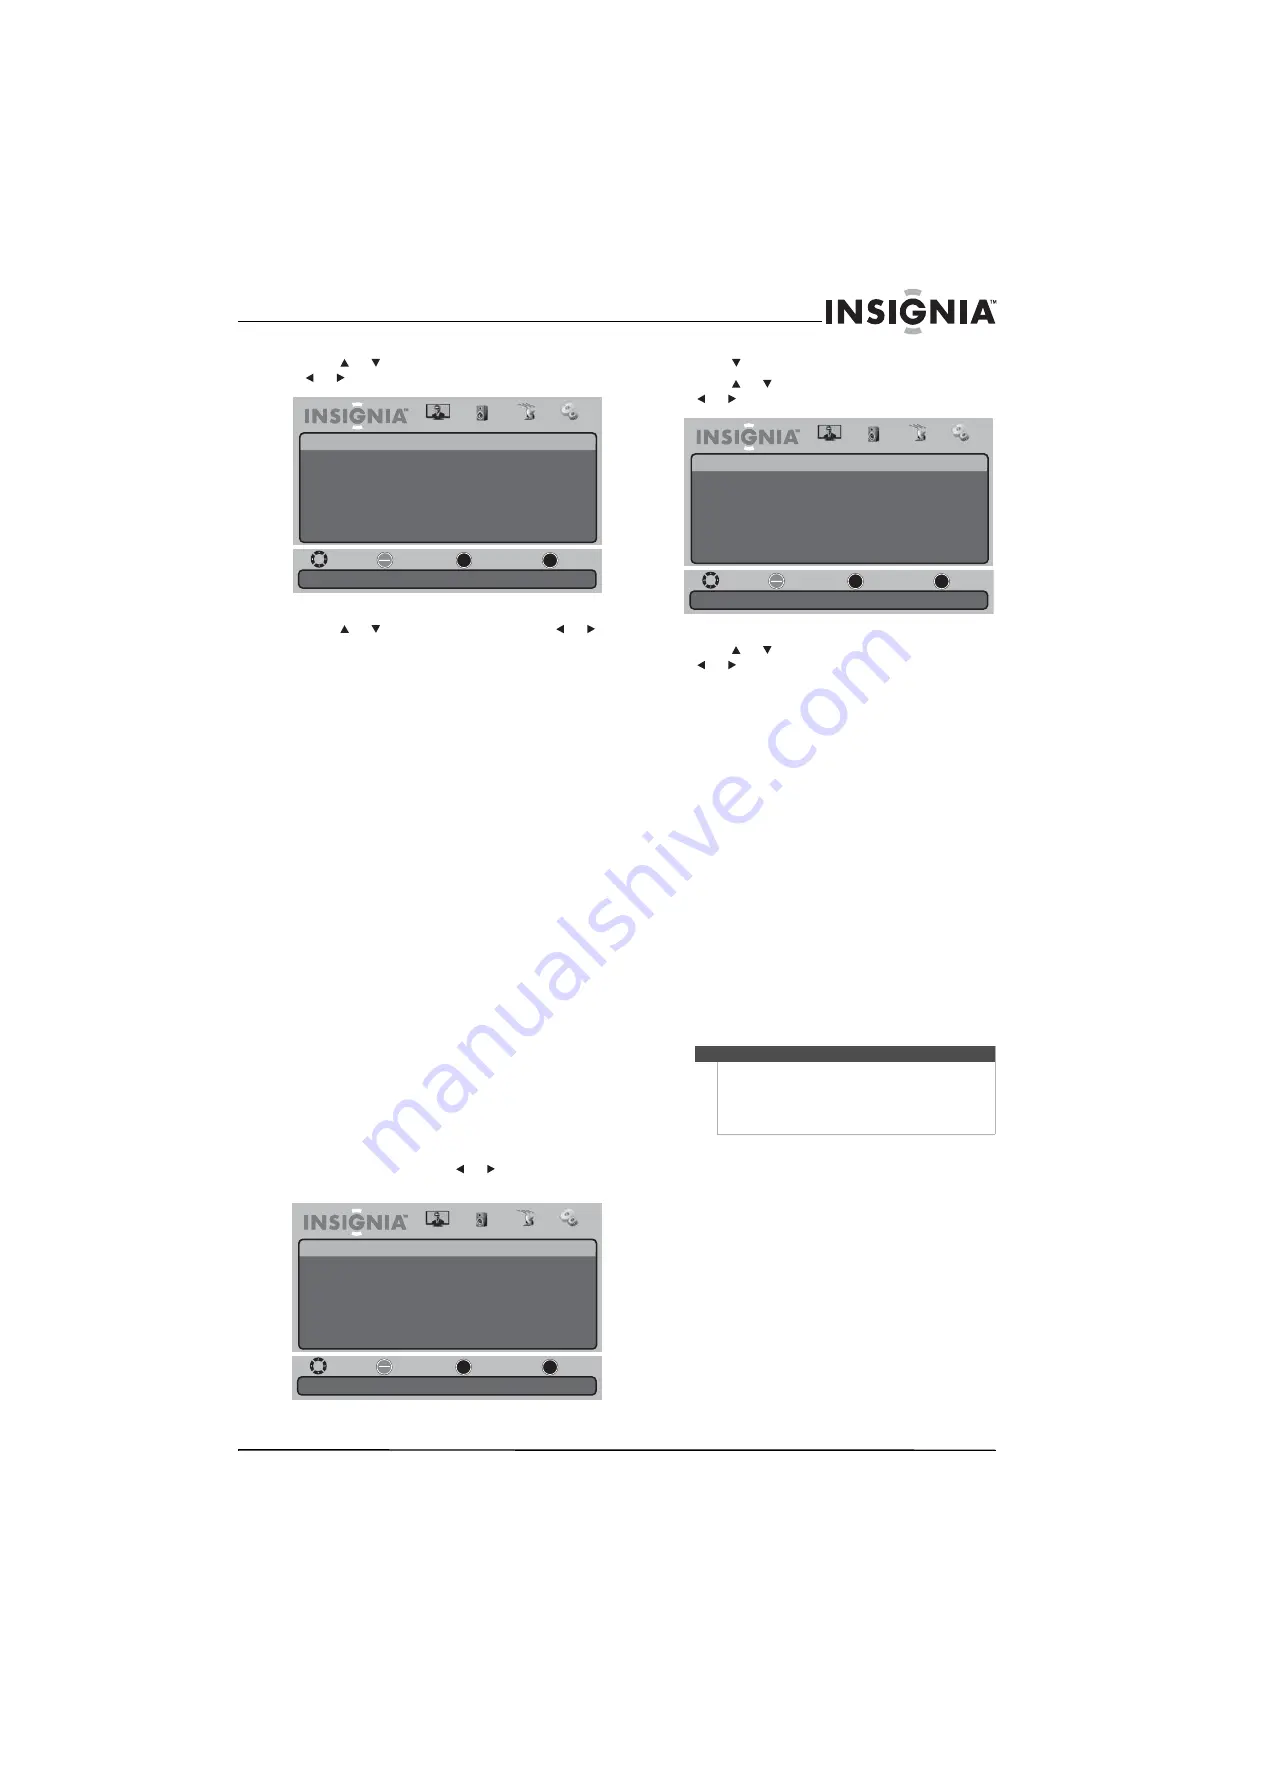
3
Press
or
to
highlight
Time
, then press
or
to open the
Time Settings
menu.
4
Press or to highlight a setting, then press
or to adjust the setting. You can select:
•
Mode
—You can select
Auto
or
Custom
. If you
select
Auto
, the date and time are set
automatically using information from a digital
channel that broadcasts time information. If
you select
Custom
, you can manually set the
date and time. For more information, see
“Manually setting the current date and time”
on page 30.
•
Time Zone
—You can select
Atlantic
,
Eastern
,
Central
,
Mountain
,
Pacific
,
Alaska
, or
Hawaii
.
•
Daylight Savings
—You can select
On
or
Off
.
•
Time Format
—You can select
12 hour
or
24
hour
.
•
Date/Time
—Displays the date and time.
•
Sleep Timer
—For more information, see
“Setting the sleep timer” on page 30.
•
Wake Timer
—For more information, see
“Setting the wake timer” on page 31.
5
Press
MENU
one or more times to return to the
previous menu.
6
Press
EXIT
to close the menu.
Move
Select
Previous
Exit
OK
ENTER
MENU
EXIT
Picture
Settings • Closed Caption • Option
Audio
Channel
Settings
Style
Size
Font
Text Color
Text Opacity
Background Color
Background Opacity
Edge Effect
Edge Color
Automatic
Normal
Font 0
White
Solid
Black
Solid
None
Black
Set the look of digital CC. Automatic uses broadcaster’s style.
Move
Set various TV options.
Select
Previous
Exit
OK
ENTER
MENU
EXIT
Picture
Settings
Parental Controls
Time
Menu Settings
Input Labels
Computer Settings
Closed Caption
Reset to Factory
Audio
Channel
Settings
Note
•
If a power failure occurs or the TV is unplugged,
all the times are reset.
•
The
Date/Time
option only displays the time
when your TV is on a digital channel and time
information is available.
Move
If Automatic, options are automatically set by TV source.
Select
Previous
Exit
OK
ENTER
MENU
EXIT
Picture
Settings • Time Settings
Mode
Time Zone
Daylight Savings
Time Format
Date / Time
Sleep Timer
Wake Timer
Pacific
Auto
Audio
Channel
Settings
Off
12 hour
----/--/-- --:--
Off
Summary of Contents for 09-1082
Page 1: ...19 720p LED HDTV 22 1080p LED HDTV NS 19E430A10 NS 22E430A10 UserGuide...
Page 4: ...iv Contents www insigniaproducts com...
Page 40: ...36 NS 19E430A10 NS 22E430A10 19 720p LED HDTV 22 1080p LED HDTV www insigniaproducts com...
Page 41: ...37 19 720p LED HDTV 22 1080p LED HDTV www insigniaproducts com...
Page 42: ...38 NS 19E430A10 NS 22E430A10 19 720p LED HDTV 22 1080p LED HDTV www insigniaproducts com...
Page 43: ...39 19 720p LED HDTV 22 1080p LED HDTV www insigniaproducts com...


