Q
Q
U
U
I
I
C
C
K
K
R
R
E
E
F
F
E
E
R
R
E
E
N
N
C
C
E
E
G
G
U
U
I
I
D
D
E
E
Rev.1.1 (January 2006)
4
2
2
.
.
I
I
n
n
s
s
t
t
a
a
l
l
l
l
a
a
t
t
i
i
o
o
n
n
a
a
n
n
d
d
I
I
P
P
a
a
l
l
l
l
o
o
c
c
a
a
t
t
i
i
o
o
n
n
The setup in this guide utilizes a crossover cable connection between the NVC units and
installation computer as shown in figure 2-1 for easy installation and demonstration of basic
feature sets. The NVC supports network configurations including LAN, ADSL modem, and cable
modems including IP sharing devices. Use normal Ethernet cables in most cases unless
connecting directly between the installation PC and the NVC.
2
2
.
.
1
1
.
.
I
I
n
n
s
s
t
t
a
a
l
l
l
l
a
a
t
t
i
i
o
o
n
n
P
P
r
r
o
o
c
c
e
e
d
d
u
u
r
r
e
e
Brief information for quick installation is provided in this section. For more detailed information you are
recommended to refer to pertinent documentations provided with the product or refer to Inscape Data’s home
page (
http://www.inscapedata.com
).
It is recommended to configure and bench test all units prior to field
installation.
1.
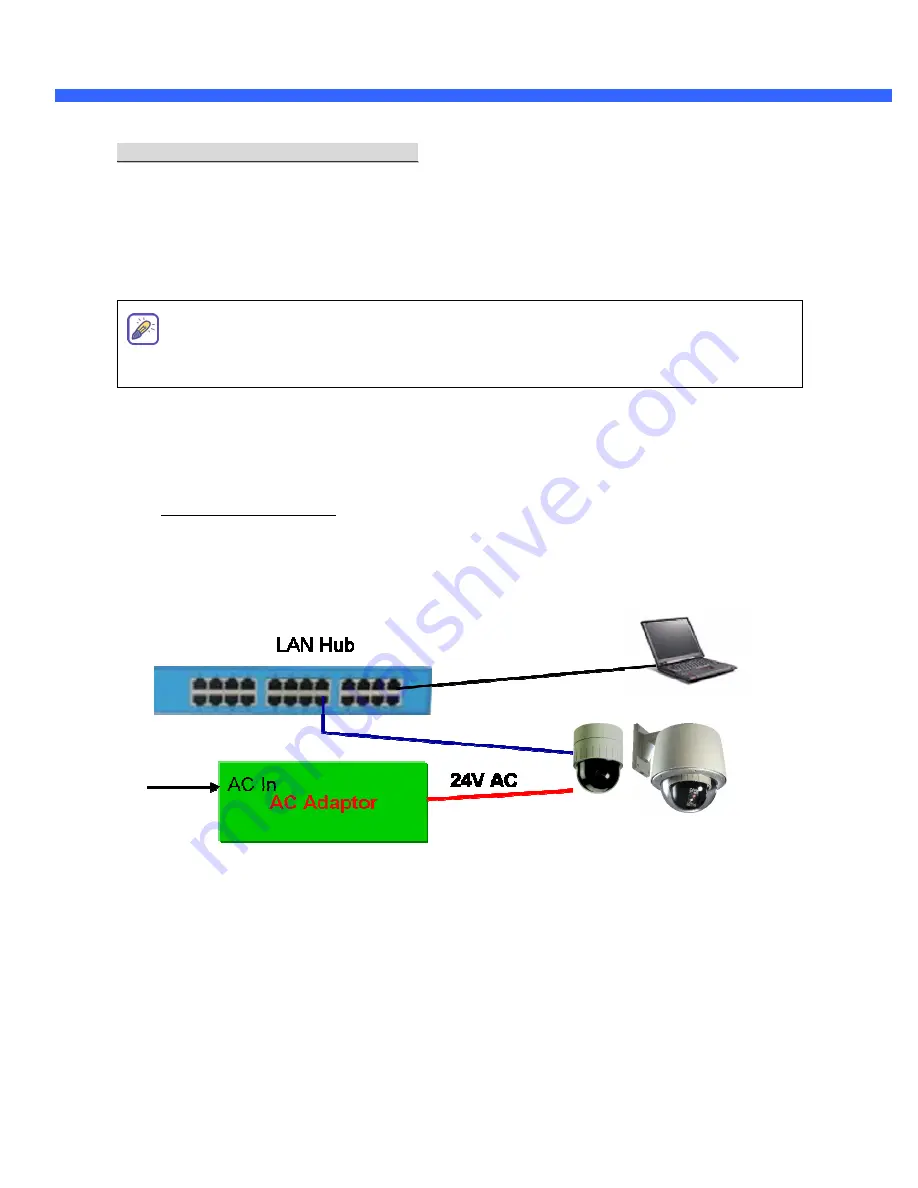
Apply power to NVC 1000/3000 and Connect NVC 1000/3000 to LAN like the following picture.
Fig. 2-1 Connecting Network camera and PC
2.
Install “IP installer” and “NVR100” software on your PC.
3.
Assign IP address to NVC 1000/3000 using IP installer software (see section 2.3 of this guide).
4.
Access the administration tools via Internet Explorer to change system configuration related to your
deployment.
The
quickest
way
to
access
the
administration
tools
is
to
type
in
http://IPaddress/admin.htm
.
The default
user name
and
password
is
root
/
root
. Please refer to
the user manual regarding specific settings more pertinent to your deployment. (i.e. video rate or frame
For further information on LAN, xDSL, and cable modem connections, please refer to
the user manual in the CD provided with the product.


