03
BEFORE BEGINNING
Clean your area:
1. Remove the treadmill from box and place on a level ground. It is recommended that you place a
protective covering under the treadmill.
2. Place in an area that will meet minimum clearance requirements
Front side: 30cm
Back side: 180cm
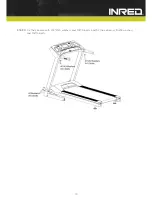
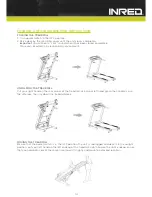
3. Whenever moving or setting up the treadmill, the deck must be in the upright position with the
deck safety lock securely engaged.
4. To place the TREADMILL in operating position, release the deck safety lock then lower the deck
with the end caps until it rests completely on the ground.
5. Make sure safety cord is engaged or unit will not operate.
6. Plug unit into outlet following the grounding guidelines below
GROUNDING:
This unit must be properly grounded to ensure safe operation. Should this equipment fail to perform
properly, grounding reduces the chance of electrical shock. The unit must be plugged into a suitab-
le AC grounded outlet that is correctly installed and grounded in conformance with local codes and
ordinances.
Gather your tool:
Make sure all the necessary tools gathered before the installation. Having the right tools at hand will
save time and make less assembly mistake.
Helpful Tips
Straddle the running belt and allow it to start moving at a safe speed before stepping on.
Hold the handlebar while adjusting the controls.
Focus your eyesight ahead to help maintain your balance.
Wear comfortable, good-quality walking or running shoes.
Warm-up and cool–down before and after your workout period
Summary of Contents for MTK 450
Page 1: ...OWNER S MANUAL RUN MTK 450 ...
Page 7: ...FEATURES 05 ...
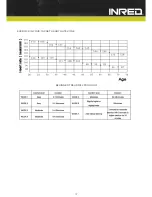
Page 9: ...07 EXERCISE IN YOUR TARGET HEART RATE ZONE BEGINNER TREADMILL PROGRAM ...
Page 12: ...ASSEMBLY PART LIST 10 BILD FEHLT ...
Page 13: ...ASSEMBLY STEPS STEP 1 Take the treadmill out of the carton 11 ...
Page 14: ...STEP 2 Unfolded the treadmill 12 ...
Page 17: ...CONSOLE 15 ...
Page 21: ...19 PROBLEM CONTROLSYSTEM AND SOLUTION ...
Page 22: ...20 PROBLEM CONTROLSYSTEM AND SOLUTION ...
Page 26: ...EXPLODED DRAWING 24 ...
Page 27: ...PARTS LIST 25 ...


