P2.
5
|
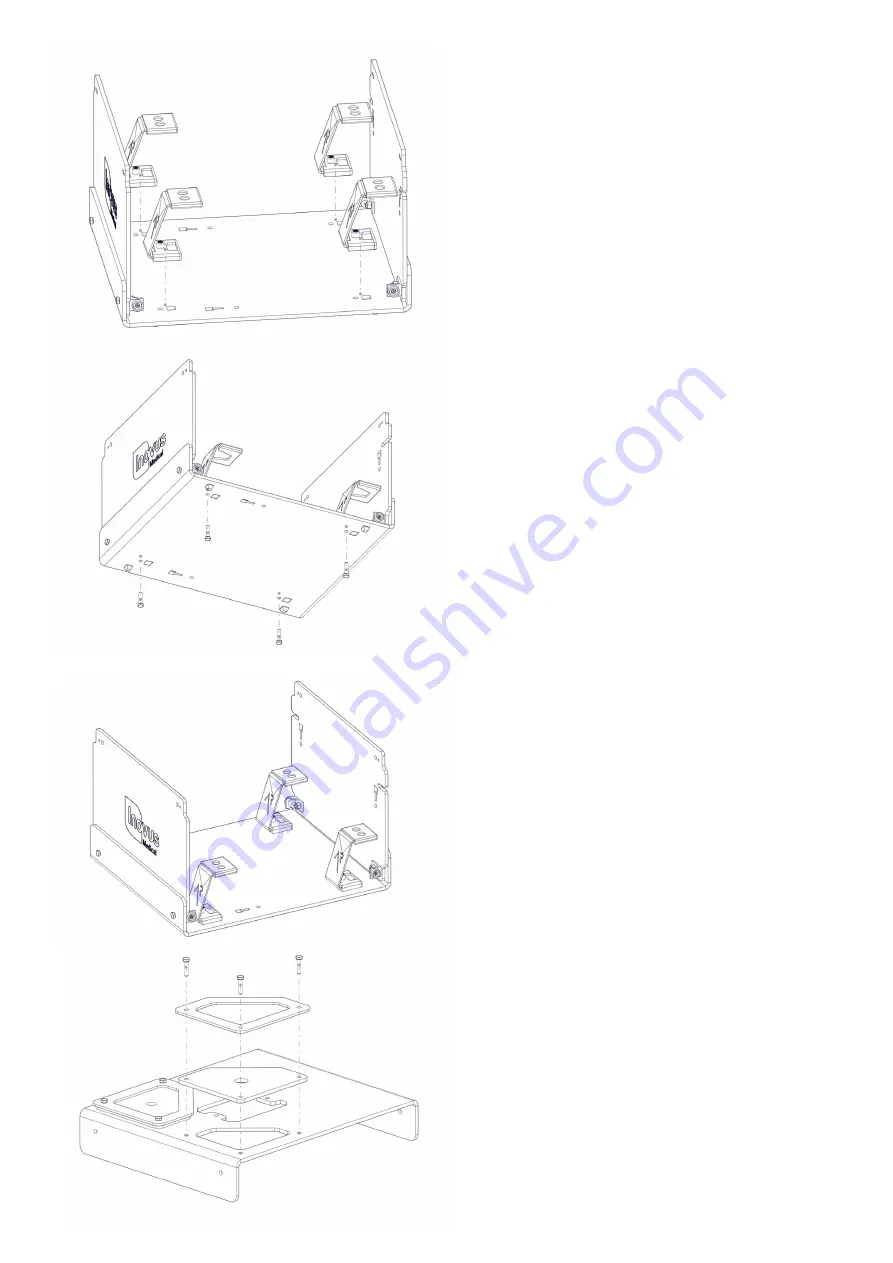
Take 4x AR20_M-BKT, position them in the
keys provided. In a practical sense this will
need to be done one at a time with the
simulator positioned on its side.
6
|
Using 4x M5B24 screw each AR20_M-
BKT into position on the base. These parts
are threaded for ease of assembly.
7
|
At this stage the simulator should look
exactly like the reference image.
If something appears to be incorrect,
go back through the steps again.
8
|
Locate the following parts:
AR20_TPB01 x1
AR20_BKT x2
AR20_SK x2
M5B24 x6
WN14 x6
Placing the AR20_SK on to the top surface
of the AR20_TPB01 ensure that the holes
align correctly. You can now position the
black AR20_BKT on top of the silicone skin,
pushing three M5B24 through the holes.
Now move to the next step.


