8.16.19 357-07014-02 Rev A © Inovonics, 2019
2
6
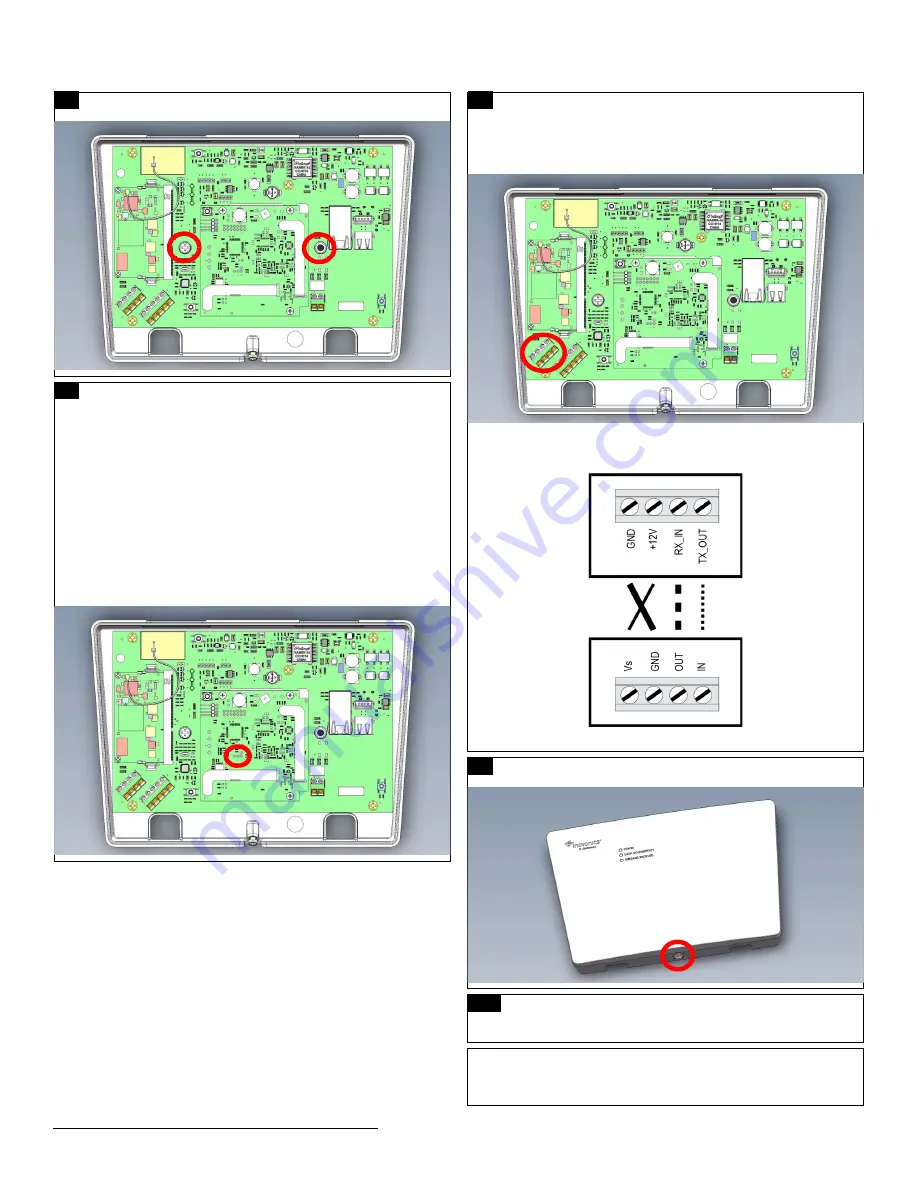
Use the included screws and drywall anchors to flush-mount the
TapWatch gateway.
7
The TapWatch gateway is able to use a range of radio
frequencies, and is shipped from Inovonics set for your
geographic area using the frequency band selection pins.
• A jumper will be set on the left two pins, marked AUS, to set
the frequency range to 915-928 MHz for Australia.
• A jumper will be set on the right two pins, marked NZ, to set
the frequency range to 921-928 MHz for New Zealand.
• The jumper will be removed to set the frequency band to 902-
928 MHz for North America.
a. Ensure the frequency band is set for your geographic are.
b. If the frequency band is not set for your geographic area,
place a selection jumper on the appropriate frequency band
selection pins to select Australia or New Zealand, or remove
it for North America.
c. If you have changed the frequency band, press the reset
button to complete configuration.
8
If deploying the TapWatch gateway on a site with Frequency
Agile (FA) hardware, you will need to connect an FA403 receiver
to the TapWatch gateway; if not deploying the TapWatch gateway
on a site with FA hardware, skip to step 9.
• You will wire the FA403 receiver to the EXT RECEIVER
terminal blocks on the gateway shown below.
• Use the following wiring diagram to connect the FA403 to the
TapWatch gateway:
9
Use a Phillips screwdriver to close the TapWatch gateway
housing.
10
Refer to the
TapWatch User Manual
for instructions on how to
associate a TapWatch gateway to a site, and register repeaters
and transmitters to the TapWatch gateway.
Note:
The first time you connect a TapWatch gateway to the Internet it
will check for and initiate firmware updates. This may take up to 15
minutes and the gateway may experience a re-boot cycle to complete
the update.


