— 27 —
You also need to open a specific port on the network router.
From the router’s Port Forwarding utility, you will be able to
enter your static IP address for the NOVIA 272, followed by
a colon and a port number. The port number may be any
number in the range indicated by the router. If your Inter-
net Service Provider (ISP) assigns you a static IP address,
then it is a simple matter to address the NOVIA 272 from
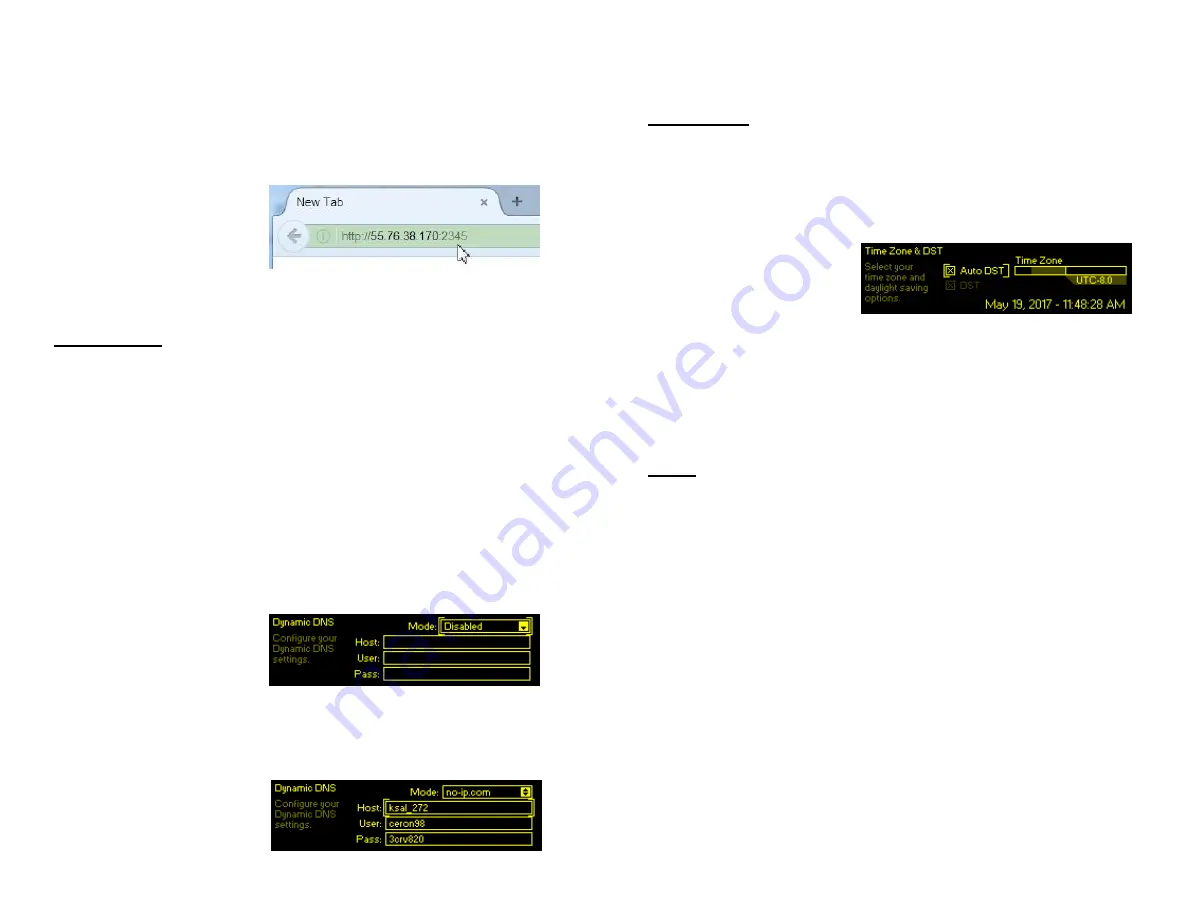
anywhere. Just type the
IP address and port
number into your
browser as shown here.
But if your ISP issues
you a
dynamic
IP, which is most often the case, then you
must utilize the services of an IP-forwarding provider.
Dynamic DNS
It would be impossible to address equipment behind a dy-
namic IP address if it were not for IP-forwarding providers
available on the Internet. Their service, either free or at a
very modest charge, allows the NOVIA 272 to keep that pro-
vider apprised of its reassigned IP address each time your
ISP reassigns it. The IP-forwarding provider intercepts data
attempting to connect with your unit and converts the IP
address to the updated one.
There are three popular forwarding service providers. You
may find that their basic forwarding service (all you really
need) is free of charge, but advanced features may com-
mand a nominal annual fee. All services require registration
on the appropriate Website.
From the Main Menu,
navigate to
Setup
/
Net-
work
/
Dynamic DNS
.
Disa-
bled
is the default
Mode:
selection, but here you
may choose among the three popular providers. Write
down these provider names and do an Internet inquiry for
each to learn more about their services and to register with
whichever one seems best suited to your needs.
The DNS provider will
issue you a
Hostname
,
Username
and
Password
.
Enter these into each of
— 28 —
the three fields. Your screen will look similar to this exam-
ple when finished.
Timekeeping
The internal daypart scheduler and time stamps for alarm
notification and logging require setting the built-in real time
clock (RTC) to an Internet time standard.
Under the
Setup
/
Network
/
Tim
e/
Time Zone & DST
, use the
Time
Zone
slider to select your local zone with respect to UTC. If
you have already estab-
lished an Internet con-
nection, today’s date
and the local time will
appear at the bottom of
the screen.
Auto DST
is the default setting for Daylight
Saving time. Force DST by checking the
DST
box, or un-
check both boxes to ignore DST completely.
An accurate, default Internet
Time Server
has been pre-
programmed into the NOVIA 272 at the factory. You may
change this if there is a reason to do so.
SNMP
SNMP (Simple Network Management Protocol) allows other
TCP/UDP/IP equipment on the same Local Area Network
(LAN) to communicate directly with the NOVIA 272, and for
the unit itself to initiate an alarm to other equipment on the
network. Setup instructions here are abbreviated; please
consult other literature for an explanation of SNMP terms
and protocols.
Under
Setup/Network/SNMP/Mode & Communities
, the default
Mode:
setting is
Disabled
. Reset this to
Read Only
to allow the
NOVIA 272 to be interrogated by the SNMP Manager, or set
Mode:
to
Read & Write
so that the SNMP Manager can send
commands to the NOVIA 272.
Communities
are actually passwords for security purposes.
SNMP Ports
have typical settings that may be changed as re-
quired. ‘Traps’ are SNMP alarms initiated by the NOVIA
272. Enter the local network IP addresses of associated
SNMP equipment under
Trap Destinations
so that they can re-
ceive alarms.


