8
LINE INPUT AND RANGE SELECTION
Input
Connections
The
DAVID-III
has electronically-balanced (transformerless) left-
and right-channel
PROGRAM LINE INPUTS
. These appear as XLR
female connectors on the rear panel. As these are bridging, high
impedance inputs, they provide no termination for the console or
other equipment that feeds the
DAVID-III
. Most professional
equipment nowadays has low output impedances and high input
impedances. The concept of 600-ohm line matching dates from
the age of transformer coupling and is rooted in ancient telephone
practices. With few exceptions, audio line impedance matching is
ridiculed by today s hip broadcasters (you) and equipment
manufacturers (us).
Unbalanced
Inputs
The
DAVID-III
may be fed from gear with unbalanced outputs.
Disco mixers have proven perfectly serviceable for an installation on
a tight budget. For unbalanced lines, the single center conductor of
the shielded input lead should be connected to Pin 2 of the XLR
connector, and the shield connected both to Pin 1 and to Pin 3.
Input Gain
Range
The
DAVID-III
can accommodate line-level program inputs with a
nominal Zero-VU level between 15dBu and +10dBu. This 25dB
range is divided into two more manageable, overlapping gain ranges
that are selected by a series of four internal jumpers.
As shipped, the
DAVID-III
is set up for professional level inputs that
lie in the 0dBu to +10dBu range. Most console and STL receiver
outputs will fall into this range; +4dBu and +8dBu are typical
program line levels.
Lower levels, between 15dBu and 0dBu, may be encountered when
interfacing with semi-pro gear or with feeds from lossy studio-
transmitter telephone line circuits. Extra gain for the low level
range is enabled by changing jumpers beneath the top cover.
Gain Jumpers
Under the top cover and just behind the left channel input connector
you will find four, 3-pin jumper strips. These are identified as JP2
through JP5 in the circuit board legend, and each has a push-on
jumper shunt. LO and HI designations identify the jumper
position for low-level and high-level inputs, respectively, and all four
jumpers must be set identically. This is shown in Figure 2, below.
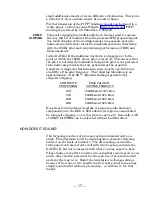
Jumpers for HIGH LEVEL Inputs
Jumpers for LOW LEVEL Inputs
Figure 2 -
Input Gain Range Jumpering


