5
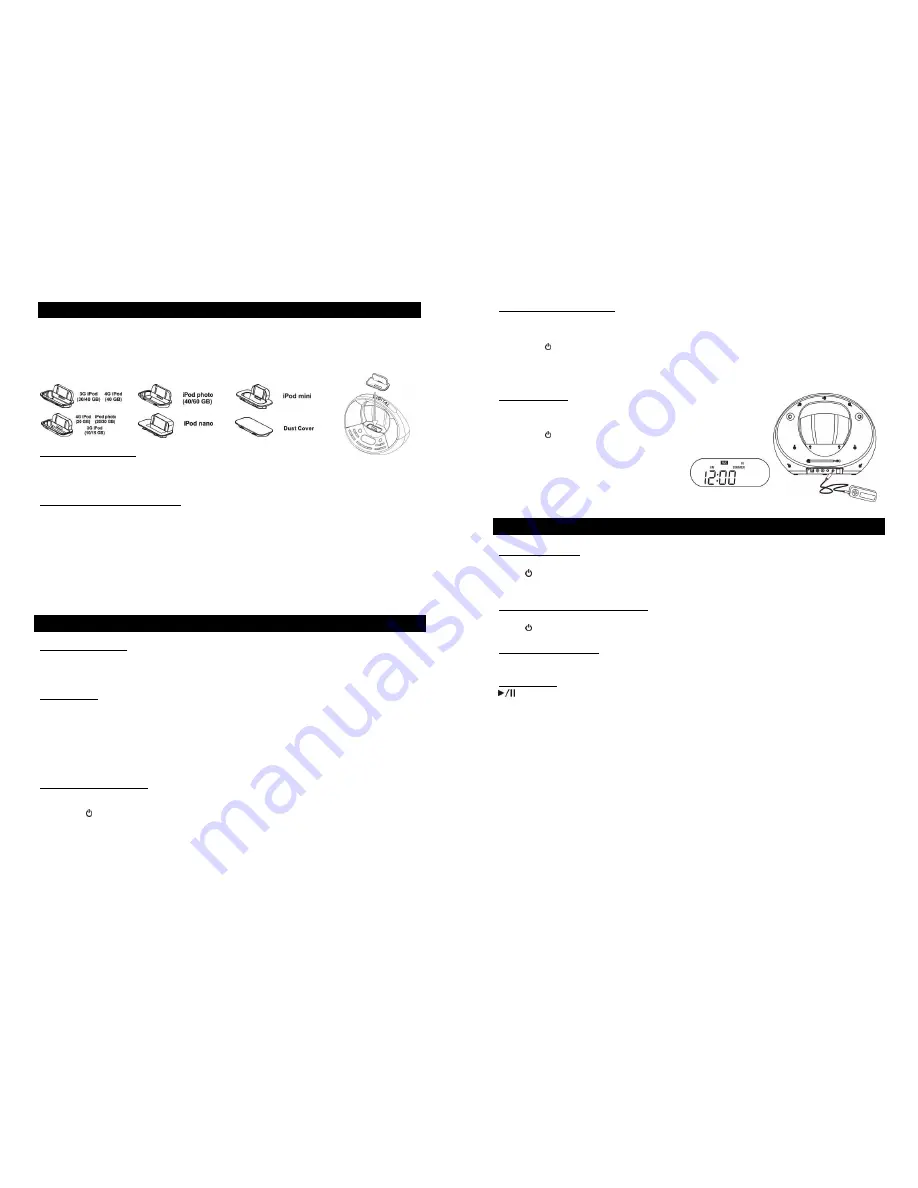
iPod Dock Adapter: Installation
This unit comes with 5 different sized removable dock adapters designed to help your iPod fit
securely in the dock. These adapters are NOT guaranteed to fit all newly released iPod models.
No
adapters are provided for the 5G (fifth generation) 30GB and 60GB iPods with video capability.
Please use the adapters that were included with these iPods at time of purchase.
To Install a Dock Adapter
Select the dock adapter that best fits your iPod model and gently place it in the dock.
Note:
These dock adapters are not designed to accommodate iPod cases.
To Remove/Replace a Dock Adapter
1.
Remove your iPod from the dock
2.
Grip the dock adapter and gently pull upwards.
Note:
To avoid damage to your iPod, ensure that you are using the correct dock adapter for your
iPod and that your iPod is properly docked.
Note:
If no iPods will be docked for a long period of time, use the dust cover to protect the dock
connector.
iPod is a registered trademark owned by Apple Computer Inc. in the U.S. and in other countries
Audio/Video Connection
PHONES Connection
You can use headphones (
not included
) to listen in privacy. Insert the headphone’s 3.5mm plug into
the
PHONES
Jack (21). Use the corresponding adaptors (
not included)
if your headphone is a
different size. The speakers will automatically deactivate when headphones are connected.
Listening Safely
To protect your hearing, follow these guideline when you use headphones.
9
Reduce sound level to a minimum before begin putting on headphones, then adjust volume to
your desired sound level.
9
Do not listen at extremely high volume levels. Extended high volume listening can lead to
permanent hearing loss.
9
Once you set the volume, do not increase it. Overtime, your ears adapt to the volume level, so
a volume level that does not cause discomfort might still damage your hearing.
SUBWOOFER Connection
(
Subwoofer not supplied with this product
)
1.
Connect one end of the RCA cable (
not included
) to
SUB-WOOFER
Jack (20) and the other
end to your subwoofer.
2. Press
STANDBY
to turn the unit on.
3.
Make sure your subwoofer is turned on.
6
VIDEO OUTPUT Connection
1.
With an iPod with video capability docked, you can view your videos on your TV.
Connect one end of an RCA cable (
not included
) to the
VIDEO
Jack (19) and the other end to
the video input jack of your TV.
2. Press
STANDBY
to turn the unit on.
3. Press
FUNCTION
(7, 31) button to select iPod mode. “iPod” will be indicated on the display.
4.
Select the correct video input setting on your TV.
5.
Play the iPod docked with the unit.
AUX Connection
1.
Connect one end of a 3.5mm plug signal wire (
not included
)
*
to the
AUX IN
Jack (22), and the other end to your
audio device.
2. Press
STANDBY
to turn the unit on.
3. Press
FUNCTION
(7,31) button to select AUX mode.
“AUX” will be indicated on the display.
4.
Play your audio device.
*
The cable must have a
3.5mm (1/8 inch) stereo plug on both ends.
General Operation
Turning the Unit On
In this mode, you will have control of your music and play mode.
Press
STANDBY
. The unit will light up, and begin playing the selected play mode
(RADIO/iPod/AUX).
Turning the Unit Off (Standby Mode)
In this mode, you will have control of the clock/alarm clock.
Press
STANDBY
. The unit’s lights will turn off (with the exception of the display).
Selecting the Play Mode
Switch between RADIO/iPod/AUX by pressing
FUNCTION
.
Playing Music
/
BAND
button:
iPod mode: Press to play/pause the selected playlist on the connected iPod.
Radio mode: Press to switch between AM and FM band.
VOLUME –
/
buttons:
Press to adjust the volume level. There are a total of 31 steps: “00” is the minimum level, and “30”
is the maximum level.
X-BASS
button:
Press the
X-BASS
button so that “XBASS” appears on the display. The bass output will increase.
Press the
X-BASS
button again to deactivate.


