background image

LOOMAX DIVX-DVD-PLAYER 
USER MANUAL


© 2003 INNOTECH All Rights Reserved 


WARNING 


TO REDUCE THE RISK OF FIRES AND ELECTRIC SHOCKS, DO NOT EXPOSE THIS 
UNIT TO RAIN OR MOISTURE 


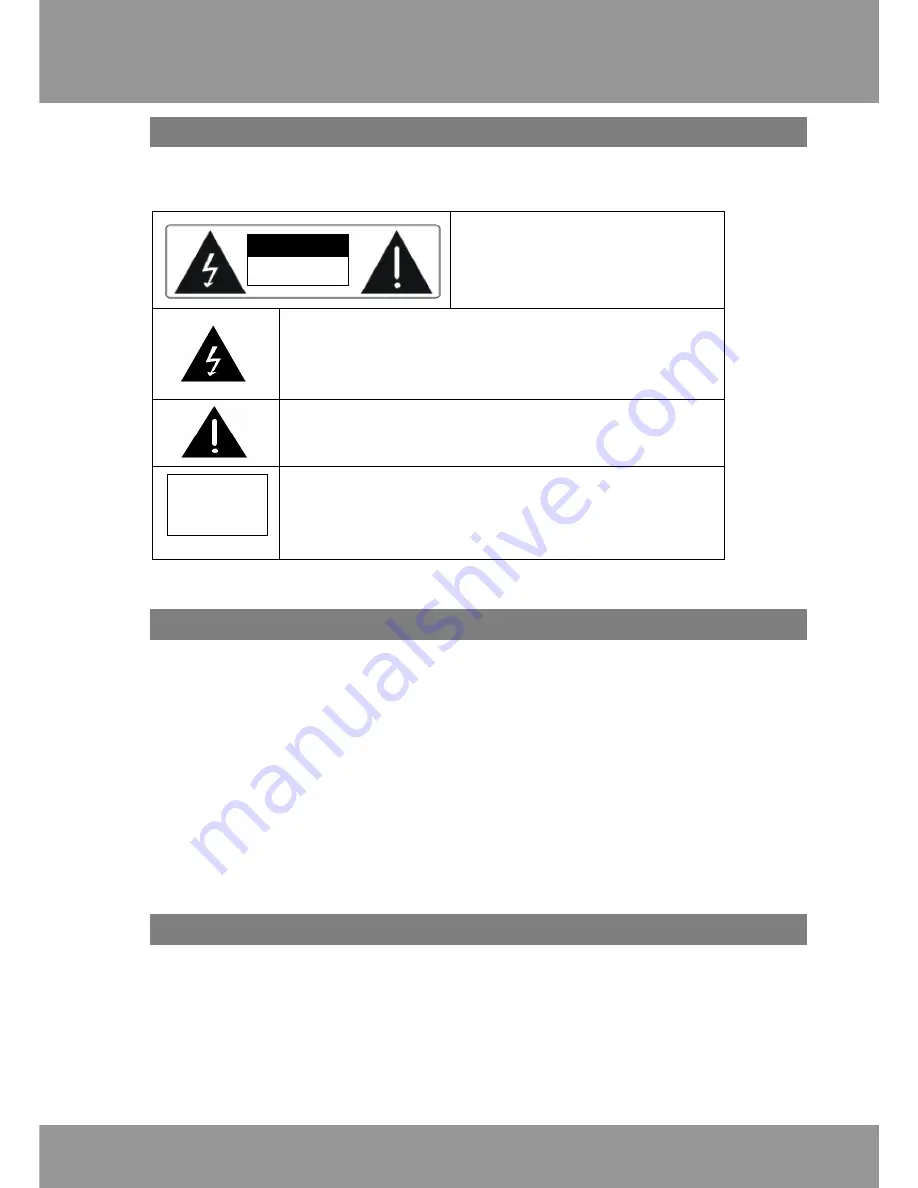
CAUTION: 

To reduce the risk of fires and 

electric shock, do not remove the cover of the unit. 

Refer servicing only to qualified person


This lighting flash arrow symbol in a triangle is intended to alert users to 

the presence of non-insulated high voltage within the product’s enclosure 

that may be of sufficient magnitude to constitute a risk of electric shock 

to person 


The exclamation point symbol in a triangle is intended to alert users to 
the presence of important operating and maintenance instructions in the 
literature accompanying the unit 


The marking of products using lasers. The marking will be shown at the 
rear panel of the unit, means the unit have been classified as Class 1, 
and are utilizing laser beams that are of weaker class. There is no 
danger of hazardous radiation outside the unit 


REFER SERVICING ONLY TO QUALIFIED SERVICE PERSON 


IMPORTANCE 


¨


Read through this instruction manual before installation and use.


¨


Do not touch the power plug with wet hand. 

¨


When disconnecting the power cord from the power outlet, hold the plug, do not pull the wire.  

¨


Switch off the main power when the unit is not in use. (Disconnect the power plug from the power outlet 
when you do not intend to use the unit for a prolonged period of time.)  

¨


Before moving the unit, remove the disc from the unit’s tray first. 

¨


Do not open the cover or touch any of the components inside the unit. 

¨


Do not install or operate the unit direct exposed to sunlight or nearby objects radiating heat that may lead to 
overheat and dangerous to the unit.  

¨


Do not install or operate the unit to moisture or humidity that may affect the laser head. 

¨


Install the unit on flat surface with good air circulation. Do not cover the ventilation holes on the unit by 
any kind. Otherwise, the unit would possibly overheat and malfunction. 

¨


Wipe the panel and case with soft dry cloth only. Do not apply any kind of thinner, alcohol or sprays when 
the cleaning of the unit.


WARRANTY NOTICE 


Dear customer, 
when returing a product within the warranty period please make sure that you return the 
product completely (incl. accessories) and in the original packaging. Otherwise we cannot offer 
you the usual warranty service.


CLASS 1 

LASER 
PRODUCT 

RISK OF ELECTRIC SHOCK  

DO NOT OPEN


CAUTION 

Summary of Contents for Loomax

Page 1: ...LOOMAX DIVX DVD PLAYER INSTRUCTION MANUAL Read this manual before installation and use...

Page 2: ...been carefully checked and is believed to be accurate However INNOTECH assumes no responsibility for any inaccuracies that may be contained in this manual In no event will INNOTECH be liable for direc...

Page 3: ...pack the unit 5 2 Loading batteries into the Remote Control 5 System Connections 1 Connecting to TV set Stereo 6 Panel Description 1 Front Panel 7 2 Rear Panel 7 3 Remote Control 8 Getting Start 1 Pla...

Page 4: ...Do not touch the power plug with wet hand When disconnecting the power cord from the power outlet hold the plug do not pull the wire Switch off the main power when the unit is not in use Disconnect t...

Page 5: ...C MPEG 4 ISO format CD DA MP3 CD R CD RW Photo CD JPEG 1 DISC INFORMATION Disc types DVD DivX CD Recording method Digital MPEG II MPEG 4 Digital Capacity Single layer Single side 4 7GB 2 hr Single lay...

Page 6: ...uth Africa 3 East Asia incl Hong Kong Taiwan South Korea Southeast Asia 4 Australia Caribbean Central South America Mexico New Zealand 5 Africa Former Soviet Union India North Korea Pakistan Turkmenis...

Page 7: ...r heating source Store discs in cabinet vertically in dry condition prevent moisture or humidity Clean the disc with soft dry cloth only wipe gently radically from center to the edge Do not apply thin...

Page 8: ...to the battery compartment Make sure that the batteries have been inserted in the right polarities matching to the symbols as indicated in the battery compartment When replacing batteries replace both...

Page 9: ...NG TO TV SET AUDIO Connect the unit s video output to the TV s video input terminal yellow Connect the unit s Audio output Front Left and Right to the TV s audio input terminals Left white and Right R...

Page 10: ...ts Reserved PANEL DESCRIPTION 1 FRONT PANEL 1 2 3 4 5 6 7 8 9 1 MAIN POWER SWITCH 6 STOP 2 DISC TRAY 7 SKIP BACKWARD 3 VFD DISPLAY PANEL 8 SKIP FORWARD 4 OPEN CLOSE 9 ENTER 5 PLAY PAUSE 2 REAR PANEL 1...

Page 11: ...NUMERIC KEYS 17 ZOOM 3 STEP 18 ANGLE 4 SLOW 19 REPEAT 5 SHUFFLE 20 REPEAT A B 6 PROGRAM 21 SUBTITLE 7 N P 22 DISPLAY 8 TITLE 23 ENTER 9 SETUP 24 RETURN 10 DIRECTION KEY 25 SEARCH BACKWARD 11 MENU 26...

Page 12: ...AX power on screen shows Load a disc Press the OPEN button on the front panel or on the remote control to open the disc tray Load a disc into the tray and press the OPEN button again to close the disc...

Page 13: ...ys the disc automatically 2 Press STOP button LOOMAX power on screen appears If the above DO NOT fix the problem see TROUBLESHOOTING The unit s TV output color is selectable to PAL or NTSC IMPORTANT I...

Page 14: ...ure is functioned only for the disc which has ANGLE function q When the ANGLE MARK is set ON the screen displays the mark q When the ANGLE MARK is set OFF the mark is not displayed 11 SETUP MENU MAIN...

Page 15: ...during OFF SCR SAVER SCREEN SAVER q When the unit is stopped no operation no function button is pressed in 1 minute screen saver appears for the purpose to protect the TV screen if SCR SAVER is set ON...

Page 16: ...EMOD RF remodulation mode with heavy compression and digital dialog normalization 13 SETUP MENU MAIN PAGE GENERAL SETUP SPEAKER SETUP AUDIO SETUP PREFERENCE EXIT SETUP DOWNMIX STEREO MAIN PAGE SPEAKER...

Page 17: ...PCM OUTPUT q To select LPCM output at 48K or 96K 14 AUDIO OUT OP MODE DUAL MONO STEREO COMPRESSION PROLOGIC LPCM OUTPUT MAIN PAGE AUDIO SETUP PAGE AUDIO OUT FULL OP MODE DUAL MONO 6 8 COMPRESSION PROL...

Page 18: ...MAL LB VIDEO OUTPUT WIDE AUDIO SUBTITLE DISC MENU LOCALE PARENTAL PREFERENCE PAGE TV TYPE 1 G AUDIO 2 SUBTITLE 3 PG DISC MENU 4 PG 13 LOCALE 5 PARENTAL 6 PG R PASSWORD 7 NC 17 DEFLAUTS 8 ADULT PREFERE...

Page 19: ...set OFF and in STOP mode SMART NAVI q To select the display with MENU for playing MP3 and PHOTO CD JPEG 16 TV TYPE AUDIO SUBTITLE DISC MENU LOCALE PARENTAL PASSWORD CHANGE DEFLAUTS PREFERENCE PAGE OLD...

Page 20: ...TER PLAY to view the JPEG PHOTOS Then press STOP to go back to the menu of SMART NAVI FUNCTION KEYS Zoom Press the ZOOM Button then the screen will show ZOOM ON and press Icons to zoom in or zoom out...

Page 21: ...lumns the FILE on the right side press ENTER PLAY to play the MP3 Music Then press STOP stop playing and go back to the menu of SMART NAVI FUNCTION KEYS Forward Press the icons to playing fast forward...

Page 22: ...ON KEYS Forward Press the icons to playing fast forward and fast backward Backward Continuously pressing and back to normal Next Press to the next or previous chapter or files Previous Mute Press MUTE...

Page 23: ...playing do not press the STOP button the unit will memorize the stopping position When the same disc is loaded again the unit will continue playing from the position that it stopped If another disc h...

Page 24: ...the remote or turning the SEARCH switch on the unit to change the SEARCH speed or back to normal PLAY Press button to resume normal PLAY SKIP FORWARD SKIP BACKWARD Skip to the next or previous chapter...

Page 25: ...tus Repeat pressing the button to activate the first page the second page of Menu and clear the Menu display ENTER CONFIRM AN ENTRY Confirm a setting entry in the Unit Disc s Function Menu CURSOR Pres...

Page 26: ...ode Title Chapter and Time modes Other disc types mode Pressing the CURSOR button to select search mode Track and Time modes REPEAT REPEAT PLAYBACK CHAPTER TITLE TRACK DISC Repeat playing a selected C...

Page 27: ...ISPLAY button PROGRAM SETTING Programming a disc playing in a desired sequence The unit memorizes a disc program setting and recognizes a memorized disc program automatically when the disc is loaded 1...

Page 28: ...nit Mute when slow SLOW MOTION Repeat pressing the button to change the SLOW motion speeds or back to normal PLAY mode BOOKMARK TO STORE THE SPECIFIC PORTONS SUB TITLE SUB TITLE LANGAGE Press SUBTITLE...

Page 29: ...MAX DIVX DVD PLAYER USER MANUAL 2003 INNOTECH All Rights Reserved Function Key Description SETUP GO TO SETUP MENU N P VIDEO SYSTEM SELECTION NTSC PAL Press and to increase or decrease the audio volume...

Page 30: ...y 1 No disc load a disc 2 Disc has been loaded upside down Place the disc with the label side up 3 Disc s region code is not matching to the unit 4 Disc is not correct type to be played 5 Disc is dama...

Page 31: ...d output not complete 1 Check the TV and amplifier has been power on and correctly setting 2 Check the TV and amplifier system connections are secure 3 Press AUDIO button 4 select other audio tracks o...

Page 32: ...Signal Output Color System NTSC PAL Audio System AC3 digital output DTS digital output Video Output 1Vpp at 75 ohm Audio Output Stereo 2Vpp Audio Output 5 1 channels 0 5Vpp Frequency Response CD 4Hz 2...

Reviews: