4
Manual Operation
• Press the button once to turn the light/appliance on or off.
3
Remote Control
• Log into your account at www.mynexia.com. Click the Lighting &
Automation tab. The appliance module will be displayed.
• Optional: If using the Nexia Home Intelligence mobile
application, then click MY PHONES, EDIT PHONE, and check
the box to control the home appliance module with your mobile
device.
1
Installation
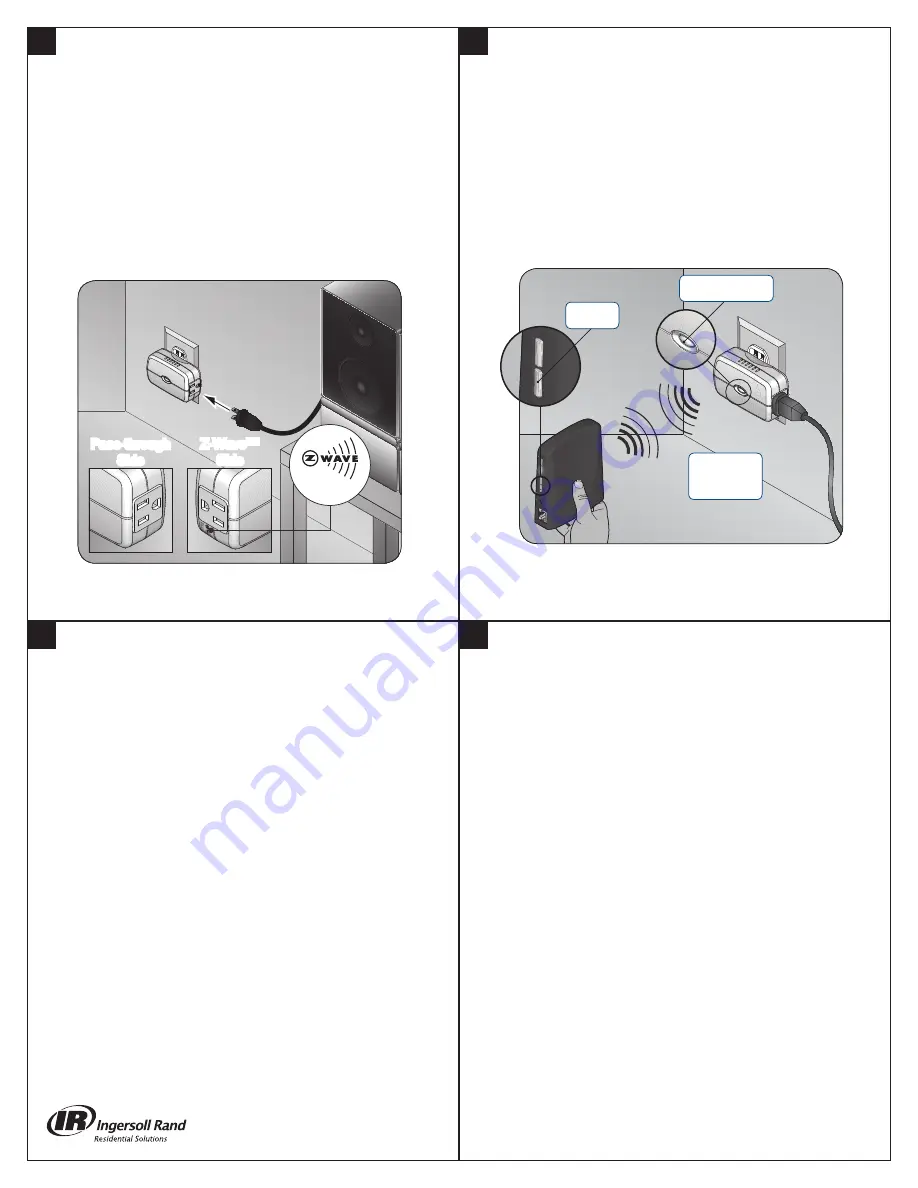
1. Plug the home appliance module into any available outlet.
• Use any indoor, three-prong, 120 volt A/C outlet.
2. (Optional) Plug a lamp (incandescent or CFL) or small
appliance into the Z-Wave™ side of the home appliance
module.
• There are two outlets on the home appliance module. One of
the outlets is labelled with a Z-Wave™ logo. A lamp or small
appliance can be controlled by the system if it is plugged into
the Z-Wave™ side of the appliance module.
• The other outlet can be used simply as a pass-through outlet
(1800 watts maximum total for both outlets). It is not controlled
by the system, and the system is not affected when it is used.
Pass-through
Side
Z-Wave™
Side
Max. 600W
Incandescent
2
Enrollment
1. Enroll the home dimmer module into the bridge.
a. Disconnect power and Ethernet from the bridge.
b. Install a fresh 9-volt battery into the bridge.
c. Hold the bridge within 6 feet (1.8 meters) of the appliance
module throughout enrollment.
d. Press and release the plus (+) button on the bridge.
e. Double-click the button on the appliance module.
f. Observe the lights on the bridge. The orange light will blink while
enrollment is taking place. Enrollment is complete when the
orange light becomes solid.
g. Reconnect power and Ethernet to the bridge.
-
+
Within 6’
(1.8 m)
-
+
Click
Double-Click
©
2012 Ingersoll Rand
Printed in U.S.A.
P516-364 Rev. 2/12-b


