background image


45532694_ed2  

3


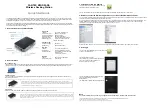
1 Docking station – DS 


Use the drawings and the component list for the specified unit. In the description below, the figures 
below (xx) refer to the corresponding figures on the drawing.  


Always turn off the air and material supply & depressurize the entire 
system before installing, removing or adjusting any accessory on this 
product, or before performing any maintenance on this product or any 
accessory. 

Failure to follow these instructions can result in personal injury.


1.1 Dismounting the Docking Unit 

Drawings/Component lists:  
 

  DS-ATC complete 

(T2X-16-500-IR/ -501-IR/ -505-

IR) 

  Docking unit 

(T2X-16-502-IR/ -503-IR) 

 
a)  Turn of the pneumatic system, ensuring the clamps are off. The clamp is normally open when the 

doser is away from the docking station. (Upper position – inside the guiding pins.) 

b)  Take off the cover plate (9) by removing the 3 hexagonal screws (14), use a  4 mm Allan key. 

c)  Disconnect material hose from the coupling (20 on T2X-16-502-IR/503-IR). 

d)  Disconnect the air hose and lubrication hoses. Disconnect electric connection (24 on T2X-16-502-

IR/503-IR). 

e)  Take off the docking unit (1) by removing the 4 hexagonal nuts and washers (16 and 17).  

f)  The docking unit (T2X-16-502-IR/-503-IR) can now be removed and exchanged. 

g)  Inspect locating pins (2 on T2X-16-502-IR/-503-IR). If they are damaged they can be changed by 

unscrewing the screws (13 on T2X-16-502-IR/-503-IR). 

Summary of Contents for DOSER

Page 1: ...45532694 Edition 2 August 2007 Doser Docking Station Maintenance Manual...

Page 2: ...1 3 Change Male Docking Valve Complete 5 1 4 Hydraulics of the Docking Station 6 1 5 Pneumatics of the Docking Station 7 1 6 Male Docking Valve 8 1 6 1 Dismantling of the Male Docking Valve 8 1 6 2 As...

Page 3: ...IR Docking unit T2X 16 502 IR 503 IR a Turn of the pneumatic system ensuring the clamps are off The clamp is normally open when the doser is away from the docking station Upper position inside the gui...

Page 4: ...ur screws 15 on T2X 16 502 IR 503 IR and remove the pneumatic clamp 10 on T2X 16 502 IR 503 IR Mount the new clamp The two alignment pins 16 are used for guidance and the eight hexagonal screws 15 on...

Page 5: ...e valve complete 5 on T2X 16 502 503 from the docking unit Disconnect the air hose lubrication hoses and the electric connection Now the complete valve can be replaced Note To do maintenance work on t...

Page 6: ...16 502 IR Docking Unit Onboard lub T2X 16 503 IR For doser hydraulics and pneumatics See Doser Maintenance Manual Form 45532660 NOTE Only lubrication of inlet valve for OnBoard Lubricetion No connecti...

Page 7: ...ation T2X 16 501 IR Docking Unit ATC T2X 16 502 IR Docking Unit Onboard lub T2X 16 503 IR Also see pneumatic scheme T2X 07 xxx From To 1 Inlet pneumatics 2 Pneumatic valves connection 1 3 Pneumatic va...

Page 8: ...lose the distance shims 23 and 24 e The packing housing 2 can now be removed Also the Variseal 15 can be removed f To take out the Step seal 16 the retaining shim 5 has to be removed by unscrewing th...

Page 9: ...emporarily e Push the valve needle complete 7 in through the two seals 15 and 16 until the needle head touches the valve seat closed valve Note One will feel a certain resistance each time the needle...

Page 10: ...ing n Position all parts on the docking valve according to the drawing Tighten the four screws 19 Torque is 10 Nm o Finally the pneumatic unit function should be tested Connect the air and check the m...

Page 11: ...2X 20 029 IR sheet 505 7 BK 15 BN 33 BU 24 WH 6 XP61 36POL T2X SF 008 IR T2X 20 029 IR sheet 505 7 Length 270mm WH 3 XP62 19 POLES T2X SF 005 IR T2X 20 029 IR sheet 508 1 WH 3 XP61 36POL T2X SF 008 IR...

Page 12: ...12 45532694_ed2 www irtools com 2007 Ingersoll Rand Company...

Reviews: