background image

Copyright© 2019 Ingenico


All rights reserved


900034667 R11 000  04/0119


17


AXIUM D7


5_3 

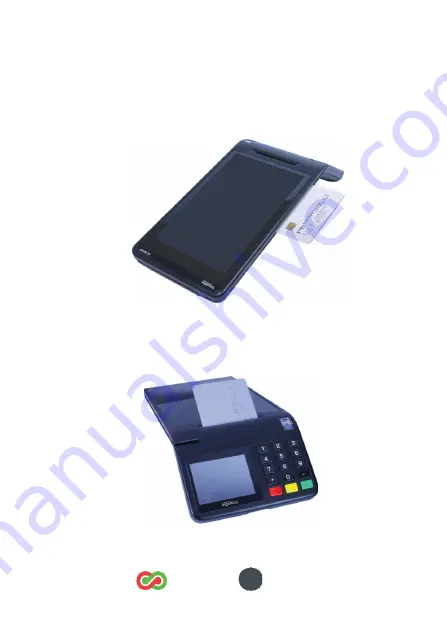
Reading card


Magnetic stripe card


The card can be read either from bottom to top or from top 

to bottom, with the stripe facing down.


Use a regular movement in order to ensure a reliable card 

reading.


Smart Card reader


Insert the card vertically with the chip facing the customer 

and leave in position throughout the transaction.


Summary of Contents for AXIUM D7

Page 1: ...AXIUM D7 User Guide...

Page 2: ...inal 3_1 Connect the battery 3_2 Install SIM MicroSD 3_3 Install SAM 3_4 Switch On Off theterminal 4_Charge your terminal 4_1 Battery characteristics 4_2 Charge of the battery 4_3 Changing the battery...

Page 3: ...2019Ingenico All rightsreserved 900034667 R11 000 04 0119 3 AXIUM D7 7_Docking station 8_Recommendations 8_1 Safety 8_2 Security of your terminal 9_Standards 10_Troubleshooting 11_Marking 26 22 25 22...

Page 4: ...erminal It presents you the necessary information about use installation maintenance safety and security recommendations WARRANTY SECURITY Use only the power supply included with the product to ensure...

Page 5: ...esentation 2_1 Content of the box AXIUM D7 terminal unit equipment Payment side with small display and physical keyboard Merchant side AndroidTM User Interface with a 7 inch display and touch panel in...

Page 6: ...The power supply unit provided with your equipment is specially designed for Ingenico terminals Do not use any other power supply The use of a power supply with apparently similar voltage current cha...

Page 7: ...00034667 R11 000 04 0119 7 AXIUM D7 2_2 Overview of the AXIUM D7 7inch Display with Touch Panel Front camera Smart Card Reader Keyboard with backlight Magnetic Card Reader Contactless Reader around th...

Page 8: ...40VAC 50 60 Hz Class VI equipment Connections on terminal USB C connector rear contacts for connexion with docking station 3_Prepare your terminal 3_1 Connect the battery Turn your terminal and unclip...

Page 9: ...to the connector as shown on picture Place the battery pack in its compartment Close the battery compartment trapdoor 3_2 Install SIM MicroSD Turn your terminal and unclip the battery trapdoor by pus...

Page 10: ...as shown on the figure MicroSD connector is located on terminal bottom Insert the Micro SIM 1 and the Micro SIM2 option ADVICE be sure to use only MicroSIM format 3FF or NanoSIM format 4FF inserted in...

Page 11: ...l and unclip the trapdoor by pushing on the clip as shown with the arrow on the picture The connector modules security SAM are located inside the terminal in a closed compartment SAMs are identified b...

Page 12: ...omatically shuts down It may also be switched off by pressing the ON OFF key few seconds until it appears the message SWITCH OFF on merchant side In order to restart the terminal press the ON OFF key...

Page 13: ...r each time it is placed on its docking station Charging is automatic How does the battery need to be charged When used with a terminal power supply connect the power supply to AXIUM D7 USB C connecto...

Page 14: ...2 Inordertopreservetheenvironnement disposeusedbatteryin compliance with current country recycling legislation Note The terminal memorizes that there is no battery simply by powering up It will then c...

Page 15: ...11 000 04 0119 15 AXIUM D7 Risk of explosion if battery is replaced by an incorrect type do not disassemble use specified charger only do not short circuit do not dispose of in fire do not throw in wa...

Page 16: ...pplications that are in the terminal Axium D7 keyboard is composed of 15 physical keys The red key cancels the The green key validates procedure in progress The yellow key cancels the last characters...

Page 17: ...c stripe card The card can be read either from bottom to top or from top to bottom with the stripe facing down Use a regular movement in order to ensure a reliable card reading Smart Card reader Inser...

Page 18: ...n a residential installation This equipment generates uses and can radiate radio frequency energy and if not installed and used in accordance with the instruction may cause harmful interference to rad...

Page 19: ...r avec une antenne d un type et d un gain maximal ou inf rieur approuv pour l metteur par Industrie Canada Dans lebut der duire les risques de brouillage radio lectrique l intention des autres utilisa...

Page 20: ...eral decades of centimetres from the Human body Merchant or Customer side This POS does not support or cannot support body worn accessories like belt clips etc its weight 535gr and its height 265 x 12...

Page 21: ...vibrations dust damp and electromagnetic radiation computer screen anti theft barrier etc Operating conditions Ambiant temperature From 0 C to 40 C Max Relative humidity 85 at 40 C Storage conditions...

Page 22: ...ifferent features to ease your life Charging please refer to 4 2 3 USB Ports Printing capability Ethernet and Wifi option AXIUM D7 can be charged with a dedicated Ingenico docking Station On the back...

Page 23: ...terminal Only use the appropriate chargers and batteries listed in the Ingenico s catalogue Do not short circuit the battery Do not attempt to open the battery container Used batteries must be dispos...

Page 24: ...ce fulfils PCI PTS security requirements Upon receipt of your terminal you should check for signs of tampering of the equipment It is strongly advised that these checks are performed regularly after r...

Page 25: ...PIN entry process difficult Positioning of in store security cameras such that the PIN entry keypad is not visible NEVER ask the customer to divulge their PIN Code Customers should be advised to ensu...

Page 26: ...cumulators Those provisions are requiring producers and manufacturers to become liable for take back treatment and recycling upon end of life of equipment and batteries The associated symbol means tha...

Page 27: ...recover Put terminal on powered base Get technical support Cards are not read Check thatthemagneticcardis swipedcorrectly withmagnetic band on terminal side Swipe again the card with the magnetic stri...

Page 28: ...x current This marking indicates that your terminal is suitable for direct current DC only It is completed by afferent values voltage and max current This marking indicates power supply meets the ener...

Page 29: ...at any other recipient of this document or informationcontained therein is heldresponsibletoINGENICOfor the confidentiality of that information Care has been taken to ensure that the content of this d...

Reviews: