ABOUT YOUR INFINEA®
MPOS CHARGING STATION (1-Unit)
ASSEMBLY
Infinea
®
mPOS
Charging Station
(1-Unit)
QUICK START GUIDE
CHARGE STATUS
TROUBLESHOOTING
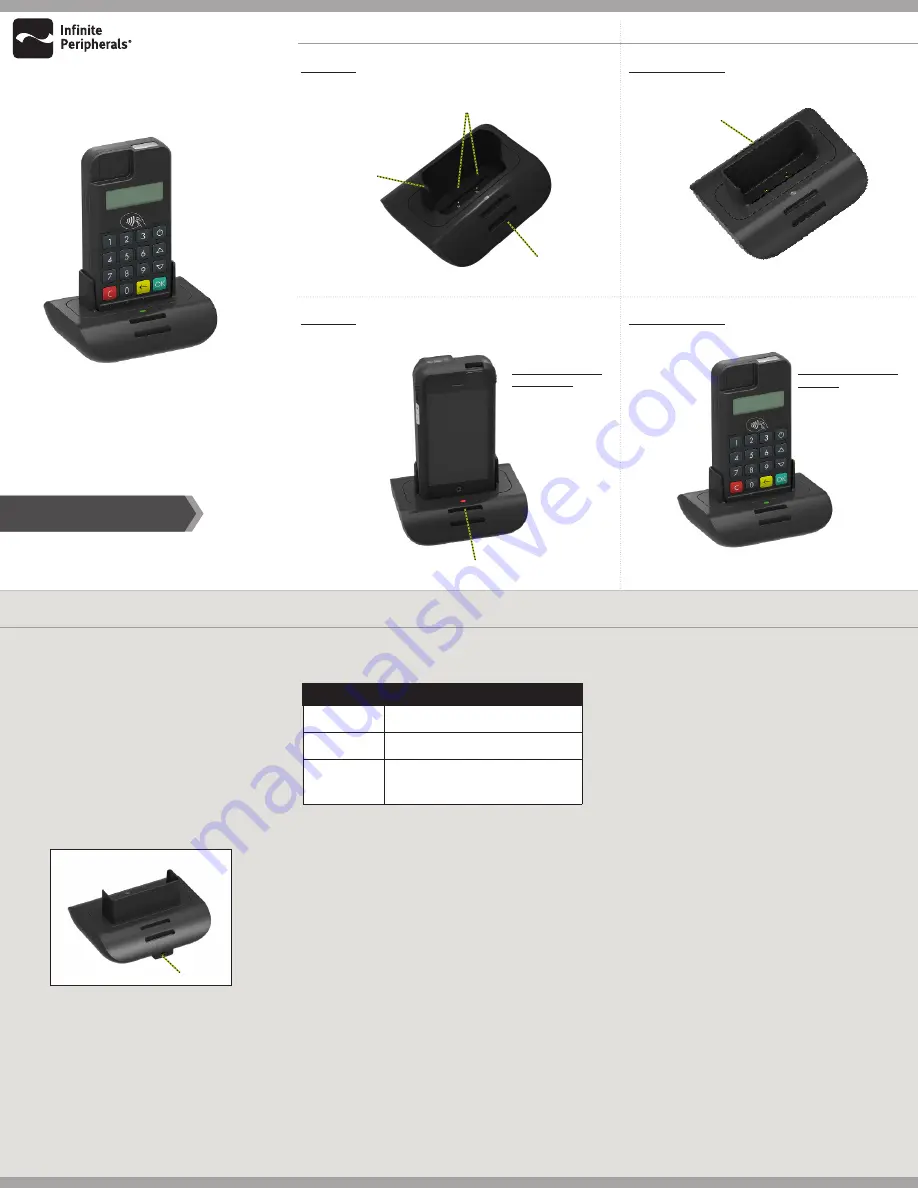
mPOS
Cooler Vent
Standard
Attachment
LED Indicator
mPOS
Insert iOS screen
face foward
mPOS Flat
Flat Attachment
mPOS Flat
Insert Keypad face
forward
Charging Contacts
1. Place the Infinea mPOS Charging Station
on a sturdy, clean and dry surface in an
open, well-ventilated area away from
direct sunlight.
2. Insert the USB plug into the USB port on
the charger. Connect the other end of the
USB cable to a PC USB port or USB 5V
power adapter.
3. Insert the Infinea mPOS unit into a
charging bay, ensuring that the battery
contacts are aligned with the bay’s
contacts. The LED will light up to provide
the charging status.
The Infinea mPOS Charging Station uses the
following LEDs to indicate the charge status:
STATUS INDICATOR LEDS
Green
Inserted device is fully charged.
Orange
Inserted device is charging.
No LED
Indicates there is no device in
charging bay or there is no power
supply attached the charger.
The LED does not come on when the Infinea
mPOS is inserted into the charging station.
• Ensure that the USB cable is securely
inserted into the USB port on the charging
station and connected to the PC USB or
USB 5V power adapter
• Ensure the unit is seated properly in the
charging bay
It takes an excessive amount of time to fully
charge the battery.
• Verify ambient temperature meets the
operating temperature requirements
Operating:
0°C – 40°C (32°F – 104°F)
USB Port


