background image

WARNINGS AND CAUTIONS

The pressure regulator and hose assembly sup-

plied with the appliance must be used, replace-

ment pressure regulators, and hose assemblies 

must be those specified by the appliance manu-

facturer.

Do not store a spare LPG cylinder under or 

near this appliance.

Never fill the cylinder beyond 80% full.

Do  not  clean  the  heater  with  cleaners  that  are 

combustible or corrosive.

NOTE: PLEASE READ THE FOLLOWING SAFETY RULES.

Place the dust cap on the cylinder valve outlet 

whenever the cylinder is not in use. Only install 

the type of dust cap on the cylinder valve that is 

provided with the cylinder valve. Other types of 

caps or plugs may result in leakage of propane.

Within  a  partial  enclosure,  which  includes  an 

overhead cover and three side walls, as long as 

30% or more of the horizontal periphery of 

the enclosure is permanently open.

This appliance requires a 20-lb (9 kg) LPG supply 

cylinder.

The LPG supply cylinder to be used must be:

Constructed and marked in accordance with the 

Specifications for LPG cylinders of the U.S.

Department  of  Transportation  (DOT) or 

Standard for Cylinders, Spheres and Tubes for 

Transportation  of  Dangerous  Goods  and  Com-

mission, CAN/CSA-B339, as applicable;

Provided  with  a  listed  overfilling  prevention 

device and provided with a cylinder connection 

device  compatible  with  the  connection  for  the 

appliance.

The  cylinder  be  disconnected  when  the  appli-

ance is not in use.

Storage  of  an  appliance  indoors  is  permissible 

only if the cylinder is disconnected and removed 

from the appliance.

A  cylinder  must  be  stored  outdoors  in  a  well-

ventilated  area  out  of  the  reach  of  children.  A 

disconnected  cylinder  must  have  dust  caps 

tightly installed and must not be stored in a build-

ing, garage or any other enclosed area.

WARNING:

Certain  materials  or  items,  when  stored  under 

the heater, will be exposed to radiant heat and 

could be seriously damaged.

Inspect  the  visible  portion  of  the  hose  before 

each use of the appliance and inspect the entire 

hose assembly, at least annually.

The cylinder used must include a collar to protect 

the cylinder valve.

4

Summary of Contents for 11875025

Page 1: ...er flammable vapours and liquids in the vicinity of this or any other appliance A liquefied petroleum gas LPG cylinder not connected for use shall not be stored in the vicinity of this or any other ap...

Page 2: ...S WARNING AND CAUTIONS EXPLODED VIEW 5 CONTENTS 1 2 5 PARTS HARDWARE 6 ASSEMBLY INSTRUCTIONS 7 12 SAFETY CHECK 13 OPERATION 14 16 LOCATION THE HEATER FOR USE 17 MAINTENANCE STORAGE 18 19 TROUBLESHOOTI...

Page 3: ...0 BTU hr Fuel LPG Gas supply 20 lb 9 kg LPG gas cylinder 18 1 4 in high 12 1 4 in diameter Manifold pressure 11 in W C Diameter of the injector 1 13 in 1 90 mm Safety features Flame failure device ant...

Page 4: ...se will not be subject to accidental damage Any guard or other protective device removed for servicing the heater must be replaced prior to operating the heater Installation and repair should be done...

Page 5: ...must be Constructed and marked in accordance with the Specifications for LPG cylinders of the U S Department of Transportation DOT or Standard for Cylinders Spheres and Tubes for Transportation of Dan...

Page 6: ...the parts are present If any part is missing or damaged do not attempt to assemble the product Contact customer service for replacement parts Please wear protective gloves when assembling this produc...

Page 7: ...Glass tube Spiral Glass fixing base Base assembly Cylinder locking bar 1 1 1 3 3 1 1 1 1 1 1 2 3 4 5 6 7 8 9 10 Description Qty M6 x 12 bolt assembly M5 x 16 bolt assembly M5 x 10 screw M4 x 10 screw...

Page 8: ...nt person Proper assembly is the responsibility of the installer Align the edges of two meshes 5 put one mesh support rod 4 on the overlap of two meshes 5 and tighten them with four M5 x 10 screws The...

Page 9: ...petent person Proper assembly is the responsibility of the installer Step 3 Attach the assembled reflector assembly to three mesh support rods 4 with three M4 x 10 bolt assemblies EE Warning This appl...

Page 10: ...ller Step 5 Warning This appliance requires installation by a Attach the spiral 7 to the base assembly 9 with two M4 x 10 screws DD Attach the glass fixing base 8 to the base assembly 9 with four M5 x...

Page 11: ...e meshes 5 to the base assembly 9 with 3 M5 x 16 bolt assemblies BB competent person Proper assembly is the responsibility of the installer Step 6 Put the glass tube 6 into the four buckle slices on t...

Page 12: ...ne 1 5 V AA battery not included in the compartment below the control panel Fill with sand until the hole is full Hole Warning This appliance requires installation by a competent person Proper assembl...

Page 13: ...ent person Proper assembly is the responsibility of the installer 10 9 Step 11 Place the gas cylinder not included into the base assembly 9 and fix it with the cylinder locking bar 10 Attach the regul...

Page 14: ...les appear there is leakage Loosen and retighten this connection If the connection still leaks please call our toll free service line at 1 866 814 0585 Note 1 The cylinder supply system must be arrang...

Page 15: ...ough the ignition hole provided If the pilot does not light up turn the knob clockwise to OFF position Wait 5 minutes and repeat the procedure injuries heat reflector 14 THE HEATER the gas vapours to...

Page 16: ...ck to check the flame stability 9 In case of an accidental breakdown of the flame due to wind or other reasons a Flame Safely Device FSD will automatically shut off the gas supply within 90 seconds If...

Page 17: ...ase refill the gas cylinder blue flame These flames should not produce thick black smoke indicating an obstruction of airflow through the burners 16 ODOUR ODOUR OILS BURNING control knob position then...

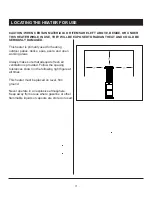
Page 18: ...imarily used for heating outdoor patios decks spas pools and open working areas Always make sure that adequate fresh air ventilation is provided Follow the spacing tolerances shown in the following ri...

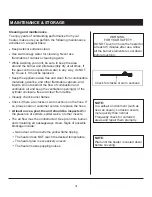
Page 19: ...at all times If the gas control is exposed to water in any way do NOT try to use it It must be replaced Keep the appliance area free and clean from combustible materials gasoline and other flammable v...

Page 20: ...Disconnect the regulator from the LPG cylinder by turning counterclockwise and move LPG cylinder to a secure well ventilated location outdoors DO NOT store in a location that will exceed 125 F 51 6 C...

Page 21: ...her than genuine parts are not covered by this warranty This warranty shall be effective from the date of purchase as shown in the purchaser s receipt ONE YEAR LIMITED WARRANTY This warranty is valid...

Page 22: ...tation en gaz de l appareil 2 teignez toute flamme nue 3 Si l odeur persiste tenez vous distance de l appareil et appelez imm diatement le fournisseur de gaz ou le service d incendie Pour un usage ext...

Page 23: ...E S S I T R E V A VUE CLAT E 26 CONTENU 22 23 26 7 2 PI CES ET QUINCAILLERIE 3 3 8 2 DIRECTIVES D ASSEM BLAGE V RIFICATION DE LA S CURIT 34 UTILISATION 35 37 EMPLACEMENT POUR UTILISER LE RADIATEUR 38...

Page 24: ...pane Alimentation en gaz Bouteille de propane de 20 lb 9 kg 18 1 4 po de hauteur et 12 1 4 po de diam tre Pression d admission Colonne d eau de 11 po Diam tre de l injecteur 1 13 po 1 90 mm Mesures de...

Page 25: ...le tuyau de propane hors des all es passantes o il risque d tre accroch et hors des endroits o le tuyau risque de subir des dommages accidentels Avant de mettre le radiateur en marche replacez l cran...

Page 26: ...lammables Mettez le capuchon antipoussi re sur l orifice de sortie du robinet de la bouteille lorsque celle ci n est pas utilis e Utilisez uniquement des capuchons antipoussi re du m me type que celui...

Page 27: ...l y a des pi ces manquantes ou endommag es ne tentez pas d assembler l article Communiquez avec notre service la client le pour obtenir des pi ces de rechange V rifiez la pr sence de fuites l aide d u...

Page 28: ...e Spirale Base de fixation du tube de verre Assemblage de la base Barre de verrouillage de la bouteille 1 1 1 3 3 1 1 1 1 1 1 2 3 4 5 6 7 8 9 10 Assemblage de boulon M6 de 12 mm Assemblage de boulon M...

Page 29: ...atre vis M5 de 10 mm Fixez ensuite le dernier grillage 5 et les deux autres tiges de support du grillage 4 l unit assembl e l aide de huit vis M5 de 10 mm DIRECTIVES D ASSEMBLAGE tape 1 tape 2 tape 1...

Page 30: ...z le d me r flecteur 1 l assemblage du r flecteur l aide de six assemblages de boulon M4 de 10 mm EE tape 4 Avertissement L appareil doit tre install par une personne comp tente Il incombe l installat...

Page 31: ...e 9 l assemblage de la base 10 l aide de quatre vis M5 de 10 mm CC DIRECTIVES D ASSEMBLAGE tape 5 tape 5 Avertissement L appareil doit tre install par une personne comp tente Il incombe l installateur...

Page 32: ...sup rieure du tube de verre 6 est ins r e dans les fentes de la boucle de l cran r flecteur 3 Fixez les grillages 5 l assemblage de la base 9 l aide de trois assemblages de boulon M5 de 16 mm BB tape...

Page 33: ...situ sous le panneau de commande DIRECTIVES D ASSEMBLAGE tape 8 tape 9 tape 8 Remplissez du sable jusqu ce que le trou soit Trou tape 9 Avertissement L appareil doit tre install par une personne comp...

Page 34: ...a barre de verrouillage de la bouteille 10 Fixez le r gulateur la bouteille tournez le dans le sens des aiguilles d une montre pour bien le serrer puis fermez la porte Remarque N oubliez pas de v rifi...

Page 35: ...se forment c est qu il y a une fuite Desserrez et resserrez tous les points de ce raccord S il y a encore des fuites veuillez communiquer avec le service la client le au 1 866 814 0585 Remplacez le t...

Page 36: ...bris Assurez vous que les composants retir s au cours de l assemblage ou de l entretien sont replac s et fix s avant d allumer l appareil Le radiateur doit tre compl tement inspect e avant chaque util...

Page 37: ...e HIGH lev et vice versa 9 Si la flamme s teint accidentellement cause du vent ou de toute autre raison le dispositif de s curit de la flamme fermera automatiquement l alimentation en gaz dans les 90...

Page 38: ...position OFF arr t 2 Fermez le robinet de la bouteille de propane 3 Attendez 5 minutes pour laisser le gaz se dissiper 4 Si l odeur persiste appelez imm diatement le fournisseur de gaz REMARQUE Si le...

Page 39: ...es terrasses les patios les spas les piscines et les espaces de travail ciel ouvert Assurez vous toujours que la circulation d air est ad quate Respectez en tout temps les distances acceptables indiqu...

Page 40: ...d eau d une fa on ou d une autre ne l utilisez PAS Il doit tre remplac Assurez vous que la zone autour de l appareil est d gag e Veillez ce qu il n y ait pas de mat riaux combustibles d essence ni d a...

Page 41: ...sque vous transportez l appareil ou qu il reste longtemps inutilis Tournez le r gulateur de la bouteille de propane dans le sens contraire des aiguilles d une montre pour le d brancher Rangez la boute...

Page 42: ...abriqu selon les normes de qualit les plus strictes Nous garantissons au consommateur ou l acheteur initial que cet article et toutes ses pi ces ne pr senteront aucun d faut de mat riaux ou de fabrica...

Reviews: