background image

26

EN

How to carry out a 

drying cycle

Starting and selecting a programme

1.

 Plug the dryer into the power supply socket.

2.

 Select the programme according to the type of laundry 

(see Laundry).

3.

 Open the door, ensure that the filter is clean and securely placed and that the water container is empty and correctly slotted 

(see 

Maintenance).

4.

 Load the machine, making sure that no piece of laundry gets between the door and the relative seal. Close the door.

5.

 Press the ON/OFF button to switch on the machine.

6.

 After consulting the programme chart and the indications for each type of fabric (

see Laundry

), turn the Programme selection 

knob towards the programme corresponding to the type of laundry to be dried 

(see Programmes and options).

Warning: If the position of the programme selection knob changes after pressing the START/PAUSE button, the selected program-

me will NOT be modified. To modify the programme, press the START/PAUSE button to put the programme in pause mode (the 
indicator light flashes orange), then select a new programme and the relative options. Press the START/PAUSE button to start the 
new programme.

7.

 Select the ”Timed Drying” function by pressing the timed drying button until the required time is dispayed

 (see Programmes and 

options).

8.

 If necessary, set the time of the delayed start and any other options 

(see Programmes and options).

9.

 Press the ALARM 

 button to sound a buzzer signalling the end of the programme.

10. 

Press the START/PAUSE button to start the drying cycle. The display will show the approximate time remaining.

Laundry can be checked while the drying programme runs and any garments already dry can be removed, while drying continues 
for the remaining items. After closing the door, press the START/PAUSE button to resume machine operation.

11.

 The final COOL TUMBLE phase (i.e. the fabrics are cooled) activates during the last few minutes of the drying programme; 

always allow this phase to terminate.

12.

 At the end of the drying cycle the display shows END.

The buzzer will beep 3 times to let you know that your programme is complete. (Note: If the SOUND option was selected the buzzer 
beeps 3 times every 30 seconds for 5 minutes).
Open the door, remove the laundry then clean the filter and replace it. Empty the water container and put it back in its slot 

(see 

Maintenance).

If the clothes are not removed at the end of the cycle the automatic 

Anti Craese

 action will, on those programmes with this feature,  

continue to rotate the drum intermittently for up to 10 hours to minimise creasing.  Opening the door or pressing the OFF button will 
stop the 

Anti Crease

 action.

13. 

Disconnect the dryer from the power supply.

Automatic pre-post Anti Crease

This is an automatic function which provides an anti crease treatment both before and after the drying programme.  By periodically 
rotating the drum before the start of the drying cycle, when a delayed start is selected, the formation of creases is prevented.  On 
certain programmes (see the programme table) the drum also rotates periodically at the end of the drying cycle on.  This post crease 
care action continues until either the door is opened or the 

OFF 

button is pressed.

Standby mode

This tumble dryer, in compliance with new energy saving regulations, is fitted with an automatic standby system which is enabled 
after about 30 minutes if no activity is detected. Press and hold the 

ON/OFF

 button until the dryer reactivates.

Summary of Contents for IDCE G45X B H PS

Page 1: ... com Inhoudsopgave Installatie 2 Waar men de wasdroger moet installeren Ventilatie Electrische aansluiting Informatie vooraf Waarschuwingen 4 Algemene veiligheid Energiebesparing en milieurespect Zorg en onderhoud 6 Onderbreking van de electrische voeding Reiniging van het filter na elke cyclus Controle van het mandje na elke cyclus Legen van het watervat na elke cyclus Reiniging van de condensati...

Page 2: ...tervat niet te gebruiken In dit geval hoeft men dit watervat dus niet na elke cyclus te legen Indien de wasdroger boven of naast een wasmachine staat kunnen ze dezelfde afvoer gebruiken Het is voldoende als men de slang in afbeelding A losmaakt en op de afvoer aansluit Indien de slang niet bij de afvoer komt kan men een slang met dezelfde diameter aanschaffen om de afstand te overbruggen Om deze n...

Page 3: ...telijke lading minuten 3 104 Condensatie efficiëntieklasse op een schaal van G minst efficiënt tot A meest efficiënt B Gemiddelde condensatie efficiëntie Luchtgedragen akoestische geluidsemissies dB A re 1 pW 68 0 Energie efficiëntieklasse op een schaal van A laag gebruilk tot D hoog gebruik B Deze huishoudelijke droger is een Automatisch Duur van de modus aan voor stroommanagementsysteem minuten ...

Page 4: ...bruik de droger niet als het filter het waterreservoir en de Warmtepomp niet goed op hun plaats zitten zie Onderhoud Doe niet teveel wasgoed in de droger zie Wasgoed voor maximaal laadvermogen Doe geen drijfnatte was in de droger Volg altijd aandachtig de was en drooginstructies op de etiketten van de kledingstukken zie Wasgoed Doe geen overmatig grote kledingstukken in de droger Droog geen acrylv...

Page 5: ...anding Wasverzachter of gelijkaardige producten mogen niet worden gebruikt in een droogautomaat om statische elektriciteit te voorkomen tenzij de praktijk specifiek wordt aanbevolen door de fabrikant van de wasverzachter Droog geen ondergoed dat metalen verstevigingen bevat zoals beha s met metalen beugels Wanneer de metalen beugels loskomen tijdens het drogen kan de droogautomaat worden beschadig...

Page 6: ... door een reactie tussen water en of reinigingsmiddelen zoals wasverzachter Dit gekleurde laagje heeft geen enkele invloed op de prestaties van de wasdroger Legen van het watervat na elke cyclus Haal het waterverzamelvaatje uit de wasdroger en leeg het in een wasbak of iets dergelijks daarna moet men het weer op de juiste manier terugzetten Controleer altijd dit vaatje en leeg het voordat men een ...

Page 7: ...n Gebruik geen oplosmiddelen of schuurmiddelen Laat de wasdroger regelmatig controleren door bevoegd technisch personeel zodat de veiligheid van de electrische en mechanische onderdelen kan worden gegarandeerd zie Service Kort advies Vergeet niet het filter van de deur te reinigen enhet filter van de condensator na elke droogcyclus Vergeet niet het waterreservoir te legen na elke droogcyclus Opdez...

Page 8: ... om te openen Filter Luchtrooster Beschrijving van de wasdroger Openen van het deurtje Bedieningspaneel Eigenschappen Knoppen en controlelampen Opties Display Knop Start met vertraging Knop Droging met tijdsfunctie Controlelamp Water reservoir leegmaken Controlelamp Reiniging filter Controlelamp Reiniging condensor Programma voortgang Ikoon Droging met tijdsfunctie Ikoon Start met vertraging Serie...

Page 9: ...g ing werd ingesteld wordt de tijd weergegeven waarna het gekozen programma wordt gestart In deze sectie wordt ook de tijdsduur weergegeven van het gekozen programma In de sectie B wordt de fase van het programma in uitvoering weergegeven Ikoon zon Droging Ikoon ventilator Cyclus koude lucht In de sectie C de controlelampen voor het onderhoud controlelamp Vaatje leegmaken Controlelamp Reiniging fi...

Page 10: ...eren en de reeds droge kleren eruit halen terwijl men de rest verder laat dro gen Na het weer sluiten van het deurtje moet men op START PAUSE drukken om de machine weer in bedrijf te brengen 11 Tijdens de laatste minuten van de droogprogramma s zal de laatste fase KOUDE DROGING worden opgestart om de was af te koelen men moet de machine deze fase altijd laten afmaken 12 Om aan te geven dat het pro...

Page 11: ...binnenstebuiten te draaien Start het programma nogmaals voor een kortere duur Programma s en opties Programma Max lading kg Passende opties Duur cyclus Energy Saver 1 Eco Katoen 1 Memo Alarm Vertraagde start 2 Eco Overhemden 1 Memo Alarm Vertraagde start 3 Eco Synthetische stoffen 1 Memo Alarm Vertraagde start Katoen 4 Standaard Katoen Max Hoge temperatuur Snel Strijken Memo Alarm Droging met tijd...

Page 12: ...al droog zijn na het programma laat het dan nogmaals draaien Droog geen schoenen met gel erin of voorzien van knipperlichten Droog alleen schoenen van syntetisch materiaal of zeildoek Na afloop van het programma moet men het schoenenrek weer verwijderen en het filter weer erin zetten Programma Sport Kleding Dit is een programma voor het veilig drogen van kleding zoals bijvoorbeeld gymnastiekpakken...

Page 13: ...opgeslagen Om de optie opnieuw op te roepen hoeft u de droger alleen maar opnieuw in te schakelen en de knop Memo en start in te drukken Zoals in alle andere cyclussen kunt u de opties en instellingen wijzigen tenzij ze incompatibel zijn Elke 2 min verschijnt op het display het nummer van de opgeroepen cyclus Als er geen enkele cyclus is opgeslagen zal dit worden aangegeven door een geluidssignaal...

Page 14: ...rmijden moet men niet teveel in de wasdroger stoppen Wasetiketten Controleer de wasetiketten vooral als de kledingstukken voor het eerst in de wasdroger worden gedaan Hieronder worden de meest voorkomende symbolen gegeven Mag in de wasdroger Kan niet in de wasdroger worden gedroogd Drogen bij hoge temperatuur Drogen bij lage temperatuur Droogtijden De tijden zijn bij benadering aangegeven en kunne...

Page 15: ...ch nog vochtig is neem dan contact op met het servicecentrum zie Service Als op het display een F verschijnt gevolgd door een of twee nummers dient u de droger uit te schakelen de stekker uit het stopcontact te halen en het filter te reinigen zie onderhoud Doe daarna de stekker weer in het stopcontact schakel de droger in en start een nieuw droogprogramma Als het bericht voortduurt moet u het numm...

Page 16: ...e costs for our customers and to minimise materials wastage Disposing of the packaging materials follow local regulations to allow for recycling of packaging materials In order to minimise the risk of injury to children remove the door and plug then cut the power supply cord flush with the ap pliance Dispose of these parts separately to prevent the appliance from being connected to a power supply ...

Page 17: ...install the tumble dryer Ventilation Electrical connections Preliminary information Warnings 20 General safety Saving energy and respecting the environment Care and maintenance 22 Disconnecting the power supply Cleaning the filter after each cycle Checking the drum after each cycle Emptying the water container after each cycle Cleaning the condenser unit Cleaning the tumble dryer Description of th...

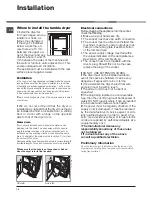
Page 18: ...e B Make sure that the hose is not squashed or kinked when the dryer is in its final location 1 2 2 1 Less than 1m Picture A Picture B 10 mm 15 mm 15 mm Electrical connections Before plugging the appliance into the socket check the following Make sure your hands are dry The socket must have an earth connection The socket must be able to withstand the machine s maximum power output as indi cated on...

Page 19: ...the label and the fiche relates The standard cotton program is suitable to dry at cupboard level 0 cotton laundry and is the most efficient programme in terms of energy consumption Partial load is half the rated load 2 based on 160 drying cycles of the standard cotton programme at full and partial load and the consumption of the low power modes Actual energy consumption will depend on how the appl...

Page 20: ...o not tumble dry large very bulky items Do not tumble dry acrylic fibres at high temperatures Do not turn off the dryer when there are still warm items inside Clean the filter after each use see Maintenance Empty the water container after each use see Maintenance Clean the condenser unit at regular intervals see Maintenance Do not allow lint to collect around the dryer Never climb on top of the dr...

Page 21: ...ts eg bras with metal reinforcing wires Damage to the tumble dryer can result if the metal reinforcements come loose during drying Do not tumble dry rubber plastic articles such as shower caps or babies waterproof covers polythene or paper Do not tumble dry rubber backed articles clothes fitted with foam rubber pads pillows galoshes and rubber coated tennis shoes Remove all objects from pockets su...

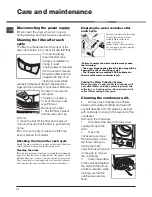
Page 22: ...mbina tion of water and or cleaning agents such as wash softeners This coloured film does not affect the dryer s performance Emptying the water container after each cycle 2 Remove the water container and empty it into a sink or other suitable drain outlet then replace it correctly Always check the water contai ner and empty it before starting a new drying cycle Failure to empty the water container...

Page 23: ...er The external metal plastic and rubber parts can be clea ned with a damp cloth Clean the front air intake grille regularly every 6 months with a vacuum cleaner to remove any lint fluff or dust deposits Furthermore remove any lint deposits from the front part of the condenser and from the filter area using a vacuum cleaner every so often Do not use solvents or abrasives Have the dryer checked reg...

Page 24: ...andle pull to open Filter Air intake grille Description of the tumble dryer Opening the door Control panel Features Options buttons and indicator lights Display Delay start button Timed Drying button Empty water container indicator light Clean filter indicator light Clean condenser unit indicator light Cycle phases Timed drying icon Delay start icon Model Serial Numbers ...

Page 25: ...ion was set the time remaining to the start of the selected programme will appear The duration of the selected programme is also displayed in this section In section B the phase of the running programme is displayed Sun icon Drying cycle Fan icon COOL air cycle In section C the maintenance indicator lights are displayed Empty water container indicator light Clean filter indicator light Clean conde...

Page 26: ...nd any garments already dry can be removed while drying continues for the remaining items After closing the door press the START PAUSE button to resume machine operation 11 The final COOL TUMBLE phase i e the fabrics are cooled activates during the last few minutes of the drying programme always allow this phase to terminate 12 At the end of the drying cycle the display shows END The buzzer will b...

Page 27: ...inside out before drying them This programme lasts about 1 00 hrs mins although it may last longer depending on the size and density of the load and on the spin speed used during the wash cycle Garments dried with this programme are usually ready to be worn although the edges of heavier garments may be slightly damp Leave them to dry naturally as an additional drying process may damage them Unlike...

Page 28: ...hirts bearing the symbol Suitable for loads of up to 4 kg We suggest turning garments inside out before drying them Sport Light Programme This programme is designed for safely drying garments such as Fitness suits and shorts bearing the symbol It is ideal for those garments that do not need to be dried fully or which have to be ironed We suggest turning garments inside out before drying them Outwe...

Page 29: ...n the display and after 3 second a beep will confirm that the details have been stored To recall the stored cycle simply turn on the dryer press the memo button and then start the cycle It is possible to change any of the options in the normal way Every 2 minutes the stored cycle number will appear on the display If no cycle has been stored you will hear a beep when the Memo button is pressed A st...

Page 30: ...s this may result is reduced drying performance Care labels Always check the care labels especially when placing garments in the tumble dryer for the first time Below are the most commonly used symbols May be tumble dried Do not tumble dry Tumble dry high heat Tumble dry low heat Drying times Drying times are approximate and may vary depending on the following Amount of water retained by items aft...

Page 31: ...nts and repeat the programme if the items are still damp contact the Technical Assistance Centre see Assistance If the display shows a fault switch the appliance off and unplug it then clean the filter and the Heat Pump Filter unit see Maintenance Reinsert the plug switch the appliance on and start another programme If the display still visualises a fault contact the Technical Assistance Centre se...

Page 32: ...ehold appliances should not be disposed of using the normal solid urban waste cycle Exhausted appliances should be collected separately in order to optimise the cost of re using and recycling materials comprising the machine while preventing potential damage to public health and the environment The crossed out wheeled bin symbol appears on all products to remind owners of the obligations regarding...

Reviews: