background image

16

GB

Installation

!

 Please keep this instruction booklet in a safe place for future reference. If 

the appliance is sold, given away or moved, please make sure the booklet is 

also passed on to the new owners so that they may benefit from the advice 

contained within it.

!

 Please read this instruction manual carefully: it contains important information 

concerning the safe operation, installation and maintenance of the appliance.

Positioning

!

 Do not let children play with the packaging material; it should be disposed 

of in accordance with local separated waste collection standards (see 

Precautions and tips).

!

 The appliance must be installed by a qualified professional in accordance 

with the instructions provided. Incorrect installation may damage property or 

cause harm to people or animals.

Built-in appliances

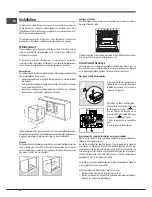
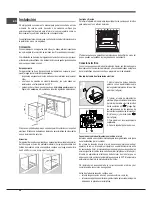
Use an appropriate cabinet to ensure that the appliance operates properly:

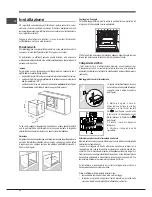
•  The panels adjacent to the oven must be made of heat-resistant material.

•  Cabinets with a veneer exterior must be assembled with glues which can 

withstand temperatures of up to 100°C.

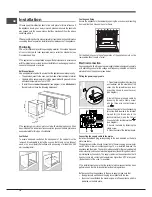
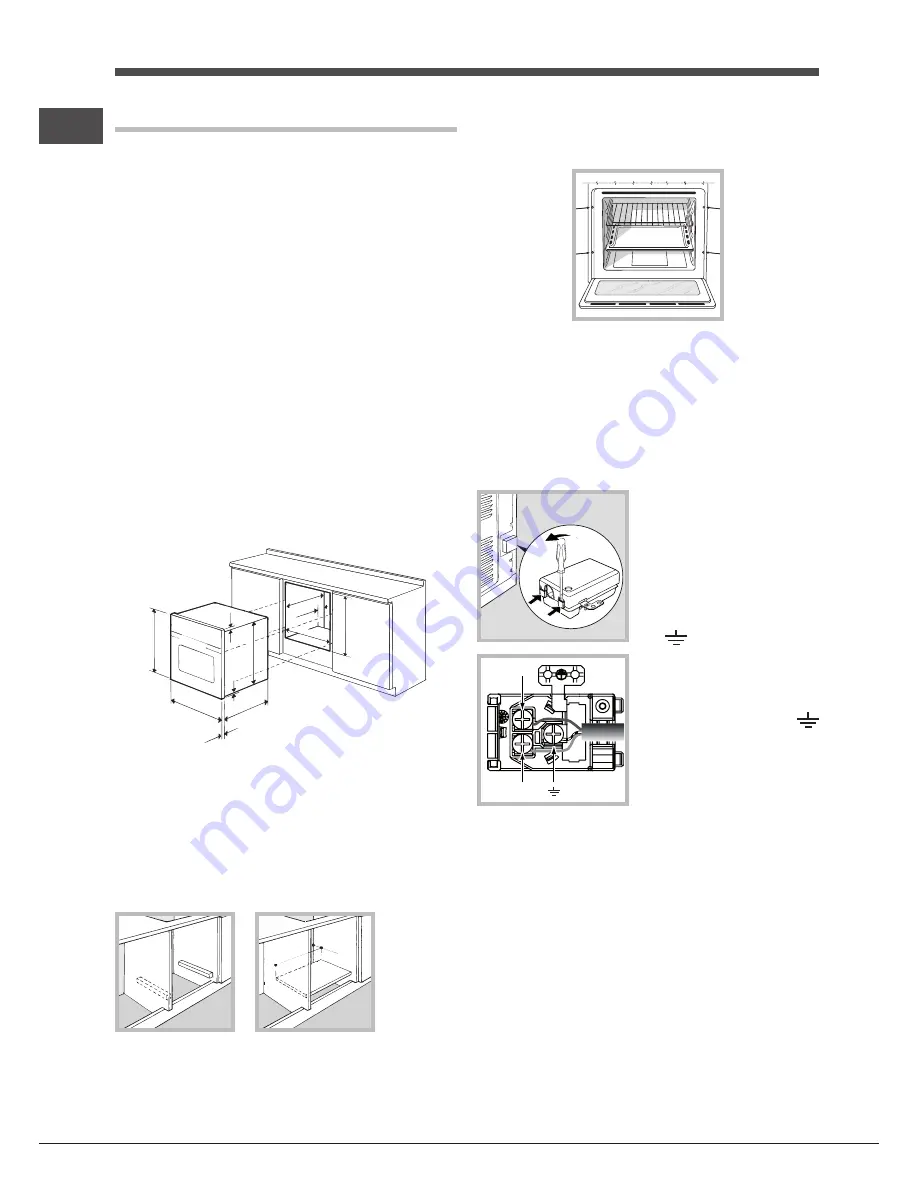
•  To install the oven 

under the counter

 (see diagram) or in a 

kitchen unit

the cabinet must have the following dimensions:

595 mm.

595 mm.

25 mm.

545 mm.

5 mm.

567 mm.

23 mm.

575-585 mm.

45 mm.

560 mm.

547 mm. min.

!

 The appliance must not come into contact with electrical parts once it has 

been installed. The indications for consumption given on the data plate have 

been calculated for this type of installation.

Ventilation

To ensure adequate ventilation, the back panel of the cabinet must be 

removed. It is advisable to install the oven so that it rests on two strips of 

wood, or on a completely flat surface with an opening of at least 45 x 560 

mm (see diagrams).


560 mm

.

45 mm.

Centring and fixing

Secure the appliance to the cabinet by opening the oven door and inserting 

4 screws into the 4 holes on the outer frame.

!

 All parts which ensure the safe operation of the appliance must not be 

removable without the aid of a tool.

Electrical connection

Ovens equipped with a three-pole power supply cable are designed to operate 

with alternating current at the voltage and frequency indicated on the data 

plate located on the appliance (see below).

Fitting the power supply cable

1. Open the terminal board by inserting 

a screwdriver into the side tabs of the 

cover. Use the screwdriver as a lever 

by pushing it down to open the cover 

(see diagram).

2. Install the power supply cable by 

loosening the cable clamp screw 

and the three wire contact screws  
L-N-

.

Connect the wires to the corresponding 

terminals: the Blue wire to the terminal 

marked (N), the Brown wire to the 

terminal marked (L) and the Yellow/
Green wire to the terminal marked 


(see diagram).

3. Secure the cable by fastening the 

clamp screw.

4. Close the cover of the terminal board.

Connecting the supply cable to the mains

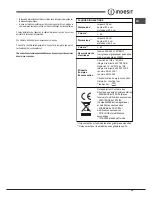
Install a standardised plug corresponding to the load indicated on the data 

plate (see table). 

The appliance must be directly connected to the mains using an omnipolar 

switch with a minimum contact opening of 3 mm installed between the 

appliance and the mains.  The switch must be suitable for the charge indicated 

and must comply with current electrical regulations (the earthing wire must not 

be interrupted by the switch). The supply cable must be positioned so that it 

does not come into contact with temperatures higher than 50°C at any point 

(the back panel of the oven, for example).

!

 The installer must ensure that the correct electrical connection has been 

performed and that it is fully compliant with safety regulations.

Before connecting the appliance to the power supply, make sure that

•  the appliance is earthed and the plug is compliant with the law.

•  the socket can withstand the maximum power of the appliance, which is 

indicated on the data plate.

L

N

N

L

Summary of Contents for FIM20 K.A S

Page 1: ...cription de l appareil 7 Description de l appareil 9 Installation 22 Mise en marche et utilisation 24 Programmes 24 Précautions et conseils 26 Nettoyage et entretien 27 Sumario Manual de instrucciones 1 Advertencias 3 Asistencia 5 Descripción del aparato 8 Descripción del aparato 9 Instalación 28 Puesta en funcionamiento y uso 30 Programas 30 Precauciones y consejos 32 Mantenimiento y cuidados 33 ...

Page 2: ...cchio sia spento prima di sostituire la lampada per evitare la possibilità di scosse elettriche Quando si inserisce la griglia assicurarsi che il fermo sia rivolto verso l alto e nella parte posteriore della cavità Warnings WARNING The appliance and its accessible parts become hot during use Care should be taken to avoidtouchingheatingelements Childrenlessthan8 years of age shall be kept away unle...

Page 3: ...céder au remplacement de l ampoule afin d éviter tout risque d électrocution Lors de l introduction de la grille s assurer que l arrêt est bien tourné vers le haut et se trouve dans la partie arrière de l enceinte Advertencias ATENCIÓN Esteaparatoysuspartesaccesiblesse vuelvenmuycalientesduranteeluso Porlotanto es importante evitar tocar los elementos calentadores Mantengaalejadosalosniñosmenoresd...

Page 4: ...de que o bloqueioestejavoltadoparacimaenaparteposterior da cavidade Hinweise ZUR BEACHTUNG Bei Gebrauch wird dieses Gerät und alle zugänglichen Teile sehr heiß Es ist darauf zu achten dass die Heizelemente nicht berührt werden Kinder unter 8 Jahren die nicht ständig beaufsichtigt sind von dem Gerät fernhalten Das Gerät darf von Kindern ab 8 Jahren und Personen mit eingeschränkten körperlichen geis...

Page 5: ...àdelprodotto Al costo di 14 25 centesimi di Euro al minuto iva inclusa dal Lun al Ven dalle 08 00 alle 18 30 il Sab dalle 08 00 alle 13 00 e di 5 58 centesimi di Euroalminuto ivainclusa dalLun alVen dalle18 30alle08 00 ilSab dalle 13 00 alle 08 00 e i giorni festivi per chi chiama dal telefono fisso Per chi chiama da radiomobile le tariffe sono legate al piano tariffario dell operatore telefonico ...

Page 6: ...tencia técnica SAT Llame al 902 133 133 y nuestros técnicos intervendrán con rapidez y eficacia devolviendo el electrodoméstico a sus condiciones óptimas de funcionamiento En el SAT encontrará recambios accesorios y productos específicos para la limpieza y mantenimiento de su electrodoméstico a precios competitivos ESTAMOS A SU SERVICIO Assistência Nunca recorra a técnicos não autorizados Comuniqu...

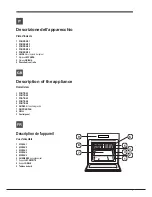
Page 7: ...nnello di controllo Description of the appliance Overall view 1 POSITION 1 2 POSITION 2 3 POSITION 3 4 POSITION 4 5 POSITION 5 6 GUIDES for the sliding racks 7 DRIPPING PAN 8 GRILL 9 Control panel Description de l appareil Vue d ensemble 1 NIVEAU 1 2 NIVEAU 2 3 NIVEAU 3 4 NIVEAU 4 5 NIVEAU 5 6 GLISSIERES de coulissement 7 Support LECHEFRITE 8 Support GRILLE 9 Tableau de bord 7 8 9 6 1 2 3 4 5 ...

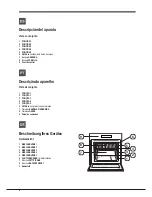
Page 8: ...crição do aparelho Vista de conjunto 1 POSIÇÃO 1 2 POSIÇÃO 2 3 POSIÇÃO 3 4 POSIÇÃO 4 5 POSIÇÃO 5 6 GUIAS de escorrimento das prateleiras 7 Prateleira BANDEJA PINGADEIRA 8 Prateleira GRADE 9 Painel de comandos Beschreibung Ihres Gerätes Geräteansicht 1 EINSCHUBHÖHE 1 2 EINSCHUBHÖHE 2 3 EINSCHUBHÖHE 3 4 EINSCHUBHÖHE 4 5 EINSCHUBHÖHE 5 6 GLEITFÜHRUNGEN für die Einschübe 7 Einschub FETTPFANNE 8 Einsch...

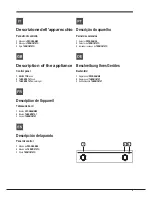
Page 9: ... l appareil Tableau de bord 1 Bouton PROGRAMMES 2 Bouton THERMOSTAT 3 Voyant THERMOSTAT Descripción del aparato Panel de control 1 Mando de PROGRAMAS 2 Mando del TERMOSTATO 3 Piloto TERMOSTATO 2 3 1 Descrição do aparelho Painel de comandos 1 Selector PROGRAMAS 2 Selector do TERMOSTATO 3 Indicador luminoso do TERMOSTATO Beschreibung Ihres Gerätes Bedienfeld 1 Reglerknopf PROGRAMME 2 Reglerknopf THE...

Page 10: ...hio al mobile aprire la porta del forno e avvitare 4 viti a legno nei 4 fori posti sulla cornice perimetrale Tutte le parti che assicurano la protezione debbono essere fissate in modo tale da non poter essere tolte senza l aiuto di qualche utensile Collegamento elettrico I forni dotati di cavo di alimentazione tripolare sono predisposti per il funzionamento con corrente alternata alla tensione e f...

Page 11: ...TERISTICHE Dimensioni larghezza cm 43 5 altezza cm 32 4 profondità cm 43 5 Dimensioni larghezza cm 45 5 altezza cm 32 4 profondità cm 43 5 Volume lt 62 Collegamenti elettrici tensione a 220 240V 50 60Hz vedi targhetta caratteristiche potenza massima assorbita 2250W Volume lt 65 Regolamento EU No 65 2014 che integra la Direttiva 2010 30 EU Regolamento EU No 66 2014 che integra la Direttiva 2009 125...

Page 12: ...del forno Siaccendeselezionando conlamanopolaPROGRAMMI Rimaneaccesa quando si seleziona un programma di cottura Programmi Programmi di cottura Per tutti i programmi è impostabile una temperatura tra 60 C e MAX tranne per il programma GRILL per il quale si consiglia di impostare solo su MAX Programma FORNO TRADIZIONALE Siattivanoidueelementiriscaldantiinferioreesuperiore Conquestacottura tradiziona...

Page 13: ... 15 15 15 160 180 180 160 30 40 35 40 50 60 25 30 Forno Sopra Ritocchi di cottura 3 4 15 220 Grill Sogliole e seppie Spiedini di calamari e gamberi Filetto di merluzzo Verdure alla griglia Bistecca di vitello Cotolette Hamburger Sgombri Toast 1 1 1 1 1 1 1 1 n 4 4 4 4 3 4 4 4 4 4 4 5 5 5 5 5 5 5 5 5 Max Max Max Max Max Max Max Max Max 8 10 6 8 10 10 15 15 20 15 20 7 10 15 20 2 3 Tabella cottura Pe...

Page 14: ...ompresi con ridotte capacità fisiche sensoriali o mentali da persone inesperte o che non abbiano familiarità con il prodotto a meno che non vengano sorvegliate da una persona responsabile della loro sicurezza o non abbiano ricevuto istruzioni preliminari sull uso dell apparecchio L apparecchiononèdestinatoaesseremessoinfunzionepermezzo di un temporizzatore esterno oppure di un sistema di comando a...

Page 15: ...orta Pulire il vetro della porta con spugne e prodotti non abrasivi e asciugare con un panno morbido non usare materiali ruvidi abrasivi o raschietti metallici affilatichepossonograffiarelasuperficieecausarelafrantumazionedelvetro Per una pulizia più accurata è possibile smontare la porta del forno 1 Aprire completamente la porta vedi figura 2 Alzare e ruotare le levette poste sulle due cerniere v...

Page 16: ...he cabinet by opening the oven door and inserting 4 screws into the 4 holes on the outer frame All parts which ensure the safe operation of the appliance must not be removable without the aid of a tool Electrical connection Ovensequippedwithathree polepowersupplycablearedesignedtooperate with alternating current at the voltage and frequency indicated on the data plate located on the appliance see ...

Page 17: ... cm depth 43 5 cm Volume 62 l Dimensions width 45 5 cm height 32 4 cm depth 43 5 cm Volume 65 l Electrical connections Voltage 220 240V 50 60 Hz see data plate maximum power absorbed 2250 W Only for models with drawn rails Only for models with wire rails EU Directive no 65 2014 supplementing Directive 2010 30 EU EU Regulation no 66 2014 implementing Directive 2009 125 EC Standard EN 60350 1 Standa...

Page 18: ... door Once cooking has been completed the cooling fan continues to operate until the oven has cooled down sufficiently Oven light When selecting with the SELECTOR knob the oven light goes on It remains lit when a cooking mode is selected Cooking modes Cooking modes A temperature value can be set for all cooking modes between 60 C and MAX except for the GRILL programme for which only the MAX power ...

Page 19: ...35 20 25 30 35 Pastry Mode Raised Cakes Tarts Fruit cakes Brioches 0 5 1 1 0 5 3 3 3 3 15 15 15 15 160 180 180 160 30 40 35 40 50 60 25 30 Top oven Browning food to perfect cooking 3 4 15 220 Grill Soles and cuttlefish Squid and prawn kebabs Cod filet Grilled vegetables Veal steak Cutlets Hamburgers Mackerels Toasted sandwiches 1 1 1 1 1 1 1 1 n 4 4 4 4 4 4 4 4 4 5 5 5 5 5 5 5 5 5 Max Max Max Max ...

Page 20: ... circumstances should you attempt toperformtherepairsyourself ContactanauthorisedServiceCentre see Assistance Do not rest objects on the open oven door Do not let children play with the appliance The appliance should not be operated by people including children with reduced physical sensory or mental capacities by inexperienced individuals or by anyone who is not familiar with the product These in...

Page 21: ...re cleaners on the appliance Cleaning the oven door Clean the glass part of the oven door using a sponge and a non abrasive cleaning product then dry thoroughly with a soft cloth Do not use rough abrasive material or sharp metal scrapers as these could scratch the surface andcausetheglasstocrack Formorethoroughcleaningpurposes theoven door may be removed 1 Open the oven door fully see diagram 2 Li...

Page 22: ...upe d au moins 45 x 560 mm voir figures 560 mm 45 mm Centrage et fixation Pour fixer l appareil au meuble ouvrir la porte du four et visser 4 vis à bois dans les 4 trous du cadre Toutes les parties qui servent de protection doivent être fixées de manière à ne pouvoir être enlevées qu avec l aide d un outil Raccordement électrique Les fours munis d un câble d alimentation tripolaire sont prévus pou...

Page 23: ...ères en fil PLAQUE SIGNALETIQUE Dimensions largeur 43 5 cm hauteur 32 4 cm profondeur 43 5 cm Volume L 62 Raccordements électriques tension 220 240V 50 60Hz voir plaque signalétique puissance maximum absorbée 2250W Dimensions largeur 45 5 cm hauteur 32 4 cm profondeur 43 5 cm Volume L 65 Directive de l UE n 65 2014 intégrant la directive 2010 30 UE Règlement n 66 2014 de l UE intégrant la directiv...

Page 24: ...que ce dernier se soit suffisamment refroidi Eclairage du four Pourl allumer sélectionnez àl aideduboutonPROGRAMMESLalampe reste allumée en cas de sélection d un programme de cuisson Programmes Pour tous les programmes vous pouvez sélectionner une température comprise entre 60 C et MAX sauf pour le programme GRIL pour lequel il est préconisé de sélectionner MAX Programme FOUR TRADITION Mise en mar...

Page 25: ...tisserie Gâteaux levés Tartes Gâteaux aux fruits Brioches 0 5 1 1 0 5 3 3 3 3 15 15 15 15 160 180 180 160 30 40 35 40 50 60 25 30 Résistance de voûte Pour parfaire la cuisson 3 4 15 220 Gril Soles et seiches Brochettes de calmars et crevettes Tranches de colin Légumes grillés Côte de veau Côtelettes Hamburgers Maquereaux Croque monsieur 1 1 1 1 1 1 1 1 n 4 4 4 4 3 4 4 4 4 4 4 5 5 5 5 5 5 5 5 5 Max...

Page 26: ... enfants ne jouent avec l appareil Il n est pas prévu que cet appareil soit utilisé par des personnes enfants compris présentant des capacités physiques sensorielles ou mentales réduitesoun ayantpasl expérienceoulesconnaissancesindispensables à moins qu elles ne le fassent sous la surveillance de quelqu un responsable de leur sécurité ou qu elles aient été dûment formées sur l utilisation de l app...

Page 27: ...er la vitre de la porte avec des produits non abrasifs et des éponges non grattantes essuyer ensuite avec un chiffon doux Ne pas utiliser de matériaux abrasifs ou de racloirs métalliques aiguisés qui risquent de rayer la surface et de briser le verre Pour nettoyer plus à fond il est possible de déposer la porte du four 1 Ouvrir la porte complètement voir figure 2 Soulever et faire pivoter les levi...

Page 28: ...bralapuertadelhornoyenrosque4tornillos para madera en los 4 orificios del marco Todas las partes que garantizan la protección se deben fijar de modo tal que no puedan ser quitadas sin la ayuda de una herramienta Conexión eléctrica Los hornos que poseen cable de alimentación tripolar son fabricados para funcionarconcorrientealternaalatensiónyfrecuenciaindicadasenlaplaca de características que se en...

Page 29: ...43 5 cm altura 32 4 cm profundidad 43 5 cm Volumen litros 62 Conexiones eléctricas voltaje 220 240V 50 60Hz ver la placa de características potencia máxima absorbida 2250W Dimensiones ancho 45 5 cm altura 32 4 cm profundidad 43 5 cm Volumen litros 65 Reglamento UE nº 65 2014 por el que se aplica la Directiva 2010 30 CE Reglamento UE nº 66 2014 por el que se aplica la Directiva 2009 125 CE Reglamen...

Page 30: ...horno Se enciende seleccionando con el mando PROGRAMAS Permanece encendida cuando se selecciona un programa de cocción Programas En todos los programas se puede fijar una temperatura entre 60 C y MAX excepto en el programa GRILL para el cual se aconseja utilizar sólo MAX Programa HORNO TRADICIONAL Se encienden los dos elementos calentadores inferior y superior Con esta coccióntradicionalesmejoruti...

Page 31: ...40 50 30 35 20 25 30 35 Horno Dulce Tortas leudadas Torta glaseada Tortas de fruta Brioches 0 5 1 1 0 5 3 3 3 3 15 15 15 15 160 180 180 160 30 40 35 40 50 60 25 30 Horno superior Retoques de cocción 3 4 15 220 Grill Lenguados y sepias Broquetas de calamares y cangrejos Filete de merluza Verduras a la parrilla Bistec de ternera Chuletas Hamburguesas Caballa Tostadas 1 1 1 1 1 1 1 1 n 4 4 4 4 3 4 4 ...

Page 32: ...r Asistencia No apoye objetos sobre la puerta del horno abierta Evite que los niños jueguen con el aparato No está previsto que el aparato sea utilizado por personas incluidos los niños con capacidades físicas sensoriales o mentales disminuidas por personas inexpertas o que no tengan familiaridad con el producto salvo que estén vigiladas por una persona responsable de su seguridad o que hayan reci...

Page 33: ... aparato Limpiar la puerta Limpieelvidriodelapuertaconesponjasyproductosnoabrasivosyséquelo con un paño suave no utilice materiales ásperos abrasivos o raederas metálicas afiladas que puedan rayar la superficie y quebrar el vidrio Para lograr una limpieza más profunda es posible desmontar la puerta del horno 1 Para ello abra completamente la puerta ver la figura 2 Alce y gire las palancas ubicadas...

Page 34: ...ar no centro e prender Para prender o aparelho no móvel abra a porta do forno e atarraxe 4 parafusos na madeira nos 4 furos situados na moldura ao redor Todos os componentes de garantia da protecção precisam estar presos de modo que não possam ser tirados sem o emprego de uma ferramenta Ligação eléctrica Os fornos equipados com cabo de fornecimento com três pólo são preparados para funcionar com c...

Page 35: ...s com guias em fio PLACA DAS CARACTERÍSTICAS Medidas largura 43 5 cm altura 32 4 cm profundidade 43 5 cm Volume Litros 62 Ligações eléctricas Tensão de 220 240V 50 60Hz veja a placas das características potência máxima absorvida 2250W Medidas largura 45 5 cm altura 32 4 cm profundidade 43 5 cm Volume Litros 65 Directiva EU no 65 2014 integrando a Directiva 2010 30 EU Regulamento EU no 66 2014 inte...

Page 36: ...ente Luz do forno Acende se se for seleccionado mediante o selector dos PROGRAMAS Permanece acesa quando se seleccionar um programa de cozedura Programas Para todos os programas pode ser configurada uma temperatura entre 60 C e MAX excepto para o programa GRILL para o qual recomenda se configurar a temperatura apenas em MAX Programa de FORNO TRADICIONAL Activam se os dois elementos aquecedores inf...

Page 37: ... 25 30 35 FORNO PARA DOLCE Tortas levedadas Tortas doces Tortas de fruta Croissants 0 5 1 1 0 5 3 3 3 3 15 15 15 15 160 180 180 160 30 40 35 40 50 60 25 30 Forno de cima Retoques na cozedura 3 4 15 220 Grill Linguado e chocas Espetinhos de calamares e camarão Filé de bacalhau Verduras na grelha Bife de vitela Costeletas Hambúrgueres Cavala Tostas 1 1 1 1 1 1 1 1 n 4 4 4 4 3 4 4 4 4 4 4 5 5 5 5 5 5...

Page 38: ...bjectos sobre a porta do forno aberta Evite que as crianças brinquem com o aparelho Não é previsto que este aparelho seja utilizado por pessoas incluso crianças com reduzidas capacidades físicas sensoriais ou mentais por pessoas inexperientes ou que não tenham familiaridade com o produto a não ser que seja vigiadas por uma pessoa responsável pela sua segurança ou que tenham recebido instruções pre...

Page 39: ...mpar a aparelhagem Limpeza da porta Limpeovidrodaportacomesponjaseprodutosnãoabrasivoseenxuguecom umpanomacio nãousemateriaisásperos abrasivosouespátulasmetálicas afiadas que podem arranhar a superfície e quebrar o vidro Para uma limpeza mais cuidadosa é possível desmontar a porta do forno 1 Abra a porta inteiramente veja a figura 2 Levanteerodeasalavancassituadasnasduasdobradiças vejaafigura 3 Se...

Page 40: ...stens 45 x 560 mm verfügt sieheAbbildungen 560 mm 45 mm Zentrieren und Befestigen BefestigungdesGerätesamMöbel ÖffnenSiedieBackofentürundschrauben Sie die 4 Holzschrauben in die 4 im Backofenrahmen vorgesehenen Löcher ein Alle zum Schutz dienenden Teile müssen so befestigt werden dass ein Entfernen derselben ohne Zuhilfenahme eines Werkzeugs nicht möglich ist Elektroanschluss Die mit einem Dreilei...

Page 41: ...43 5 cm Höhe 32 4 cm Tiefe 43 5 cm Nutzvolumen Liter 62 Elektrischer Anschluss Spannung 220 240V 50 60Hz siehe Typenschild maximale Leistungsaufnahme 2250W Abmessungen Breite 45 5 cm Höhe 32 4 cm Tiefe 43 5 cm Nutzvolumen Liter 65 Nur für Modelle mit eingelassenen Führungen Nur für Modelle mit Drahtführungen EU Richtlinienr 65 2014 ergänzend zu Richtlinie 2010 30 EU EU Richtlinienr 66 2014 ergänze...

Page 42: ... eines Garvorgangs bleibt das Gebläse solange in Betrieb bis der Backofen ausreichend abgekühlt ist Backofenbeleuchtung Um dieses einzuschalten drehen Sie den Knopf PROGRAMME auf Es bleibt eingeschaltet wenn ein Garprogramm eingestellt wird Programme Für alle Programme kann eine Gartemperatur von 60 bis MAX eingestellt werden mit Ausnahme des Programms GRILL hier empfiehlt sich die Einstellung MAX...

Page 43: ...ackofen Hefekuchen Mürbeteigkuchen Obstkuchen Brioches 0 5 1 1 0 5 3 3 3 3 15 15 15 15 160 180 180 160 30 40 35 40 50 60 25 30 Oberhitze Nachgaren von Speisen 3 4 15 220 Grill Seezungen und Tintenfische Tintenfisch und Krebsspieße Kabeljaufilet Gegrillte Gemüse Kalbsteaks Koteletts Hamburger Makrelen Toasts 1 1 1 1 1 1 1 1 n 4 4 4 4 4 4 4 4 4 5 5 5 5 5 5 5 5 5 Max Max Max Max Max Max Max Max Max 8...

Page 44: ...örungen bitte keinesfalls Innenteile selbst zureparieren SetzenSiesichmitdemKundendienst sieheKundendienst in Verbindung Stellen Sie bitte keine Gegenstände auf der geöffneten Backofentür ab Dieses Gerät ist kein Spielzeug für Kinder Das Gerät ist nicht zur Verwendung durch Personen einschließlich Kinder miteingeschränktenkörperlichenodergeistigenFähigkeitenoder Wahrnehmungsstörungen oder aber ohn...

Page 45: ...chenSchwamm und mildem Spülmittel und trocknen Sie sie abschließend mit einem weichen Tuch Verwenden Sie keine rauen scheuernden Materialien oder scharfkantige metallische Schaber da diese Kratzer auf ihrer Oberfläche hinterlassen und das Zerbrechen des Glases zur Folge haben können Um den Backofen mühelos gründlich reinigen zu können kann die Backofentür abgenommen werden 1 Öffnen Sie die Tür gan...

Page 46: ...46 DE ...

Page 47: ...47 DE ...

Page 48: ...48 DE 195122974 03 03 2015 XEROX FABRIANO Indesit Company S p A Viale Aristide Merloni 47 60044 Fabriano AN www indesit com ...

Reviews: