


8
GB
PLEASE PHONE US TO REGISTER YOUR APPLIANCE AND ACTIVATE YOUR 5 YEAR PARTS GUARANTEE ON 08448 24 24 24
• The maximum quantity of food that may be frozen daily is
indicated on the plate containing the technical properties
located on the bottom left side of the refrigerator compartment
(for example: Kg/24h: 4).
!
To avoid blocking the air circulation inside the freezer
compartment, it is advisable not to obstruct the ventilation holes
with food or containers.
!
Do not open the door during freezing.
!
If there is a power cut or malfunction, do not open the freezer
door. This will help maintain the temperature inside the freezer,
ensuring that foods are conserved for at least 9 -14 hours.
!
To maximise space inside the freezer, all drawers [with the
exception of the bottom drawer] can be removed from their
positions and the food placed directly on the racks/glass shelves
supplied [where present].
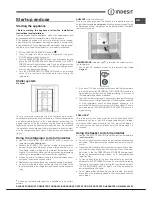
Operation and maintenance of the water
dispenser.
When first used, or after prolonged periods of inactivity, wash the tank
with water. The water dispenser supplies cold water without having to
open the refrigerator door each time.
This also allows for reducing the product’s energy consumption. To fill the
tank, lift the flap or remove the cover (see picture) then pour in the water
with a carafe or other suitable container. Avoid filling the tank completely.
1
7
2
4
5
6
4
3
5
6
8
9
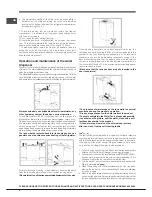
Always exclusively use drinkable natural mineral water: any
other liquid may hamper the device’s correct operation.
To withdraw water with the refrigerator door closed, press the
dispenser actuator with a suitable container (glass, carafe, etc.).
Release the actuator once the desired quantity has been dispensed.
The water tank should be cleaned regularly under running water; do
not use detergents. To clean the tank, remove the tank cover and
upper ledges; subsequently, remove the tank by pulling it outwards
while pressing the appropriate button (see picture).
The tank must be replaced back into its housing as soon as
possible so as to avoid excessive heating of the refrigerator.
1
7
2
4
5
6
4
3
5
6
8
9
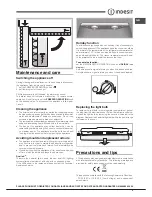
For more thorough cleaning, it is advisable to unscrew the valve
from the tank (see picture) and clean it under running water.
! Be careful not to pull the transparent mobile element of the valve.
1
7
2
4
5
6
4
3
5
6
8
9
Once cleaning operations have been completed, screw the
valve back on while ensuring that the internal seal adheres to the
end part of the tank bushing; subsequently, put the tank-valve
assembly back into the appropriate cylindrical housing of the
door, while making sure that the upper hook on the rear wall of
the tank is properly inserted in the appropriate compartment on
the inner wall of the door. Put the previously removed ledges and
tank cover back in place.
! Make sure that the tank has been properly inserted in the
door (see picture).
1
7
2
4
5
6
4
3
5
6
8
9
! The presence of water drops on the tank walls is a normal
occurrence during the product’s operation.
! Dry any drops present on the outer walls of the product.
! To empty completely the Water Tank, please disassembly
it as shown on the picture, spill the water, clean with a soft
textile and assembly in the product.
! If the water drops remain on the external door surface
after use, clean it with a soft cleaning textile.
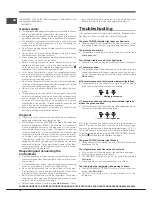
Ice
3
ice tray
The fact that they are situated on the top part of the freezer drawers
ensures greater cleanliness: the ice no longer comes into contact
with the food placed inside the freezer compartment; furthermore,
the dripping of the water during filling is avoided (a lid to cover
up the hole after filling with water is also provided).
1. Pull out the tray by pushing it up. Check that the tray is completely
empty and fill it with water through the opening provided.
2. Take care not to exceed the level indicated (MAX WATER LEVEL).
Excess water prevents the ice cubes from dispensing (if this
happens, wait for the ice to melt and empty the tray).
3. Turn the tray 90°: due to the connected compartments each mould
fills with water (
see diagram
).
4. Close the opening with the lid provided and put the tray back,
placing the top part in the corresponding housing and allowing
it to drop in again.
5. When the ice has formed (minimum time approximately 8 hours)
knock the tray against a hard surface and wet the outside so that
the ice cubes come loose and take them out through the opening.