Impact Acoustic AG, Bodenhof 4, 6014 Luzern (Switzerland)
4
Chatpod 300
step 3
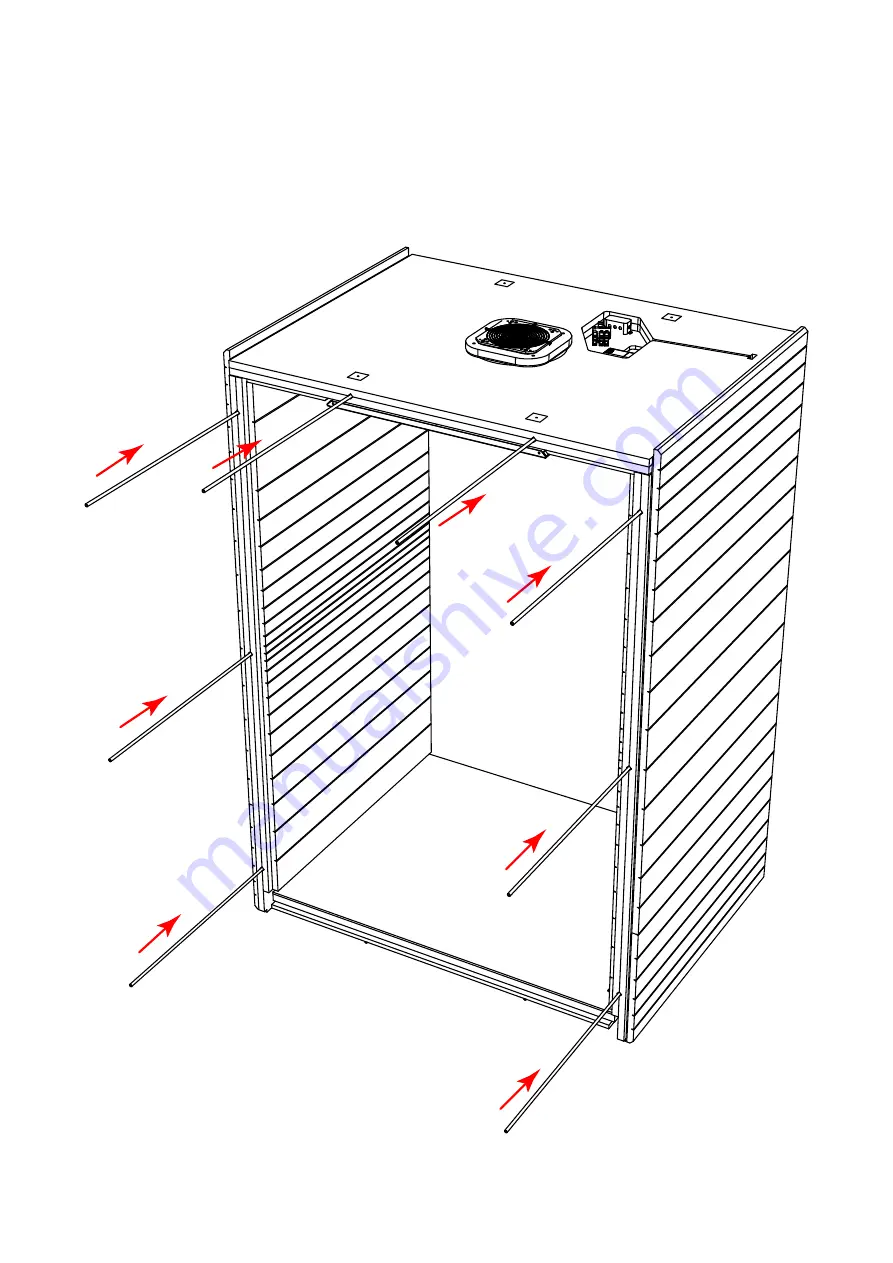
Insert the eight connecting rods.
Page 1: ...Impact Acoustic AG Bodenhof 4 6014 Luzern Switzerland 01 03 2022 30min Assemblyinstructions Chatpod 300 ...
Page 2: ...of delivery step 1 Place the honeycomb cardboard blocks under the cardboard supports of the base Make sure that the bottom sits stably on the blocks and that the blocks protrude a few centimenter to the sides Insert the supply cable and the 2m cable into the H distributor until they click into place supply cable 5m cable 2m ...
Page 3: ...of the right side into the H distributor Place the two sides on the honeycomb blocks and tuck them into the bottom This should go easily if not make sure the sides and bottom are aligned Hold the sides until the top is assembled Pin the top together with the sides pull the cable through the top from the right side ...
Page 4: ...Impact Acoustic AG Bodenhof 4 6014 Luzern Switzerland 4 Chatpod 300 step 3 Insert the eight connecting rods ...
Page 5: ...tic AG Bodenhof 4 6014 Luzern Switzerland 5 Chatpod 300 step 4 Insert the wooden dowels into the holes Join the two back panel elements and pull them together with the connectors Do the same with the front elements ...
Page 6: ...d 300 M6 x 40mm step 5 Join the back wall with the sides the bottom and the top Secure the back panel by screwing the six screws a few turns into the connecting rods Do the same with the front Now tighten all the screws which must be countered on the opposite side ...
Page 7: ...Luzern Switzerland 7 Chatpod 300 M8 x 16mm M8 x 45mm step 6 Screw the two steel plates to the table column The screws must be tightened with 30Nm The handle of the table column must not be operated until the table is completely assembled ...
Page 8: ...0 7x30mm 6 3x70mm M6x12mm step 7 Screw the mounting plate to the side with the two 6 3x70mm screws Screw the table column to the base with the eight 7x30mm screws Fix the table column additionally with the sheet metal piece and the two M6x12mm screws Euro screw 6x20mm ...
Page 9: ...5 mm Bohrdurchmesser x abhängig von Monitorhalterung Drilling diameter x depending on monitor bracket Diamètre de perçage x selon le support du moniteur x mm B E E 11 80 mm 79 mm 48 5 Einbauanleitung Installation Instructions Guide d installation 1 2 4 5 7 Max Drehmoment Max Torque Max Couple M 0 33 Nm TX 8 8 optional 10 65 mm 45 mm 65 mm 65 mm Bohrdurchmesser x abhängig von Monitorhalterung Drill...
Page 10: ...uzern Switzerland 10 Chatpod 300 click step 9 Remove the four honeycomb cardboard blocks Align the chatpod using the four leveling feets Insert the plug as shown Place the two outer panels on the cover Plug the power cord into the socket ...
Page 11: ...ods Secure them with the set screws Assemble the door handle in the following order lock metal washer plastic washer door handle Press the two halves of the door handle together while tightening the stud screw with the 3 mm hex key Make sure that the handle is mounted with the pre mounted square pin in the inside of the chatpod ...