background image


Configuring the Bands/Channels 

Once the LapRF is connected, click on the ‘LapRF Setup’ icon and configure your bands and channels.  
The switch on the left enables/disables each pilot slot, be sure to disable unused slots for maximum 

accuracy.  
Once the band and channel have been selected, the frequency is displayed.  
Use the power switch to select the power level that you will be running.  
Click the ‘Write Settings to LapRF’ button to program the time. Note that once these are 

programmed, the settings will persist even when the timer is power cycled.  

Finally, Race! 

Click on the Race button, and then ‘Start Race’.  


‘Goggles Down, Thumbs up’ 

Joe Scully - Some time in 2015 


Summary of Contents for LapRF

Page 1: ...LapRF Personal Timing System Operator s Manual Rev 1 2 August 2017...

Page 2: ...uetooth Smart Antenna Internal CE compliant or external dipole for extra range up to 50m App Support Mobile iOS and Android Compatibility iOS iOS devices require BLE iPhone 4s or later iPad 3rd Gen or...

Page 3: ...rt finish gate Different from other offerings on the market the LapRF uses custom timing receivers with specially designed antennas to ensure that only quads which pass through the beam are timed and...

Page 4: ...ut 4 seconds until the LEDs light up and the LapRF beeps To power off repeat this procedure Connecting to the LapRF Take note that despite the fact that there s a bind button on the bottom and the Lap...

Page 5: ...m accuracy Once the band and channel have been selected the frequency is displayed Use the power switch to select the power level that you will be running Click the Write Settings to LapRF button to p...

Page 6: ...ult in an explosion and severe burns Always use a protective carrying case when transporting these cells WARNING To avoid damage when charging the 18650 battery via USB be extremely careful with batte...

Page 7: ...mber on the left side of the screen will create a manual time and can be used to evaluate the app The color if the Start Race button currently indicates a valid connection to the lapRF Red for no conn...

Page 8: ...has a single timing module which scans each of the active channels When a single pilot is enabled the RF signal is sampled at the maximum rate and supports quads flying through the start finish gate a...

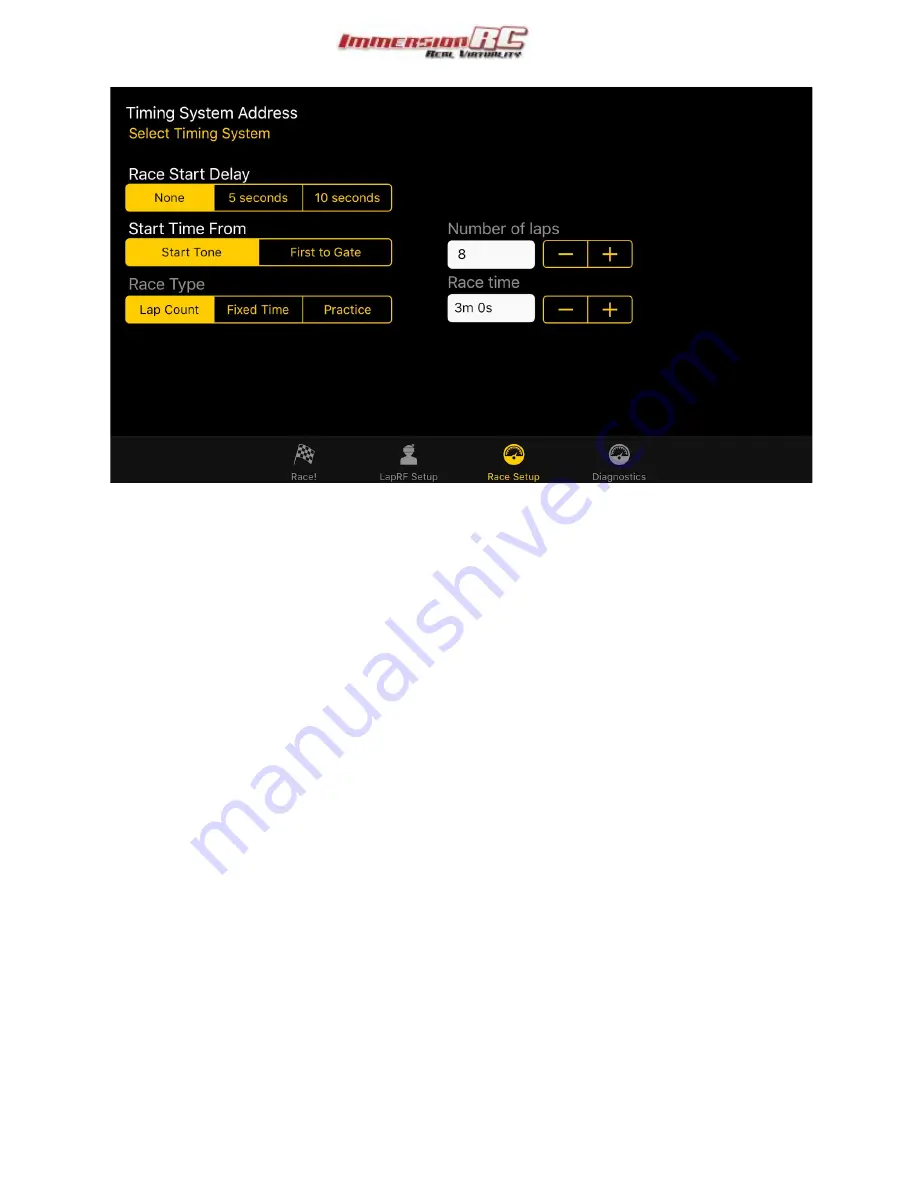
Page 9: ...t Race button and the race starting Use it to give time to get your goggles on before flying Start Time From FPV races are usually either configured to start from the tone start grid is positioned aft...

Page 10: ...times will be shown on the Race page Diagnostics The diagnostics page shouldn t normally be required but can be a useful tool during debugging The RSSI level of each configured pilot slot is shown Pow...

Page 11: ...e fastest lap per pilot is shown highlighted in green The status of the connection to the LapRF is also shown along with the Bluetooth signal strength RSSI and the battery voltage Each field will chan...

Page 12: ...n selecting Select Device from the context menu the list of all detected LapRF devices is presented Note If your device does not appear here ensure that Bluetooth is enabled and that no other mobile d...

Page 13: ...channel picker Select also the race transmitter power in the drop down to the right When you are happy with the settings don t forget to click the Send button to send them to your LapRF Note that whe...

Page 14: ...General Settings The general settings page enables names to be entered for each of the pilots along with the various race modes 14...

Page 15: ...y be required but can be a useful tool during debugging The RSSI level of each configured pilot slot is shown Power on video transmitters and walk them through the gate to ensure correct configuration...

Page 16: ...a 45 degree angle from one corner of the gate When laying out tracks for RF timing avoid parts of the track which come close to the timing gate to prevent false readings For start grid positioning pl...

Page 17: ...icult to mount The radiation pattern of the antenna can fill the gate better than the up firing alternative 45 Degree Firing A solution that works well when other parts of the track get close to the s...

Page 18: ...32 5769 5806 5843 5880 5917 RaceBand E 5705 5685 5665 5645 5885 5905 5925 5945 Band E B 5733 5752 5771 5790 5809 5828 5847 5866 Band B A 5865 5845 5825 5805 5785 5765 5745 5725 Band A Note The band th...

Page 19: ...o not try to remove this with a knife from the outside of the box the part slides out easily when the box is opened For the antenna the FatShark 2 4GHz dipole works well http www getfpv com 2 4 ghz 2...

Page 20: ...d battery Ensure that the timer is turned off Press and hold the Bind button while pressing the Power button The status led will blink rapidly Connect the timer to a PC with the USB cable Run the Imme...

Page 21: ...pilot that crossed the gate These colors are Slot 1 Red Slot 2 Yellow Slot 3 Green Slot 4 Light Green Slot 5 Cyan Slot 6 Blue Slot 7 Pink Slot 8 Magenta Yes seems cool but in practice it is of little...

Page 22: ...around 59 is suitable This corresponds to a gain of 29 5 dB one gain code 0 5dB Maximum value is 63 for a gain of 32 5dB If you want to use higher power 200mW 23dBm for example you need to turn the v...

Page 23: ...ed for the multiGP IO event for all 8 LapRF 8 Way trackers even the one pointing at the gate which was hovering 12 feet above the ground Real Practical Tried and Tested Values Most gates with the trac...

Page 24: ...larger events consider using the LapRF Event Timing System Problem My LapRF doesn t appear in the list of devices Solution First thing to check is that another device is not currently connected to th...

Reviews: