8
9
5
6
102
107
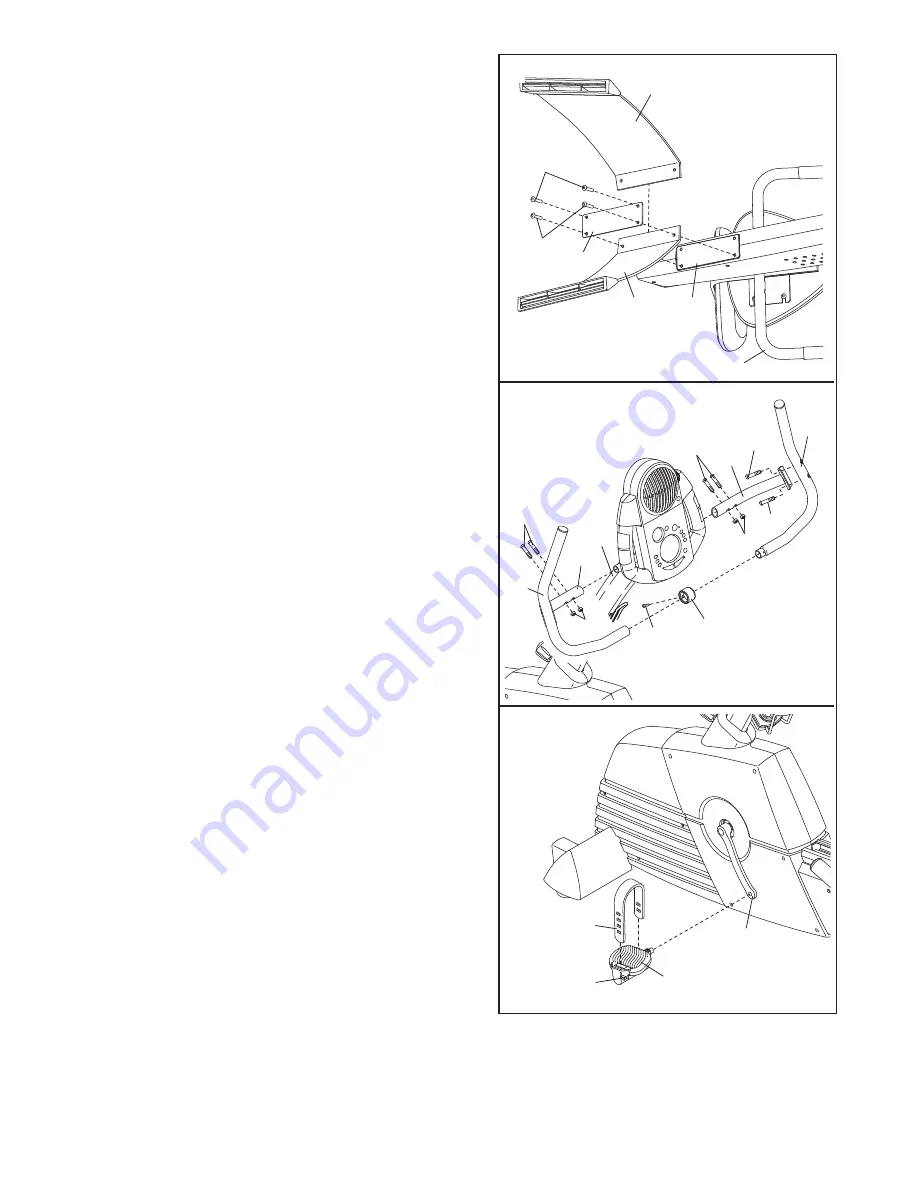
8. With the help of another person, carefully tip the
exercise cycle onto its left side so it is resting on the
left Seat Handlebar (3).
Identify the Left Rear Stabiliser (16), which is marked
with an “L.” Attach the Left Rear Stabiliser and the
Stabiliser Plate (87) to the Frame (1) with two M8 x
24mm Button Screws (40) as shown; do not tighten
the Button Screws yet.
Insert the Right Rear Stabiliser (98) between the
Stabiliser Plate (87) and the Frame (1). Attach the
Right Rear Stabiliser with two M8 x 24mm Button
Screws (40). Tighten all four Button Screws.
40
87
40
1
8
98
16
10. Identify the Left Pedal (22), which is marked with an
“L.” Using an adjustable wrench, firmly tighten the
Left Pedal
counterclockwise into the Left Crank Arm
(24). Tighten the Right Pedal (not shown)
clockwise
into the Right Crank Arm. Important: Tighten both
Pedals as firmly as possible. After using the exer-
cise cycle for one week, retighten the Pedals. For
best performance, the Pedals must be kept tight-
ened.
Adjust the Left Pedal Strap (25) to the desired posi-
tion, and press the end of the Left Pedal Strap onto
the tab on the Left Pedal (22).
Adjust the Right Pedal Strap (not shown) in the
same way.
24
25
Tab
22
10
9. Slide the Collar (107) onto the Left Handlebar (6).
Insert the Right Handlebar (5) into the Left Handlebar.
Connect the Collar, the Left Handlebar, and the Right
Handlebar with an M4 x 16mm Screw (57).
Attach the Right and Left Handlebar Brackets (68, 71)
to the Upright (2) with four M6 x 32mm Button Bolts
(102) and four M6 Nylon Locknuts (63). Do not tight-
en the Button Bolts and Nylon Locknuts yet.
Attach the Right and Left Handlebars (5, 6) to the
Right and Left Handlebar Brackets (68, 71) with four
M8 x 12mm Button Screws (106). Tighten all the
hardware used in this step. Make sure that the M6
Nylon Locknuts (63) are in the hexagonal holes in
the Right and Left Handlebar Brackets (68, 71).
3
57
2
102
63
63
106
106
68
71


