ILS21HL INSTRUCTIONS MANUAL
ILS21 HL
Page 23
3.
Installing
After selecting the destination folder and clicking “Next”, the installation will appear.
Page 1: ...n t e l l i g e n t L e c t e r n S y s t e m s B V I n d u s r i e w e g 2 2 N L 9 4 0 3 A A A s s e n t h e N e t h e r l a n d s 3 1 2 0 2 4 0 0 2 3 2 w w w i n t e l l i g e n t l e c t e r n s c...
Page 2: ...ILS21HL INSTRUCTIONS MANUAL ILS21 HL Page 1...
Page 3: ...ILS21HL INSTRUCTIONS MANUAL ILS21 HL Page 2 Contents Quick Sheet 1 Introduction 2 Sho Q 3 ILS21HL Presentation System Operation 3 Specifications 4 General 5 Extended 6...
Page 4: ...the user and productivity to meetings with seamless execution of multiple presentations Windows 7 and Vista users may use Sho Q 7 which adds pen and touch interactivity also Sho Q 7 The ILS21ILS21HLc...
Page 5: ...d in order to fit the specified scenario Figure 3 illustrates the multiple connectors The cables have to be connected to the lectern s VGA and USB plugs on the notebook panel as well as to the VGA and...
Page 6: ...the multiple card reader ports which are provided on the front panel as well as the 4 USB inputs Next to the USB ports the DVD Rom can be found with the power button at the right FIGURE 6 The steps o...
Page 7: ...on voltage fan speed and temperature Display support VGA DVI HDMI LVDS and TV OUT display output Controller Intel GM45with integrated GMA 4500MHD Video card Memory Dynamically shared 512MB system RAM...
Page 8: ...B Power delta Power Rating 250w PFC initiative Input Voltage 100 240V 47 63Hz Certification CE FCC CCC etc Display LG Panel Size 54 61 cm 21 5 inch IPS technology achieves color consistency in almost...
Page 9: ...multi card reader power button On top electrical height control switches reading light switch XLR3 microphone socket XLR4 Light socket 5 control buttons for the monitor settings Notebook panel Built i...
Page 10: ...s not switching on the power cable should be checked There are two possible locations of the problem The first possibility can be that the cable is not plugged either in the power socket on the ground...
Page 11: ...s located on the back of the PC should be checked Figure 8 shows the location of the phoenix plug in its proper placement FIGURE 8 Light The switch for the reading light is positioned next to the heig...
Page 12: ...it in only with careful positioning If the lectern does not recognize the hardware the card should be reinserted again Figure 11 shows the various card types which can be inserted FIGURE 11 USB ports...
Page 13: ...n Brightness and contrast 3 Menu 4 Exit 5 Switch on off While using the buttons the user should follow the new controls that the buttons will be responsible for which will appear on the screen next to...
Page 14: ...to the resolution of the receiver This can be simply adjusted trough the screen resolution menu which will appear after a right click on the desktop Figure 15 Switching between ILS main PC and a noteb...
Page 15: ...r can find the basic operational specifics of the Sho Q components For more information about the installing of the software the Installation manual is provided Sho Q planner The Sho Q planner applica...
Page 16: ...Sho Q planner the user can add up any number of presentations After saving the file with the save button at the right bottom corner Sho Q modules will be created for each presentation as well as a fi...
Page 17: ...n addition it provides a clock for the user to know how the presentation is going with respect to the time frame the presenter has been given Figure 14 shows the graphical user interface of Sho Q pres...
Page 18: ...presentations are created Given that the presentations are not numerous this will take very little time but as the number increases so will the time taken to finish the process It is better if they ar...
Page 19: ...by the projector or exposed on the second monitor while the presenter is able to observe the previous and the next one ILS21HL operates with Sho Q7 version supported by its Windows 7 operational syste...
Page 20: ...ve been set up on the user s notebook When the preprocessor is selected it shows the following window The user has to select the presentations and Sho Q modules of them will be created in a folder in...
Page 21: ...e the user has to choose the operational system of the notebook and the available version of Sho Q will appear with all the three components of the application 1 After choosing the component the user...
Page 22: ...ILS21HL INSTRUCTIONS MANUAL ILS21 HL Page 21 Step 3 Following the steps in the setup wizard 1 License Agreement After clicking Next the License Agreement will appear...
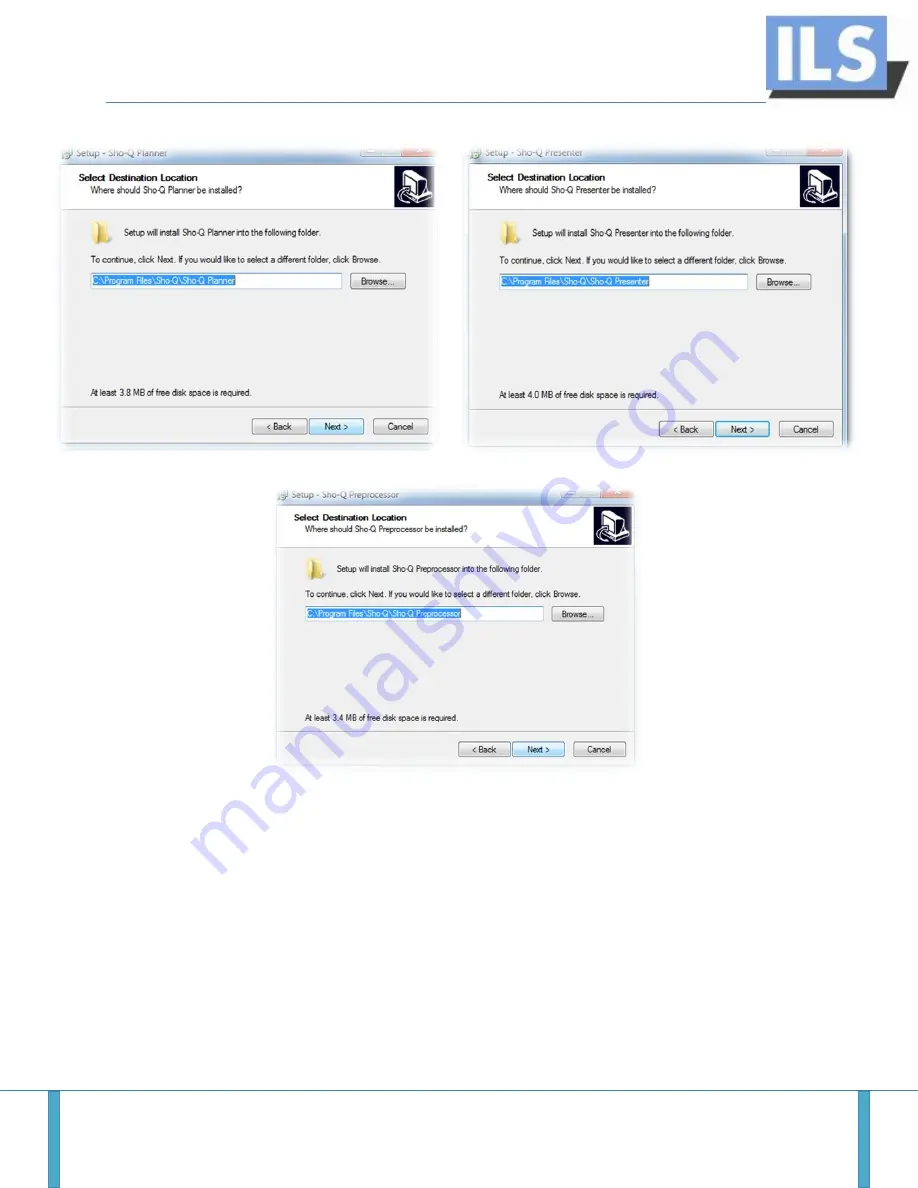
Page 23: ...license agreement a window the user has to select a destination folder for the component 2 Selecting a destination folder After accepting the license agreement a window will appear in which the user w...
Page 24: ...ILS21HL INSTRUCTIONS MANUAL ILS21 HL Page 23 3 Installing After selecting the destination folder and clicking Next the installation will appear...
Page 25: ...ILS21HL INSTRUCTIONS MANUAL ILS21 HL Page 24 4 Finish Installation After the installation is complete the user will terminate the Setup Wizard by selecting the Finish button...
Page 26: ...ILS21HL INSTRUCTIONS MANUAL ILS21 HL Page 25 5 Creating a shortcut The user can create a shortcut of the program should it be desired...
Page 27: ...edure The assembly process should be performed by at least 2 people Step 1 First the side tables have to be fixed to the stand While tightening them it has to be made sure that they are horizontal The...
Page 28: ...12o while the tables on each side are horizontal For placing the head and making the wire connections it will be easier to put a block under the stand This will make the table for the ILS21 head hori...
Page 29: ...ILS21 HL Page 28 Step 3 To fix the table for the ILS21 PC on the stand 4 M8 bolts are provided The bolts have to be tightened firmly For this it is suggested to not only use an electrical screwdriver...
Page 30: ...ws Place a block under the presenter side of the unit to allow making the cable connections easily Plug the cables in the sockets at the back of the PC Make the power and microphone connections first...
Page 31: ...tml The Sho Q7 evaluation software can be downloaded from http intelligentlecterns com ils_main shoqaero html ILS21ILS21HLWindows 7 Drivers are available on the following link http intelligentlecterns...