background image

Warnings & Precautions ................................................................................... 2
Important Safety Instructions ............................................................................ 3
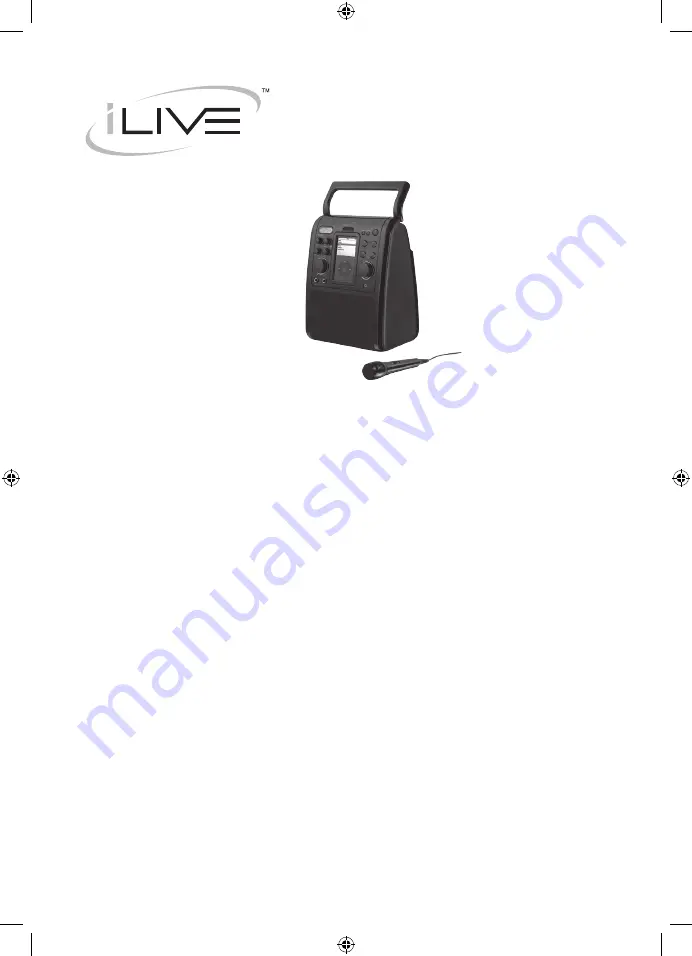
In the Box & Features ....................................................................................... 4
Powering the Unit ............................................................................................. 5
Docking an iPod ............................................................................................... 6
Playing an iPod or iPod Karaoke Song ............................................................ 7
Playing a CD+G Disc ........................................................................................ 8
Playing a DVD .................................................................................................. 9
Playing a CD................................................................................................... 10
Video Output: Connecting a Television ............................................................11
Audio Output: Connecting a Television or Stereo System .............................. 12
AUX Input: Connecting an Mp3 Player or Audio Source ................................ 13
Controls & Definitions ................................................................................ 14-20
The Setup Menu ........................................................................................ 21-23
Service Information......................................................................................... 24

INSTRUCTION MANUAL

IJ608B

Contents

Summary of Contents for IJ608B

Page 1: ...or iPod Karaoke Song 7 Playing a CD G Disc 8 Playing a DVD 9 Playing a CD 10 Video Output Connecting a Television 11 Audio Output Connecting a Television or Stereo System 12 AUX Input Connecting an Mp3 Player or Audio Source 13 Controls Definitions 14 20 The Setup Menu 21 23 Service Information 24 INSTRUCTION MANUAL IJ608B Contents ...

Page 2: ...ol s batteries are incorrectly installed Replace only with the same or equivalent battery WARNING The remote control s button cell battery contains mercury Do not put in the trash instead recycle or dispose of as hazardous waste WARNING Use of this unit near fluorescent lighting may cause interference regarding use of the remote If the unit is displaying erratic behavior move away from any fluores...

Page 3: ...r or sold with the apparatus When a cart is used use caution when mov ing the cart apparatus combination to avoid injury from tip over 13 Lightning Unplug this apparatus and disconnect the antenna or cable system during lightning storms or when unused for long periods of time This will prevent damage to the product due to lightning and power line surges 14 Servicing Do not attempt to service this ...

Page 4: ...Pod Karaoke System Microphone Remote Control A V RCA Cable AC Power Cord Documentation Plays DVD CD and CD G discs Compatible with iPod photo iPod with color display iPod with video iPod mini and iPod nano Auxilary Input Auxilary Output Video Output Two Microphone Inputs AC Powered Carry Handle Blue Backlit LCD Display ...

Page 5: ...Powering the Unit 1 To power the unit simply connect it to an AC outlet using the attached AC cord 2 Press the Power Button to turn the unit on AC 120V 60Hz ...

Page 6: ...od Compatibility 1 Turn the Dock Adjustment Dial to the appropriate iPod model or memory size iPod models and memory sizes that are not listed on the Dock Adjustment Dial can be docked by manually adjusted to the depth that fits the iPod best 2 Open the Docking Station using the lip located at the top of the Docking Station 3 When inserting an iPod nano slide the Dock connector on the unit so that...

Page 7: ...d or reduce the microphone s volume 7 Adjust the Volume Dial to set the volume of the speakers Adjust the Microphone Volume Dial to set the volume of a plugged in microphone 8 Turn the Echo Dial to adjust the echo effect added to the audio from the microphone 9 Plug headphones not included into the Headphone Output to disable the stereo speakers and listen to an iPod in private 10 Turn the Music K...

Page 8: ...esent move the microphone away from the unit and or reduce the microphone s volume 7 Adjust the Volume Dial to set the volume of the speakers Adjust the Microphone Volume Dial to set the volume of a plugged in microphone 8 Use the AVC Dial to adjust the balance between the music and the recorded vocal volume when singing into the microphone 9 When singing with a CD G karaoke disc turn the Music Ka...

Page 9: ... and pause the loaded disc Press the Stop Button to stop the disc 6 Press the Skip Search Buttons to skip from one chapter to the next or to previous tracks Press and hold the Skip Search Buttons to fast forward through the DVD 7 Adjust the Volume Dial to set the volume of the speakers 8 Press the Repeat Button on the remote to repeat the entire DVD a title a chapter or to turn the repeat function...

Page 10: ...Press and hold the Skip Search Buttons to search through an individual CD track 6 Adjust the Volume Dial to set the volume of the speakers 7 Press the Repeat Button on the remote once to repeat an individual song or an entire album 8 Plug headphones not included into the Headphone Output to disable the stereo speakers and listen to the CD in private 9 Turn the Music Karaoke Dial to Music Use the A...

Page 11: ...ton to turn the unit on 5 Insert a DVD CD G disc or iPod with video into the unit 6 Adjust the AUX DVD CDG iPod Dial to DVD CDG or iPod to match the appropriate function 7 If an iPod with video was connected on the iPod navigate to either the Photos or Videos Select either Slideshow Settings in Photos or Video Settings in Videos Set the TV Out setting to On 8 Press the Play Pause Button The connec...

Page 12: ...Cable not included into the AUX Output on the unit 2 Plug the other end of the 3 5 mm Cable into the audio input line input on a television or stereo system 3 Set the television or stereo system to the appropriate audio input channel 4 Press the Power Button to turn the unit on 5 Audio played from the unit will now be heard on the connected television or stereo system Television or Stereo System S...

Page 13: ...it 2 Plug the other end of the 3 5 mm Cable into the audio output headphone output on an Mp3 Player or Other Audio Source 3 Press the Power Button to turn the unit on 4 Adjust the AUX DVD CDG iPod Dial to AUX 5 Audio played from the Mp3 Player or Other Audio Source will now be heard on the unit If connecting to the headphone output of an audio source the source s volume controls may need to be adj...

Page 14: ...Location of Controls Front View 1 2 4 3 5 6 7 10 11 12 13 14 15 16 17 8 9 ...

Page 15: ...acles for a microphone plug 8 Docking Station Use the Dock as a connection for an iPod 9 Dock Adjustment Dial Turn the Dock Adjustment Dial to adjust the Dock for a specific sized iPod 10 Audio Press the Audio Button to adjust the DVD s audio language 11 Subtitle Press the Subtitle Button to turn the subtitles on or off and to adjust between different subtitle lan guages 12 Power Button Press the ...

Page 16: ......

Page 17: ...p3 Player or Other Audio Source on page 13 21 AUX Output Requires a 3 5mm cable not included Connect the AUX Output to a television or stereo system to play audio from the unit on a television or stereo system See Audio Output to a Television or Stereo System on page 12 22 Video Output Use the Video Output to play video from a docked iPod on a connected TV See Video Output Con necting a Television...

Page 18: ......

Page 19: ...1 Skip Buttons Press the Skip Buttons to skip through tracks or chapters 32 Album Buttons In iPod Mode press the Album Buttons to cycle through albums from an iPod 33 Repeat Button Press the Repeat Button once to repeat an individual song or an entire album 34 Subtitle Button Press the Subtitle Button to turn the subtitles on or off and to adjust between different subtitle languages 35 Audio Butto...

Page 20: ...ature while playing a DVD 45 OSD Button Press the OSD On Screen Display Button to show the Time Title Chapter Audio Language Subtitle Setting and Angle settings of a DVD 46 Play Pause Button Press the Play Pause Button to play or pause a CD CD G DVD or an iPod 47 Stop Button Press the Stop Button to stop a CD CD G or DVD 48 RAND Random Shuffle Button Press the RAND Shuffle Button to shuffle songs ...

Page 21: ...talian as different OSD Languages Disc Use the Disc setting to select the written language on the DVD s main menu The DVD Menu setting is dependent on the DVD content Audio Use the Audio setting to select the audio language of the DVD The Audio setting is dependent on the DVD s language offerings Subtitle The Subtitle setting allows the user to turn subtitles on and change the language of the subt...

Page 22: ... Wide 16 9 The Wide ratio shows the DVD movie in its widescreen format Use this setting when viewing a movie on a widescreen TV Pause Mode Auto When Auto is selected the Field Frame will automatically be converted Field Select Field to pause any field of view in the movie The picture will have less definition when paused in Field Mode Frame Select Frame to pause a frame of a movie The picture will...

Page 23: ... 3D EQ Choose between Virtual 3D Jazz Rock Pop and Classic equalizer settings to hone the audio output to a specific type of music The Setup Menu Speaker 3D EQ Off Off Virtual 3D Jazz Rock Pop Classic 3D EQ ...

Page 24: ...63106 Phone 1 314 621 2881 Fax 1 314 588 1805 Email customerservice ilive net Website www ilive net To download this Instruction Man ual in English Spanish or French visit the Support section at www ilive net Para descargar este manual de instrucción en inglés español o francés visite la sección de la ayu da en www ilive net Pour télécharger ce manuel d instruction en anglais espagnol ou le França...

Reviews: