


12
13
Audio Inputs
Digital Optical Audio
Requires a device with an Optical audio output and a Digital Optical audio cable (included).
1. Using a Digital Optical Audio Cable, connect your media player's
Optical output
to the
Optical input
on the
subwoofer.
2. With the unit powered ON, select Optical Mode through the
Source button on the subwoofer
or through the
Optcial button on the remote.
A voice prompt and a solid orange light will indicate that Optical Mode has
been selected.
Important tips for optical audio:
•
The optical output source should be set to output PCM or Optical Audio and not Dolby Digital.
•
Use the correct optical audio cable and make sure that it is firmly seated in both source and subwoofer sockets.
•
Optical audio output is activated from the audio source (a red light should be visible from the optical socket). It
may be labeled SPDIF in the settings menu of the source.
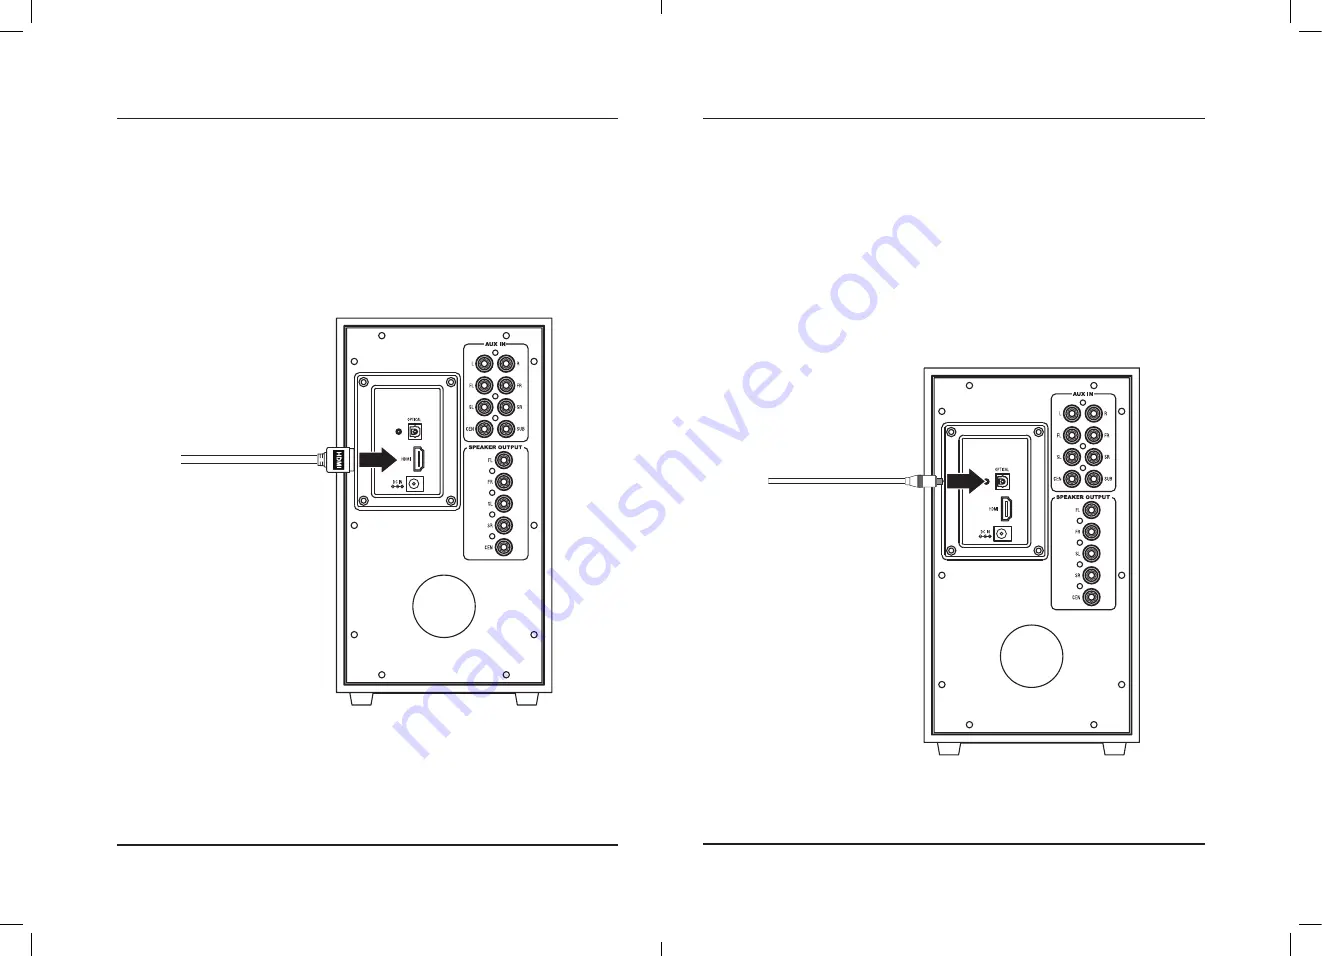
HDMI
If your television has an HDMI port with Audio Return Channel (ARC), you can connect to the HDMI input on the
subwoofer. An HDMI connection is the easiest way to connect the stereo system to your television.
Your TV must have HDMI-ARC for this audio connection to function. A regular HDMI port is not equivalent to
HDMI-ARC.
Requires a TV with HDMI-ARC and a HDMI cable (not included).
1. Using a standard HDMI cable, connect your television’s
HDMI-ARC port
to the
HDMI input
on the subwoofer.
Depending on the TV, ARC may need to be enabled through the Audio or Source settings menu.
2. With the unit powered ON, select HDMI Mode through the
Source button on the subwoofer
or through the
HDMI button on the remote.
A voice prompt and a solid purple light will indicate that HDMI Mode has been
selected.