IKEA FORKYLD Manual Download Page 20

Defrosting of the refrigerator

Frost is automatically eliminated from the

evaporator of the refrigerator compartment

every time the motor compressor stops,

during normal use. The defrost water drains

out through a trough into a special container

at the back of the appliance, over the motor

compressor, where it evaporates.
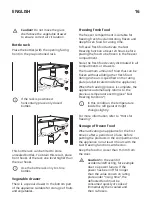
It is important to periodically clean the

defrost water drain hole in the middle of the

refrigerator compartment channel to

prevent the water overflowing and dripping

onto the food inside.
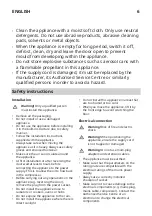
For this purpose use the tube cleaner

provided in the accessory bag.

Defrosting of the freezer

Caution! Never use sharp metal

tools to scrape off frost from the

evaporator as you could damage

it.

Do not use a mechanical device or

any artificial means to speed up

the thawing process other than

those recommended by the

manufacturer.

Do not use the supplied ice

scraper to prepare food.

About 12 hours prior to defrosting

set a lower temperature in order

to build up sufficient chill reserve

in case of any interruption in

operation.

A certain amount of frost will always form on

the freezer shelves and around the top

compartment.
Defrost the freezer when the frost layer

reaches a thickness of about 3-5 mm.

1. Switch off the appliance or pull out

electrical plug from the wall socket.

2. Remove any stored food and put it in a

cool place. 

Caution! A temperature rise

of the frozen food packs

during defrosting may

shorten their safe storage life.

Do not touch frozen goods

with wet hands. Hands can

freeze to the goods.

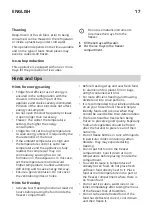
3. Leave the door open. Protect the floor

from the defrosting water e.g. with a

cloth or a flat vessel.

4. In order to speed up the defrosting

process, place a pot of warm water in the

freezer compartment. In addition,

remove pieces of ice that break away

before defrosting is complete. Use the

supplied ice scraper for this purpose.

5. When defrosting is complete, dry the

interior thoroughly. Keep the ice scraper

for the future use.

6. Switch on the appliance and close the

door.

7. Set the temperature regulator to obtain

the maximum coldness and run the

appliance for at least 3 hours using this

setting.

Only after this time put the food back into

the freezer compartment.

Period of non-operation

When the appliance is not in use for long

period, take the following precautions:

1. Disconnect the appliance from electricity

supply.

2. Remove all food.

3. Defrost the appliance.

4. Clean the appliance and all accessories.

5. Leave the doors open to prevent

unpleasant smells.

ENGLISH 

20

Summary of Contents for FORKYLD

Page 1: ...F RKYLD GB...

Page 2: ...ENGLISH Please refer to the last page of this manual for the full list of IKEA appointed After Sales Service Provider and relative national phone numbers...

Page 3: ...ENGLISH 4...

Page 4: ...ctions in a safe and accessible location for future reference Children and vulnerable people safety This appliance can be used by children aged from 8 years and above and persons with reduced physical...

Page 5: ...n of food respect the following instructions do not open the door for long periods clean regularly surfaces that can come in contact with food and accessible drainage systems store raw meat and fish i...

Page 6: ...iance At first installation or after reversing the door wait at least 4 hours before connecting the appliance to the power supply This is to allow the oil to flow back in the compressor Before carryin...

Page 7: ...tems from the freezer compartment if your hands are wet or damp Do not freeze again food that has been thawed Follow the storage instructions on the packaging of frozen food Wrap the food in any food...

Page 8: ...r to Safety chapters Warning Refer to installation instruction document to install your appliance Warning Fix the appliance in accordance with installation instruction document to avoid a risk of inst...

Page 9: ...while opening and closing the door No action Refer to the assembly instruction door alignment Install the appliance in the built in structure No action Follow the assembly instruction for the proper...

Page 10: ...the handle including the width of the bottom hinges 8 mm Space required in use H2 A B mm 1261 W2 mm 548 Space required in use D2 mm 551 A mm 1225 B mm 36 the height width and depth of the appliance i...

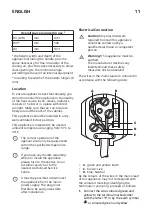
Page 11: ...ed temperature range If you have any doubts regarding where to install the appliance please turn to the vendor to our customer service or to the nearest Authorised Service Centre It must be possible t...

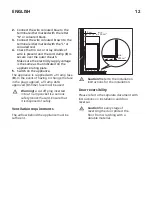
Page 12: ...with a 13 amp fuse B In the event of having to change the fuse in the plug supplied a 13 amp ASTA approved BS 1362 fuse must be used Warning A cut off plug inserted into a 13 amp socket is a serious s...

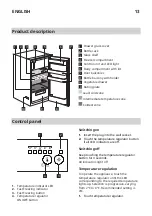
Page 13: ...Fast Freezing indicator 3 Fast Freezing button 4 Temperature regulator ON OFF button Switching on 1 Insert the plug into the wall socket 2 Touch the temperature regulator button if all LED indicators...

Page 14: ...n press the Fast Freezing button The Fast Freezing indicator switches on This function stops automatically after 52 hours It is possible to deactivate the function at any time by pressing Fast Freezin...

Page 15: ...es the door balconies can be placed at different heights To make these adjustments proceed as follows gradually pull upwards the balcony until it comes free then reposition as desired Movable shelves...

Page 16: ...esh food evenly distributed in all compartments or drawers The maximum amount of food that can be frozen without adding other fresh food during 24 hours is specified on the rating plate a label locate...

Page 17: ...igher temperature to allow automatic defrosting and to save energy this way Ensure a good ventilation Do not cover the ventilation grilles or holes Hints for freezing Activate Fast Freezing function a...

Page 18: ...If the package is swollen or wet it might have not been stored in the optimal conditions and defrosting may have already started To limit the defrosting process buy frozen goods at the end of your gro...

Page 19: ...compartment is the one marked on the rating plate with Meat all types wrap in a suitable packaging and place it on the glass shelf above the vegetable drawer Store meat for at most 1 2 days Fruit and...

Page 20: ...t the freezer when the frost layer reaches a thickness of about 3 5 mm 1 Switch off the appliance or pull out electrical plug from the wall socket 2 Remove any stored food and put it in a cool place C...

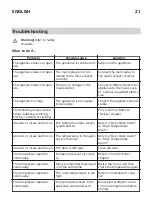
Page 21: ...clicking This is normal Refer to Noises chapter Acoustic or visual alarm is on The cabinet has been recent ly switched on Refer to Door Open Alarm or High Temperature Alarm Acoustic or visual alarm i...

Page 22: ...door The lamp does not work The lamp is defective Contact the nearest Author ized Service Centre There is too much frost and ice The door is not closed cor rectly Refer to Closing the door section Th...

Page 23: ...ure the tray is placed below the melting water out let Water flows on the floor Door was left open for a long time Open the door only when necessary Water flows on the floor The gasket is deformed or...

Page 24: ...ture setting LEDs flash at the same time An error has occurred in measuring the temperature Contact the nearest Author ised Service Centre The cool ing system will continue to keep food products cold...

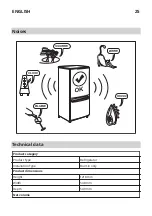
Page 25: ...es SSSRRR CLICK HISSS BRRR BLUBB Technical data Product category Product Type Refrigerator Installation Type Built in only Product dimensions Height 1218 mm Width 548 mm Depth 549 mm Net volume ENGLIS...

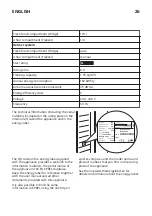
Page 26: ...ERSCHRANK NUTZINHALT XX l FREEZING CAPACITY GEFRIERVERMOEGEN X kg 24h DEFROST HEATER ABTAUWIDERSTAND XXX W 1 0 A 50 Hz MODEL XXXXXXXXXXXX PNC XXX XXX XXX SER N XXXXXXXX XX X XX X Made in Hungary Inter...

Page 27: ...iance which have been caused by faulty construction or material faults from the date of purchase from IKEA This guarantee applies to domestic use only The exceptions are specified under the headline W...

Page 28: ...ement if necessary This restriction do not apply to fault free work carried out by a qualified specialist using our original parts in order to adapt the appliance to the technical safety specification...

Page 29: ...KEA article number 8 digit code and the Serial Number 8 digit code that can be found on the rating plate for the appliance of which you need our assistance SAVE THE SALES RECEIPT It is your proof of p...

Page 30: ...g 06 1 252 1773 Belf ldi d jszab s H tk znap 8 00 s 17 00 ra k z tt Nederland Luxembourg 0900 235 45 32 0900 BEL IKEA 0031 50 316 8772 internationaal Geen extra kosten Alleen lokaal tarief ma vr 8 00...

Page 31: ......

Page 32: ...211627851 B 492021 Inter IKEA Systems B V 2021 21552 AA 2242200 3...

Reviews: