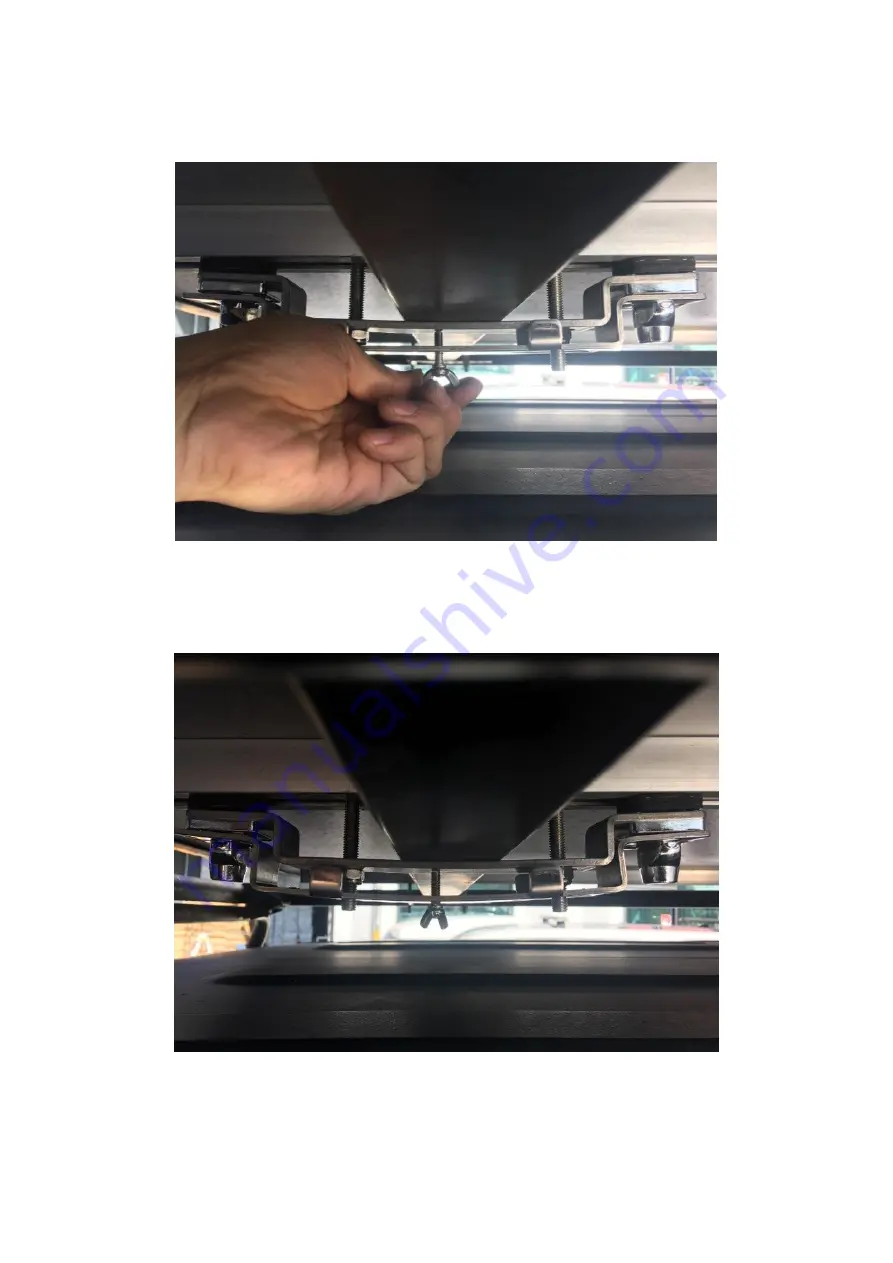
STEP 7
Step 7: Twist the hand-tightening nut to insure the bottom bracket piece is tight.
STEP 8
Step 8: One crossbar done! Now repeat the process with the second lock on your other crossbar.
Page 1: ...ce of mind deterring anyone from taking the Skycamp off your vehicle One lock goes on each crossbar and the locks block access to the nuts Please follow these instructions for an optimal installation Included parts 2 bracket locks 1 top and 1 bottom piece each 2 keys 8 rubber pads ...
Page 2: ...et locks the 2nd bolt can be used in holes 3 and 4 only Place the second bold in one of these two holes closest to your crossbar STEP 2 Step 2 Slide the top bracket into the rail under the Skycamp so that one bolt is on each side of the crossbar ...
Page 3: ...and place it over the bolts NOTE this piece replaces the standard bottom bracket piece STEP 4 Step 4 Tighten the nuts on one bolt then the other going back and forth NOTE apply lubricant to the bolts and nuts before tightening to reduce the risk of thread galling ...
Page 4: ...ween the Skycamp rail and lock before completely tightening the nuts STEP 6 Step 6 Once the nuts are securely tightened place the bottom piece of the mounting bracket locks over the nuts and secure in place by twisting the locks on each side ...
Page 5: ...STEP 7 Step 7 Twist the hand tightening nut to insure the bottom bracket piece is tight STEP 8 Step 8 One crossbar done Now repeat the process with the second lock on your other crossbar ...