Iiyama ProLite LH4265S User Manual Download Page 37

ENGLISH

34  OPERATING THE MONITOR


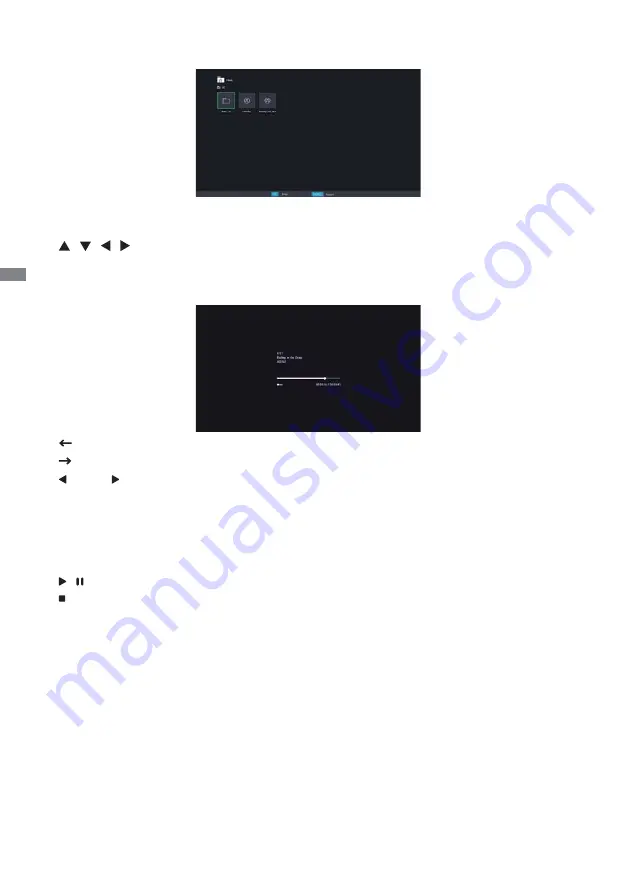
Playing music fi les 

<Remote control button functions in thumbnail view>

   • 

OK / ENTER

 : Plays the selected music fi le.

   • 

MENU / ESC

 : Returns to the Media Player menu.

   • 

 /   /   / 

 : Directional arrows for selecting a desired music.

   • 

EXIT

 : Closes the OSD menu or media player.

<Remote control button functions during playback>

  •   : Plays the previous music fi le.
  •   : Plays the next music fi le.
   • 

 / VOL-,   / VOL+

 : Turns down/up the volume.

   • 

QUICK

 : Opens the Quick menu.

   • 

MENU / ESC 

: Goes back to the previous page. 

  • 

FWD 

: Fast forwards the music. Press repeatedly to change the speed at 1X, 2X, 3X or 4X.

  • 

REV

 : Rewinds the music. Press repeatedly to change the speed at 1X, 2X, 3X or 4X.

  • 

INFO

 : Displays the current fi le status information.

  • 

 /   

 : Plays/pauses the music.

  •   : Plays the fi le from the beginning.
  • 

EXIT

 : Closes the OSD menu or media player.

  • 

0(MUTE)

 : Mutes the sound.

<Quick Menu>

   • Sound : Opens the Advanced Sound Settings menu.
   • Repeat : Sets the fi le repeat mode.
   

Off  : The fi le only plays once.


All : All fi les in the same folder play repeatedly.


1 : The same fi le plays repeatedly.

   • Device Information : Displays the current device information.

Summary of Contents for ProLite LH4265S

Page 1: ...sing the iiyama LCD monitor We recommend that you take a few minutes to read this comprehensive manual carefully before installing and switching on the monitor Please keep this manual in a safe place for your future reference USER MANUAL ...

Page 2: ...iyama com You can access the Web page of different countries from there CE MARKING DECLARATION OF CONFORMITY This LCD monitor complies with the requirements of the EC EU Directive 2014 30 EU EMC Directive 2014 35 EU Low Voltage Directive and 2011 65 EU RoHS Directive Warning This is a class A product In a domestic environment this product may cause radio interference in which case the user may be r...

Page 3: ...ORS MONITOR 7 INSTALLATION 10 CONTROLS AND CONNECTORS REMOTE CONTROL 12 PREPARING THE REMOTE CONTROL 13 BASIC OPERATION 14 CONNECTING YOUR MONITOR 17 COMPUTER SETTING 21 OPERATING THE MONITOR 23 ADJUSTMENT MENU CONTENTS 25 SCREEN ADJUSTMENTS 36 POWER MANAGEMENT FEATURE 39 TROUBLE SHOOTING 40 RECYCLING INFORMATION 41 APPENDIX 42 SPECIFICATIONS ProLite TH4265MIS 42 SPECIFICATIONS ProLite LH4265S 44 ...

Page 4: ...use fire electric shock or damage INSTALL THE MONITOR ON A FLAT STABLE SURFACE The monitor may cause an injury if it falls or is dropped DO NOT USE THE MONITOR NEAR WATER Do not use where water may be splashed or spilt onto the monitor as it may cause fire or electric shock OPERATE UNDER THE SPECIFIED POWER SUPPLY Be sure to operate the monitor only with the specified power supply Use of an incorrect...

Page 5: ...THE CABLES WHEN YOU MOVE THE MONITOR When you move the monitor turn off the power switch unplug the monitor and be sure the signal cable is disconnected If you do not disconnect them it may cause fire or electric shock UNPLUG THE MONITOR If the monitor is not in use for a long period of time it is recommended that it is left unplugged to avoid accidents HOLD THE PLUG WHEN DISCONNECTING To disconnect...

Page 6: ...srupt it with a motion picture 2 It is recommended to periodically change the background colour and background image 3 Recommended operating time is under 18 hours a day Static information display recommended to use in combination with Anti Image Retention in function 4 If the screen is active for a longer period of time it is recommended to I Run the screensaver motion picture or black pattern II...

Page 7: ...To protect the LCD panel do not scratch or rub the screen with a hard object Never use any of the following strong solvents These will damage the cabinet and the LCD screen Touching the cabinet with any product made from rubber or plastic for a long time may cause degeneration or loss of paint on the cabinet Thinner Benzine Abrasive cleaner Spray type cleaner Wax Acid or Alkaline solvent CABINET S...

Page 8: ...d by iiyama 2 Accessory for ProLite TH4265MIS Power Cable 1 VGA D sub Signal Cable HDMI Cable USB Cable 2 Remote Control Battery 2pcs Touch Pen 3pcs 2 Cable Ties For Cable management 6pcs iiyama Logo Sticker Safety Guide Quick Start Guide BEFORE YOU OPERATE THE MONITOR CHECKING THE CONTENTS OF THE PACKAGE CAUTION FEATURES Supports Resolutions up to 1920 1080 High Contrast 3000 1 Typical without To...

Page 9: ...hion and take the accessories box and the Monitor out CAUTION Moving the monitor requires at least two people If not it may drop and could result in a serious injury When moving shipping the monitor please hold by the carton holders SPECIAL NOTES ON ProLite TH4265MIS Permanent damage can occur if Sharp Edged Pointed or Metal items are used to activate Touch This could invalidate any remaining warr...

Page 10: ...ton Power Indicator Green Normal Operation Red Flash Power Management Lighting If turn off the Power Button on the Remote Control and the Back Controller Off Power Off Remote Sensor Remote Sensor Ambient Light Sensor Detects ambient lighting conditions around the Monitor and adjusts screen brightness automatically when the Ambient Light Sensor function is activated Front ProLite LH4265S ProLite TH426...

Page 11: ...ENGLISH 8 BEFORE YOU OPERATE THE MONITOR Back ProLite LH4265S ProLite TH4265MIS ...

Page 12: ...n Connector COMPONENT VIDEO VIDEO IN RCA G B R Component Video Connector AV IN RCA Video Connector AV OUT RCA Video Connector AUDIO IN1 PC Audio In Mini Jack Audio Connector AUDIO IN2 RCA L R Audio Connector AUDIO OUT RCA L R Audio output Connector USB1 USB2 Media player USB USB Connector RS232C OUT D SUB 9pin RS232C Connector RS232C IN D SUB 9pin RS232C Connector LAN RJ45 RJ45 Connector IR OUT IR...

Page 13: ...c shock or damage because it may contact with the electrical parts inside the monitor CAUTION L Mounting Stage Screw Chassis INSTALLATION NOTE Available for ProLite TH4265MIS only The touch kit of this monitor is an optical device that utilizes infrared light source and sensitive sensors for touch detection Notice the incident light that contains large quantities of infrared light may affect touch...

Page 14: ...H BEFORE YOU OPERATE THE MONITOR 11 ROTATING THE DISPLAY It is designed to be compatible in both landscape and portrait modes A A Power indicator Landscape Portrait Available Not Available A A Power indicator ...

Page 15: ...es the sound volume VOLUME Increases the sound volume OK Confirms your selection or save changes INFO Provides source and resolution information MENU Opens the monitor s on screen menu systems When the menu system is already open pressing this button will select the previous submenu Number 0 MUTE Turns on or off the mute function when the Menu is not displayed MULTI MEDIA QUICK Goes back to the main...

Page 16: ...over in the direction of the arrow Align and insert two AAA batteries according to their plus and minus ports as indicated in the remote control Replace the battery cover in the direction of the arrow and snap it back into place NOTE Replace with new batteries when the Remote Control does not work close to the monitor Use AAA dry batteries Operate the Remote Control by pointing it toward the Remot...

Page 17: ...monitor NOTE Even when using the power management mode or turning OFF the Power Switch the monitor will consume a small amount of electricity Disconnect the Power Cable from the power supply whenever the monitor is not in use or during the night to avoid unnecessary power consumption Remote Control Display the adjustment menu page The menu page appears on the screen when you press the MENU Button ...

Page 18: ... setting or perform the adjustment by pressing the Button while the menu page is displayed on the screen Move the cursor vertically Select adjustment by pressing the Button while the menu page is displayed on the screen MODE QUICK Remote Control Monitor Remote Control Monitor MODE QUICK ...

Page 19: ... the volume of sound when the menu page is not displayed on the screen Switch the input signal This is activated when you successively press the VIDEO SOURCE Button on the monitor or INPUT Button on the Remote Control as follows Remote Control Monitor MODE QUICK Remote Control Monitor MODE QUICK ...

Page 20: ...standard connector If a special cable is required please contact your local iiyama dealer or regional iiyama office For connection to Macintosh computers contact your local iiyama dealer or regional iiyama office for a suitable adaptor Make sure you tighten the finger screws at each end of the Signal Cable Don t connect the RS 232C cable and the USB cable to the computer at the same time And cannot use...

Page 21: ...al device CAUTION Turn off the power switch and unplug the monitor and peripherals before connection to avoid electric shock or damage NOTE Refer to the user manual of peripherals at the same time Ensure you have the necessary cables as required Red White Red White Red Blue Green ...

Page 22: ...ATE THE MONITOR 19 About the daisy chain PC RS 232C IN RS 232C RS 232C OUT RS 232C IN MONITOR1 MONITOR2 Monitor control connection RS 232C HDMI3 IN HDMI MONITOR1 MONITOR2 HDMI HDMI3 OUT HDMI3 IN Digital video connection HDMI ...

Page 23: ...is on or in standby mode you can use any computer that is on the same local area network to control the monitor You can not control the monitor via the RS 232C connector when LAN control is in use It is recommended that you use a recent Internet Explorer browser version 1 Enter the IP Address of the monitor in the address bar of your browser and press ENTER button 2 Input ID and Password ID admin ...

Page 24: ...allation on Windows XP The monitor Information File for iiyama monitors may be necessary for your computer and obtained via the Internet using the address http www iiyama com For additional information on how to download the driver for your touch screen monitor please access the internet site noted above Monitor Drivers are not required in most cases for Macintosh or Unix operating systems For fur...

Page 25: ... V10 6 4 higher HID for single touch only 10 10 10 11 need calibration or driver installation Linux 3 0 higher need patch for multi touch 3 5 higher HID for multi touch Not support Windows earlier versions Windows10 Windows8 8 1 6 Windows7 5 Windows7 4 Vista XP Mac OSX Linux Default mouse 1 Touch digitizer 2 Windows gestures 3 7 1 Default mouse click drag double click and right click 2 Touch digit...

Page 26: ...tically saved in the memory when the On Screen Display disappears Turning off the power should be avoided while using the Menu Adjustments for Image Position Clock Frequency and Phase are saved for each signal timing Except for these adjustments all other adjustments have only one setting which applies to all signal timings NOTE For example to correct for vertical position select Menu item of Scree...

Page 27: ... and hold the button for about 5 seconds then press the OK button when Menu is not displayed to activate deactivate the Back Controller and Remote Control Lock function Direct Freeze Function Press the button and then press 0 button when Menu is not displayed Repeat successively to activate deactivate the function Automatic Power Down Function Press the button and then press 0 button when Menu is ...

Page 28: ...Too weak Too strong Backlight 3 Brightness of back light is reduced Picture Too weak Too strong Custom Red Level Green Level Blue Level Neutral Greenish white Warm Reddish white Cool Bluish white Color Temp Hue 4 Reset Purplish Greenish Picture Settings Picture Settings Advanced Colour Settings On Base Colour Adjustment Adaptive Contrast Off Ambient Light Sensor Off Picture Contrast Booster Off Low...

Page 29: ...s turned off Enable the Base Color Adjustment Disable the Base Color Adjustment On Off Yes Resets all settings in the Base Colour Adjustment menu Picture Settings Advanced Colour Settings On Base Colour Adjustment Adaptive Contrast Off Ambient Light Sensor Off Picture Sets the MPEG NR noise reduction level Sets the MPEG NR noise reduction level more than Low Sets the MPEG NR noise reduction level mo...

Page 30: ...und Settings menu 1 Adjust the Brightness when you are using the monitor in a dark room and feel the screen is too bright 2 Only AV YPbPr and HDMI Video inputs 3 Backlight is disabled when the Ambient Light Sensor or Adaptive Contrast is active 4 Only AV NTSC input Adjustment Item Problem Option Button to Press Picture Picture Settings Advanced Colour Settings On Base Colour Adjustment Adaptive Co...

Page 31: ...enu LED On Off Power On Delay On Off The power indicator is turned on The power indicator is turned off Power On Delay is turned off You must set this item when using On Off Timer All Display wall monitors will power on randomly within 10 seconds Media Player Photos Music Videos Schedule Date and Time Displays the current date and time Year Month Day Hour Minute Time set Date set Sets when to turn on o...

Page 32: ...t mask and Default gateway settings are displayed IP Address Setup DNS Setup If you are not connected contact your IT administrator for information on the IP Address Subnet mask and Default gateway settings and enter them accordingly Čeština Czech Italian Italiano Japanese Set Monitor ID 1 Set ID to the Monitor 1 98 h s i l g n E e g a u g n a L Network Settings Control Setting RS 232C 1 D I r o t...

Page 33: ...led Displays all picture in 4 3 aspect ratio Displays the picture dot by dot VGA Settings 5 Freeze On Off Freezes the picture Freeze is turned Off Normal 4 Blue Screen Setting Blue Screen Off Touch Feature Off 1 D I r o t i n o M t e S Energy Saving Settings Aspect Full VGA Settings Freeze Off Control Setting RS 232C On Off Blue Screen is turned Off Automatic Power Down On Off Automatic Power Down is t...

Page 34: ...ce and resolution information will be displayed on the screen On Off OSD Rotation On Off Landscape Portrait Portrait display Landscape display IR Out IR Out is turned off To operating multiple monitors with one remote control Multiple monitors to connect using the IR cables On Off See your graphic card user guide for more information about changing the resolution and refresh Date Model Name Serial Num...

Page 35: ...l USB storage device simply plug the device into the USB A jack on the monitor 1 Connect your USB device to the USB port on this monitor 2 Press the INPUT button select Multi media then press the OK button 3 Uses the remote control and follow the On Screen instructions to operate USB Standard USB2 0 Supported file system FAT32 Supported file format Music MP3 MP4 WMA WAV MKA Video AVI MPG MPEG MOV MP...

Page 36: ...n Slide Show mode or Single View mode Plays to next photo Plays to previous photo Rotates the image 90 clockwise Rotates the image 90 counterclockwise QUICK Opens the Quick menu MENU ESC Goes back to the previous page FWD Zoom in REV Zoom out INFO Displays the current file status information EXIT Closes the OSD menu or media player 0 MUTE Mutes the sound Quick Menu Picture Settings Opens the Pictur...

Page 37: ...k menu MENU ESC Goes back to the previous page FWD Fast forwards the music Press repeatedly to change the speed at 1X 2X 3X or 4X REV Rewinds the music Press repeatedly to change the speed at 1X 2X 3X or 4X INFO Displays the current file status information Plays pauses the music Plays the file from the beginning EXIT Closes the OSD menu or media player 0 MUTE Mutes the sound Quick Menu Sound Opens t...

Page 38: ...t forwards the video Press repeatedly to change the speed at 1X 2X 3X or 4X REV Rewinds the video Press repeatedly to change the speed at 1X 2X 3X or 4X INFO Displays the current file status information Plays pauses the video Plays the file from the beginning EXIT Closes the OSD menu or media player 0 MUTE Mutes the sound Quick Menu Picture Settings Opens the Picture Settings menu Picture Size Sets ...

Page 39: ...case manual adjustments are required There are two ways to adjust the screen One way is automatic adjustment for Position Clock Frequency and Phase The other way is performing each adjustment manually Perform the Auto Adjust first when the monitor is connected to a new computer or resolution is changed If the screen has a flicker or blur or the picture does not fit in the display area after performi...

Page 40: ...cture may flicker during the Clock Frequency H V Position adjustment In case the picture frame is bigger or smaller than the data display area after the Clock Frequency adjustment repeat steps from 2 Stretch the right side of the picture frame to the right edge of the display area by adjusting the Clock Frequency Adjust the Auto Adjustment Adjust the image manually by following procedure below when...

Page 41: ...the refresh rate of computer to low 60Hz and repeat steps from again Adjust the H Position after the Phase adjustment if the horizontal position moves during the adjustment Adjust the Brightness and Color to get the desired picture after you complete the Clock Frequency and Phase adjustments Put back your favorite wallpaper Adjust the Phase to correct horizontal wavy noise flicker or blur in the ze...

Page 42: ...r consumption to less than 0 5W The screen becomes dark From Power Management Mode the image reappears in several seconds when either the keyboard or the mouse are touched again The power management feature of this product complies with power saving requirement of VESA DPMS When activated it automatically reduces unnecessary power consumption of the monitor when your computer is not in use To use ...

Page 43: ... The signal timing of the computer is within the specification of the monitor No sound The audio equipment computer etc is ON The Audio Cable is properly connected The Volume is turned up The Mute is OFF The audio output level of the audio equipment is within the specification of the monitor The sound is too loud or too quiet The audio output level of the audio equipment is within the specification o...

Page 44: ...ENGLISH Recycling information 41 For better environment protection please don t dispose your monitor Please visit our web site www iiyama com recycle for monitor recycling RECYCLING INFORMATION ...

Page 45: ...alog Horizontal 30 0 83 0kHz Vertical 50 76Hz Digital Horizontal 30 0 83 0kHz Vertical 50 76Hz Maximum Resolution 1920 1080 2 1 MegaPixels Input Connector VGA D sub mini 15 pin HDMI 3 Input Video Connector RCA Input Audio Connector mini jack RCA L R Input Component Connector RCA Video L R LAN RJ45 Serial Port RS 232C In Out Plug Play VESA DDC2BTM Input Sync Signal Separate sync TTL Positive or Neg...

Page 46: ... 578 0 74 5mm 38 9 22 8 2 9 W H D 24 6kg 54 3lbs Environmental Considerations Operating Temperature 0 to 40 C 32 to 104 F Humidity 85 No condensation Storage Temperature 20 to 60 C 4 to 140 F Humidity 85 No condensation Approvals CB CE CU TÜV Bauart ...

Page 47: ...nput Component Connector RCA Video L R LAN RJ45 Serial Port RS 232C In Out Plug Play VESA DDC2BTM Input Sync Signal Separate sync TTL Positive or Negative Input Video Signal Analog 0 7Vp p Standard 75 Positive Digital HDMI Input Audio Signal 0 5Vrms maximum IR Extender Connector IR In Out USB Connector USB2 0 2 Media Player Output Connector HDMI Output Video Connector RCA Output Audio Connector RC...

Page 48: ...580 0mm 22 8 290 0mm 11 4 632 5mm 24 9 51 5mm 2 0 74 5mm 2 9 482 0mm 19 0 200 0mm 7 9 400 0mm 15 7 400 0mm 15 7 4xM6 SCREW HOLE VESA MOUNT 960 5mm 37 8 934 0mm 36 8 553 5mm 21 8 527 0mm 20 7 277 0mm 10 9 632 5mm 24 9 34 5mm 1 4 57 5mm 2 3 482 0mm 19 0 400 0mm 15 7 400 0mm 15 7 200 0mm 7 9 4xM6 SCREW HOLE VESA MOUNT ...

Page 49: ...00 135 000 1360x768 47 712 60 020 85 500 1440x900 55 919 60 000 106 470 FHD 1920x1080 67 500 60 000 148 500 SD NTSC M 15 734 59 940 13 500 NTSC J 15 734 59 940 13 500 PAL BDGHI 15 734 59 940 13 500 720x480i 60Hz 15 734 59 940 13 500 720x576i 50Hz 15 625 50 000 13 500 720x480p 60Hz 31 469 59 940 27 000 720x576p 50Hz 31 250 50 000 27 000 HD 1280x720p 50Hz 37 500 50 000 74 250 60Hz 45 000 60 000 74 2...

Reviews: