background image

ENGLISH

  OPERATING THE DISPLAY  35  

Save:

 Save

Forget:

 Delete

Discard:

 Discard

Cancel:

 Close without saving

Adjustment Item

Problem / Option

Clear Storage

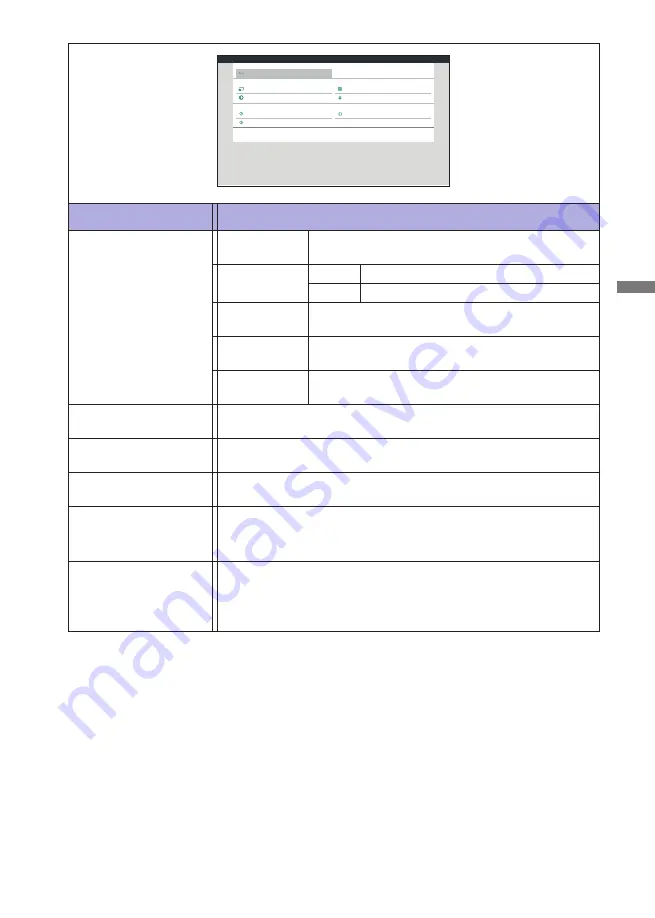
System Tools

Clear all data in signage folders.

All / Internal storage / USB storage / SD card

Factory Reset

Export to signage folder under USB/SD.
USB storage / SD card

Export signage
Display setting

Clone Media 
File

Copy the media fi le from internal, USB or SD folder.

Cancel
OK

Return to Menu.
Factory-preset data is restored. 

Import signage
Display setting

Import to signage folder under USB/SD.
USB storage / SD card

Display

Set the font size.

Small / Normal / Large / Huge

Apps

Display applications information.

Date & Time

Display Date & Time information.

Developer options

Not available on this model.

When you change the system settings, a problem like system 

instability may occur. In that case, contact your dealer or iiyama 

service center for assistance. 

About

Main info in About: System updates / Android version / Kernel version 

/ Build number

Automatically search update .zip from USB or SD card. When you 

select the updated .zip fi le, the display will restart and the update will 

start.

Developer options

System Tools

Signage Display

Ethernet

Display

Apps

Date & time

About

System

Device

Network

Settings

 Quick Info

Press the Info button and number 77 on the remote control.
Display the Network and Monitor etc. information. 

Summary of Contents for ProLite LE6540UHS

Page 1: ...he iiyama LCD display for signage We recommend that you take a few minutes to read this comprehensive manual carefully before installing and switching on the display Please keep this manual in a safe place for your future reference USER MANUAL ...

Page 2: ...ENGLISH ...

Page 3: ...yama com You can access the Web page of different countries from there CE MARKING DECLARATION OF CONFORMITY This LCD display complies with the requirements of the EC EU Directive 2014 30 EU EMC Directive 2014 35 EU Low Voltage Directive and 2011 65 EU RoHS Directive Warning This is a class A product In a domestic environment this product may cause radio interference in which case the user may be re...

Page 4: ...TORS DISPLAY 8 INSTALLATION 10 CONTROLS AND CONNECTORS REMOTE CONTROL 11 PREPARING THE REMOTE CONTROL 12 ID REMOTE CONTROL 13 BASIC OPERATION 14 CONNECTING YOUR THE DISPLAY 17 COMPUTER SETTING 20 OPERATING THE DISPLAY 21 ADJUSTMENT MENU CONTENTS 23 SCREEN ADJUSTMENTS 40 POWER MANAGEMENT FEATURE 43 TROUBLE SHOOTING 44 RECYCLING INFORMATION 45 APPENDIX 46 SPECIFICATIONS ProLite LE6540UHS 46 DIMENSIO...

Page 5: ...use fire electric shock or damage INSTALL THE DISPLAY ON A FLAT STABLE SURFACE The display may cause an injury if it falls or is dropped DO NOT USE THE DISPLAY NEAR WATER Do not use where water may be splashed or spilt onto the display as it may cause fire or electric shock OPERATE UNDER THE SPECIFIED POWER SUPPLY Be sure to operate the display only with the specified power supply Use of an incorrect...

Page 6: ...isplay and be sure the signal cable is disconnected If you do not disconnect them it may cause fire or electric shock UNPLUG THE DISPLAY If the display is not in use for a long period of time it is recommended that it is left unplugged to avoid accidents HOLD THE PLUG WHEN DISCONNECTING To disconnect the power cable or signal cable always pull it by the plug Never pull on the cable itself as this m...

Page 7: ...n brightness on the screen depending on the desktop pattern you use Due to the nature of the LCD screen an afterimage of the previous screen may remain after switching the image when the same image is displayed for hours In this case the screen is recovered slowly by changing the image or turning off the Power Switch for hours SPECIAL NOTES ON LCD MONITORS This LCD cannot be used outdoors This LCD ...

Page 8: ...monitor when not in use to assist the prevention Other ways to reduce the risk of Image Persistence will be to utilise the FAN on function if available Low Backlight and Low Brightness settings FOR EXTENDED USE AS A PUBLIC DISPLAY Image Sticking on LCD Panel When a static image is displayed for hours an electric charge trace remains near the electrode inside the LCD producing a ghost image Image P...

Page 9: ...To protect the LCD panel do not scratch or rub the screen with a hard object Never use any of the following strong solvents These will damage the cabinet and the LCD screen Touching the cabinet with any product made from rubber or plastic for a long time may cause degeneration or loss of paint on the cabinet Thinner Benzine Abrasive cleaner Spray type cleaner Wax Acid or Alkaline solvent CABINET S...

Page 10: ...r cable not supplied by iiyama The display shall be connected to a MAINS Socket outlet with a protective earthing connection An approved power cord greater or equal to H05VVF 3G 0 75mm2 must be used Power Cable HDMI Cable mDP DP Cable DisplayPort Cable RS 232C Cable Remote Control Battery 2pcs POP Label iiyama Logo Sticker EU Energy Label Safety Guide Quick Start Guide BEFORE YOU OPERATE THE DISPL...

Page 11: ... box in an upright position and open from the top of the box before removing the top cushions Remove the carton holders and pull out the upper box upwards Remove the top cushion and take out the accessories box and the display CAUTION Moving the display requires at least two people If not it may drop and could result in a serious injury Pinch and Pull the Knob ...

Page 12: ...e remote control performance and ensure good visibility of the power status diode 2 Push up the lens before mounting the display for video wall application 3 Pull Push the lens until hearing the click sound Power Indicator Green Lighting Normal Operation Red If turn off the Power Button on the Remote Control and the Back Controller Power Management Green Red Flash When SCHEDULE is enabled Off Power ...

Page 13: ...isplayPort IN DisplayPort DisplayPort Connector HDMI1 IN HDMI HDMI Connector HDMI2 IN HDMI HDMI Connector Option Slot Card OPS Option Slot MICRO SD Micro SD slot USB 5V0 5A USB Connector USB 5V2A USB power charging USB Connector USB USB2 0 USB Connector USB USB3 0 USB Connector AUDIO OUT RCA L R Audio output Connector AUDIO IN Mini Jack Audio Connector VGA IN VGA VGA Connector IR IN IR IR Connecto...

Page 14: ...mounting consideration of thickness of the mounting stage needs to be taken Tighten the M6 Screw with washer which L length is 10mm to fasten the display Using a screw longer than this may cause electric shock or damage because it may contact with the electrical parts inside the display CAUTION L Mounting Stage Screw Chassis ROTATING THE DISPLAY A A Not Available It is designed to be compatible in...

Page 15: ...submenus and settings Up Button Down Button Left Button Right Button OK Confirms your selection or save changes ADJUST Auto Adjust function only available when VGA input is selected MUTE Turns on or off the mute function when the Menu is not displayed COLOR Select tasks or options Blue Zoom in PDF Player Yellow Zoom out PDF Player NUMBER ID SET ENTER Enter text for network setting ID Mode ID To ente...

Page 16: ...r to open it Align and insert two AAA batteries according to their plus and minus ports as indicated in the remote control Replace the battery cover NOTE Replace with new batteries when the Remote Control does not work close to the display Use AAA dry batteries Operate the Remote Control by pointing it toward the Remote Sensor on the display Other manufacturers remote control will not work with th...

Page 17: ...t the desired ID 01 255 4 Press the ENTER button to confirm ID 5 The red LED will blink twice when ID has been confirmed 6 Press the ID SET button will exit the ID Mode The green LED turned on Not pressing any button within 10 seconds will exit the ID Mode If an error pressing of buttons other than the digits occured wait 1 second after the red LED lights off and then lights up again then press the c...

Page 18: ...e display NOTE Even when using the power management mode or turning OFF the Power Switch the display will consume a small amount of electricity Disconnect the Power Cable from the power supply whenever the display is not in use or during the night to avoid unnecessary power consumption Remote Control Display the adjustment menu page The menu page appears on the screen when you press the MENU butto...

Page 19: ...essing the button on the display or the button on the remote control while the menu page is displayed on the screen Move the cursor vertically Select adjustment by pressing the button on the display or the button on the remote control while the menu page is displayed on the screen Remote Control Display Remote Control Display ...

Page 20: ...play or the remote control to adjust the volume of sound when the menu page is not displayed on the screen Switch the input signal This is activated when you successively press the INPUT button on the display or the SOURCE button on the remote control Remote Control Display Remote Control Display ...

Page 21: ...connection to Macintosh computers contact your local iiyama dealer or regional iiyama office for a suitable adaptor Make sure you tighten the finger screws at each end of the Signal Cable The Class I pluggable equipment Type A must be connected to protective earth The socket outlet shall be installed near the equipment and shall be easily accessible Excessive sound pressure from ear headphones can ca...

Page 22: ... the peripheral device CAUTION Turn off the power switch and unplug the display and peripherals before connection to avoid electric shock or damage NOTE Refer to the user manual of peripherals at the same time Ensure you have the necessary cables as required Red White ...

Page 23: ...tch on its DHCP setting 2 Connect the router to this display with an Ethernet cable 3 Press HOME button on the remote control then select Setup 4 Select Connect to network then press OK button 5 Follow the on screen instructions to install the network 6 Wait for this display to find the network connection 7 If you are prompted agree to the End User Licence Agreement Connecting with a shielded CAT 5...

Page 24: ...d The Plug Play function runs on Windows XP Vista 7 8 8 1 10 by connecting the display to DDC2B compliant computer with the Signal Cable supplied For installation on Windows XP The display Information File for iiyama displays may be necessary for your computer and obtained via the Internet using the address http www iiyama com Display Drivers are not required in most cases for Macintosh or Unix op...

Page 25: ... adjustment or setting Press the BACK button on the remote control or the MENU button on the display to leave the menu and the settings you just made would be automatically saved For example to correct for vertical position select Menu item of Screen Press the OK button on the remote control or the button on the display Then select V Position by using the buttons on the remote control or the butto...

Page 26: ... Menu Adjustments for H V Position Clock and Phase are saved for each signal timing Except for these adjustments all other adjustments have only one setting which applies to all signal timings NOTE Direct You can skip the Menu items and directly display an option setting screen by using the following button operations Auto Adjust Press the ADJUST Button when the Menu is not displayed Zoom mode Pre...

Page 27: ...ore than Medium 1 Adjust the Brightness when you are using the display in a dark room and feel the screen is too bright Brightness adjustment is disabled when Brightness of Panel saving is on 2 Only HDMI Video input 3 Press to display the options Noise reduction 2 Color temperature Gamma selection 3 You can set the Gamma Native 2 2 2 4 s gamma D image Sharpness Black level Tint Color Noise reducti...

Page 28: ... reduced 80 Off Normal Smart power Midium Brightness of back light is reduced more than Midium 65 High Over scan Off Over scan is turned off On Display area about 95 Sharpness Black level Tint Color Noise reduction Gamma selection Color temperature Color controal Smart power Picture Screen Audio Configuration1 Contrast 20 50 50 55 Medium Native 50 Configuration2 Advanced option Overscan Picture reset...

Page 29: ...e of the image simultaneously H zoom V zoom Zoom the horizontal size of the image Zoom the vertical size of the image Auto adjust 1 6 Adjust Position Clock and Clock Phase automatically Screen reset Screen setting will be restored to factory preset data 1 Only VGA input 2 Only VGA and HDMI inputs 3 Only Mediaplayer input 4 Custom zoom is disabled when Pixel shift is enabled 5 See page 40 for SCREE...

Page 30: ...mum volume Set the minimum volume Return the sound volume to the previous level Turn off the sound temporarily Off On Mute Select the VGA input Analog Select the HDMI DisplayPort input Digital Audio Source Audio out sync Off On Disable audio out line out volume Enable audio out line out volume Treble Bass Volume Audio out line out Maximum volume Minimum volume Mute Picture Screen Audio Configuration1...

Page 31: ...twork control port RS232 LAN RS232 OPS RS232 4 Boot on source 2 3 Input Select input source when boot up HDMI1 HDMI2 HDMI3 HDMI4 DisplayPort VGA OPS 4 Mediaplayer Browser iiSignage PDF player Custom Playlist Select playlist index for Mediaplayer Browser and PDF player WOL On Off WOL is turned off Turn the display on remotely over LAN network RGB range For limited color scale signal Full range Limite...

Page 32: ... restored Cancel Reset Return to Menu Adjustment Item Problem Option Button to Press Configuration1 Panel saving RS232 routing Boot on source WOL RGB range Configuration1 reset Factory reset Picture Screen Audio Configuration1 Switch on state Off Auto Action Configuration2 Advanced option Action Action RS232 Action Force on Cancel Reset Return to Menu ...

Page 33: ...only custom logo when the display is turned on Monitor ID Set ID to the display 1 255 Heat status Display the thermal status Shows information about your display including Model name Serial No Operation hours and SW version Monitor information HDMI Version 1 Set the version of the HDMI 1 4 2 0 Configuration2 reset 1 Suitable for HDMI input only 2 When you would like to use a Custom Boot Logo go to ...

Page 34: ...mer Set when turn off the display Off 1 24 hours Date and time Adjust the current date and time for the internal clock Auto sync automatically Set Date Set Time You must set this item when using Schedule NOTE Power LED Light Keyboard control Off timer Date and time Schedule HDMI with One Wire Language Picture Screen Audio Configuration1 IR control Action Action Configuration2 Advanced option English...

Page 35: ...no Dutch Nederlands Language OSD Transparency The background of OSD is made transparent Off 1 100 Schedule list Up to 7 schedules can be set Enable Enable disable schedule NOTE If set with other schedule list conflict you can not enable schedule Start time End time Set start time Set end time Power LED Light Keyboard control Off timer Date and time Schedule HDMI with One Wire Language Picture Screen...

Page 36: ...up Backlight on show no signal Power LED Light Keyboard control Off timer Date and time Schedule HDMI with One Wire Language Picture Screen Audio Configuration1 IR control Action Action Configuration2 Advanced option English On Unlock Off Unlock OSD transparency Power Save Mode1 OPS settings Advanced option reset Auto Action Off Off Cancel Reset Return to Menu OPS settings 6 Auto Always off Always ...

Page 37: ...ENGLISH OPERATING THE DISPLAY 33 APPLICATION Press the HOME button and number 1668 on the remote control or ...

Page 38: ... Port SICP Network Port Change the SICP Network Port Source settings Media Player Edit Media Player playlist and effect settings Browser Edit Bookmark configration iiSignage 3 Set the iiSignage PDF Player Edit PDF Player playlist and effect settings Custom App Edit the Custom App Security External Storage Disable Enable SD card USB External Storage unlock SD card USB External Storage lock 1 The Boot ...

Page 39: ... font size Small Normal Large Huge Apps Display applications information Date Time Display Date Time information Developer options Not available on this model When you change the system settings a problem like system instability may occur In that case contact your dealer or iiyama service center for assistance About Main info in About System updates Android version Kernel version Build number Auto...

Page 40: ...usic pdfs in signage pdf 2 Save the Video Photo Music PDF files in the subfolders of your USB or SD card 3 Insert your USB or SD card into an USB port or SD card slot of the monitor 4 When using internal storage save the necessary files of your USB or SD card to an appropriate signage folder and subfolders in the internal storage of the monitor videos in signage video photos in signage photo music i...

Page 41: ...quired Slide bar Source Select storage USB SD card Playlist Show playlist Internal Select all Select all storage files Delete all Delete playlist files Add Remove Update playlist from the source Sort Sort playlist Save Abort Save or abort playlist Back Return Remote control Option key Display slidebar Play key Play media file Pause key Pause Info key Show media info OK key Select deselect file Play Se...

Page 42: ...sliding Fold Change by rotating horizontally in the center Corner Change by enlarging from the upper left corner to the lower right corner None Normal Effect Duration Photo effect duration 5s 10s 15s 20s Browser Settings Select Settings on the page Set frequently used URL 1 Select 1 7 2 Enter URL and press OK 3 Press Option to display the slide bar Import Import URL list file Export Export URL list fi...

Page 43: ...le Play Select Play on the page First you select one playlist to play between FILE1 and FILE7 Media Hotkey Play To play the PDF file Pause To pause the PDF file Fast forward Go to the next page if the page is end of the file it will go to next file Rewind Back to previous page if the page is first of the file it will back to previous file Stop Return to first page of file Color Hotkey Blue key Zoom in 10 Y...

Page 44: ... functionality please download the iiSignage Software and User Manual from our Website https iiyama com iisignage iiSignage software is using the network Port 9989 future information are available in the iiSignage User Manual Chromium Connect the network and browse the web File Manager Browse the files stored in the internal storage USB and SD card Settings See page 34 35 for Settings Custom Set up...

Page 45: ...en displaying the picture other than the screen adjustment pattern In this case manual adjustments are required There are two ways to adjust the screen One way is automatic adjustment for Position Clock and Phase The other way is performing each adjustment manually Perform the Auto Adjust first when the monitor is connected to a new computer or resolution is changed If the screen has a flicker or b...

Page 46: ...icker during the Clock H Position and V Position adjustment In case the picture frame is bigger or smaller than the data display area after the Pixel Clock adjustment repeat steps from 2 Stretch the right side of the picture frame to the right edge of the display area by adjusting the Clock Adjust the Auto Adjustment Auto Adjust Adjust the image manually by following procedure below when the scree...

Page 47: ...k your favorite wallpaper Adjust the Phase to correct horizontal wavy noise flicker or blur in the zebra pattern NOTE In case the strong flicker or blurs remain on a part of the screen repeat steps and because the Clock may not be adjusted correctly Adjust the H Position after the Phase adjustment if the horizontal position moves during the adjustment ...

Page 48: ...ess than 0 5W The screen becomes dark and the power indicator turns to red From Power Management Mode the image reappears in several seconds when either the keyboard or the mouse are touched again The power management feature of this product complies with power saving requirement of VESA DPMS When activated it automatically reduces unnecessary power consumption of the display when your computer is...

Page 49: ...ard or the mouse Increase the Contrast and or Brightness The computer is ON The Signal Cable is properly connected The signal timing of the computer is within the specification of the display If the display is in power management mode touch the keyboard or the mouse The computer is ON The Signal Cable is properly connected The signal timing of the computer is within the specification of the display ...

Page 50: ...ENGLISH 46 RECYCLE INFORMATION For better environment protection please don t dispose your display Please visit our web site www iiyama com for monitor recycling RECYCLE INFORMATION ...

Page 51: ... Input Audio Connector mini jack LAN RJ45 Serial Port RS 232C In Out mini jack Plug Play VESA DDC2BTM Input Sync Signal Separate sync TTL Positive or Negative Input Video Signal Analog 0 7Vp p Standard 75 Positive Digital HDMI DisplayPort Input Audio Signal 0 5Vrms maximum IR Extender Connector IR In Out USB Connector USB2 0 USB Media Player 2 USB3 0 USB Media Player 1 5V2A USB power charging 1 Mi...

Page 52: ...ENDIX DIMENSIONS ProLite LE6540UHS 1163 5mm 45 8 52 0mm 2 0 81 5mm 3 2 417 0mm 16 4 1430 0mm 56 3 1458 5mm 57 4 805 5mm 31 7 834 5mm 32 9 596 0mm 23 5 150 0mm 5 9 400 0mm 15 7 400 0mm 15 7 4xM6 SCREW HOLE VESA MOUNT ...

Page 53: ...680x1050 65 3 60 0 146 250 FHD 1920x1080 67 5 60 0 148 500 4K 3840x2160 67 5 30 0 297 000 135 0 60 0 594 000 IBM 720x400 31 5 70 0 28 320 SD NTSC M 15 7 60 0 13 500 NTSC J 15 7 60 0 13 500 PAL BDGHI 15 7 60 0 13 500 480i 60Hz 15 7 60 0 13 500 576i 50Hz 15 6 50 0 13 500 480p 60Hz 31 5 60 0 27 000 576p 50Hz 31 3 50 0 27 000 HD 720p 50Hz 37 5 50 0 74 250 60Hz 45 0 60 0 74 250 1080i 50Hz 28 1 50 0 74 ...

Reviews: