


ENGLISH
6 BEFORE YOU OPERATE THE MONITOR
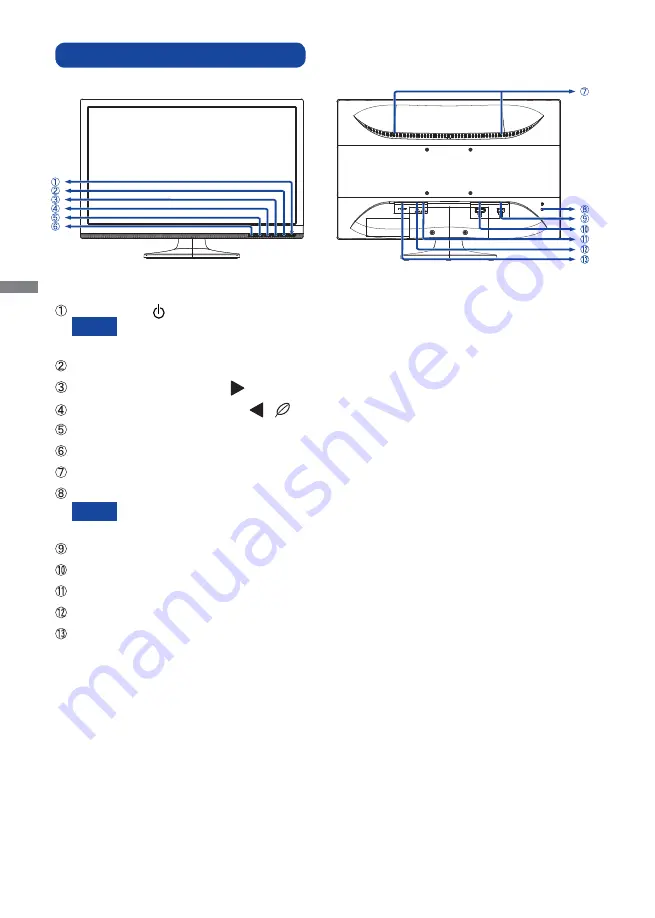
CONTROLS AND CONNECTORS
Power Switch ( ) / Power Indicator
Blue: Normal
operation
Orange:
Power
Management
Menu / Select Button (MENU)
Scroll Up / Brightness Button ( )
Scroll Down / ECO Mode Button (
/
)
Exit Button (EXIT)
Auto Button (AUTO)
Speakers*
Keyhole for Security Lock
You can fasten a security lock and cable to prevent the monitor from being removed
without your permission.
D-SUB mini 15pin Connector (D-Sub)
DVI-D 24pin Connector (DVI-D)
Headphone Connector* (LINE OUT)
Audio Connector* (LINE IN)
AC Connector (POWER IN)
NOTE
<Front>
<Back>
NOTE
*
Available for ProLite E2078HSD only.
Summary of Contents for ProLite E2078HD
Page 2: ...ENGLISH ...


