Misprints, errors and technical changes reserved
USING ON SCREEN MENU
Use the monitor and keyboard to access the main menu.
Access to the main menu
1. Make sure that the extenders, monitors and computer are turned on
2. Press the Alt gr five times one after the other. The main menu and the
overview of the submenus are displayed.
3. To access a submenu, press the corresponding key or navigate with the arrow keys up
and down to the corresponding line and then press Enter key.
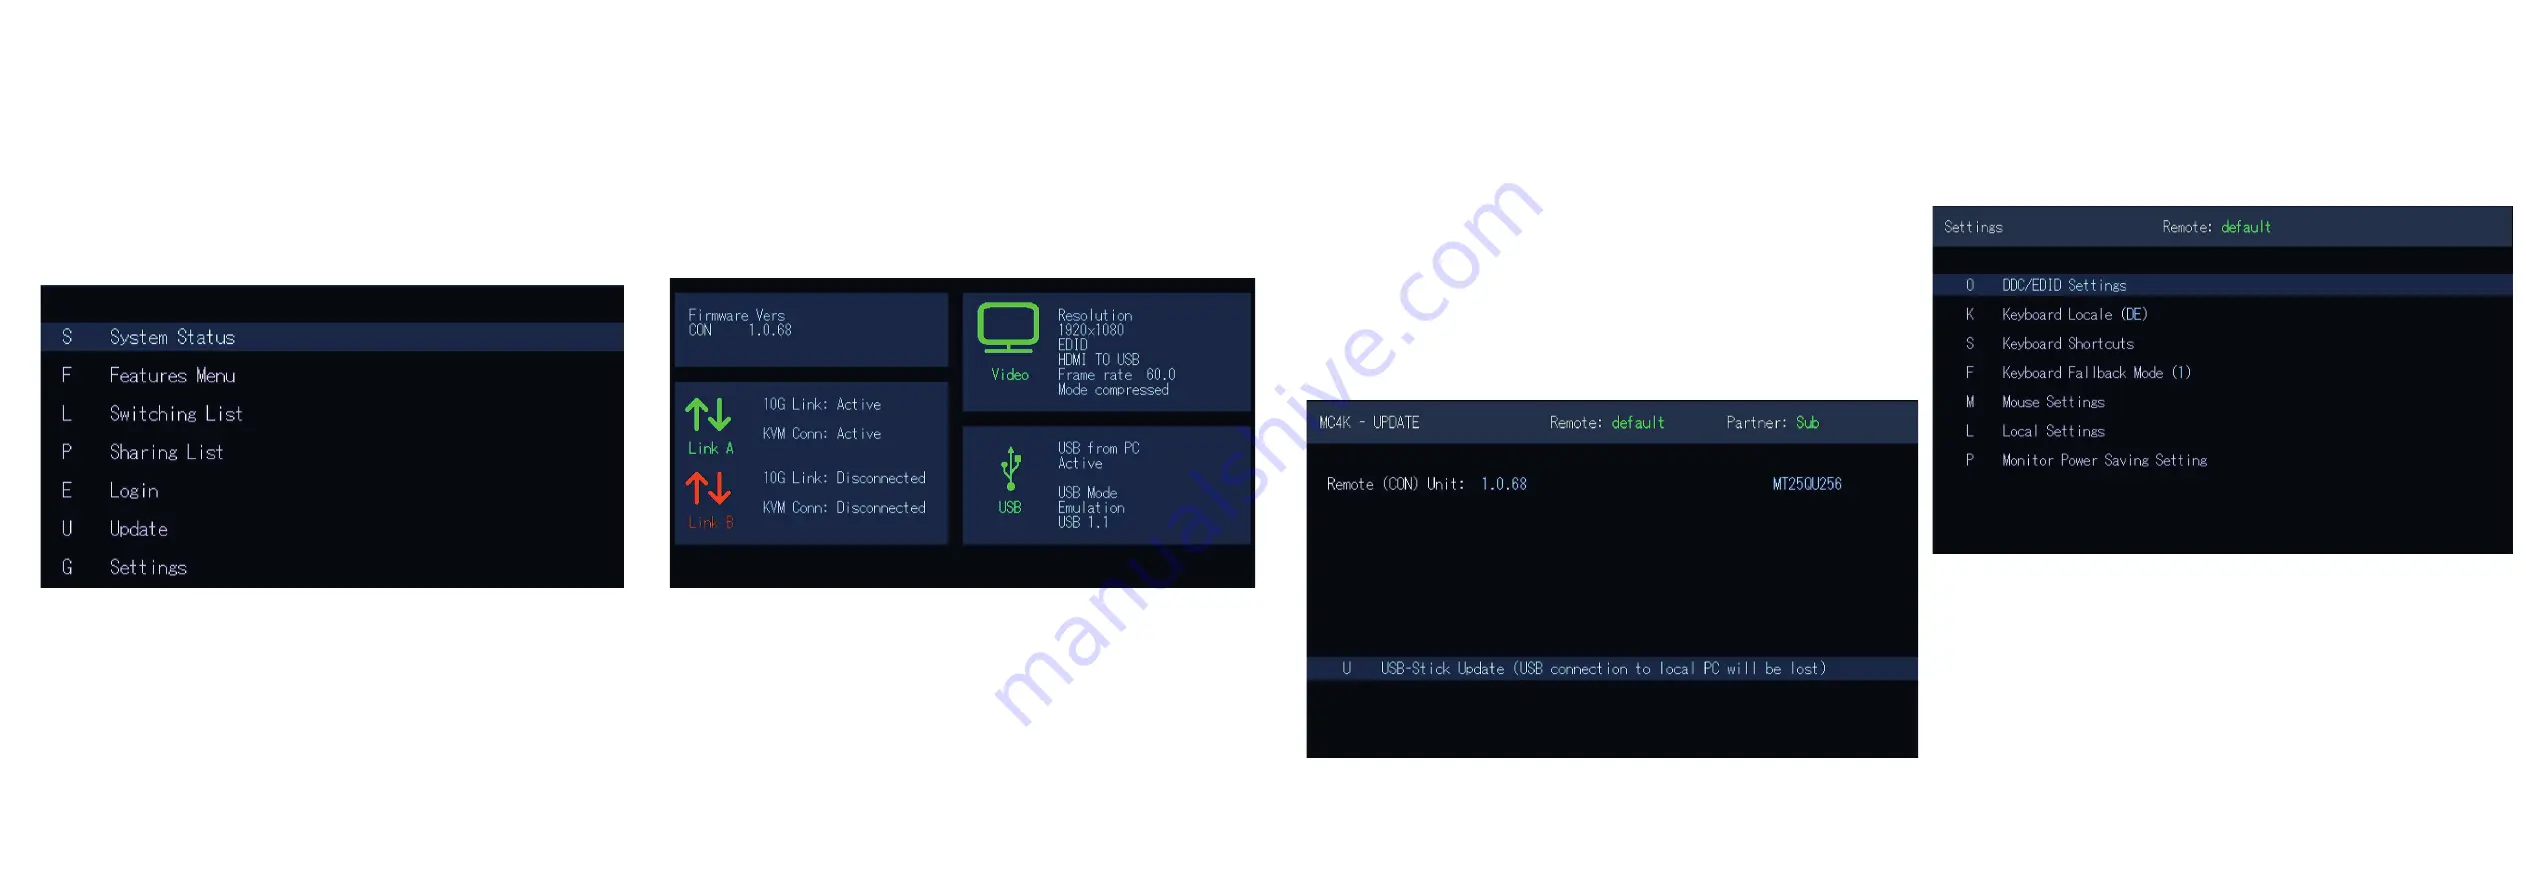
SCREEN „OSD Menü“
SCREEN „OSD menu“
In the main menu you can make the following settings by selecting the corresponding letters:
Press
S
System status
menu system status/ current status
F
Features Menu
activated features
L
Switching List
Switching List
P
Sharing List
Sharing List
E Login
Login
U
Update
update firmware
G Settings
settings
SYSTEM STATUS
By pressing the „
S
“ key or by selecting the arrow keys, you access the status menu, where you
will find information about hardware and software versions, as well as the activated upgrades
The menu displays information about the connection, the resolution of the video channel
and the USB status.
The
current Firmware
version is displayed in the upper left corner.
The
link status
indicates whether a connection is possible.
Video and USB display data transfer status
SCREEN „System Status“
1.
The current version of the firmware can be downloaded from http://
www.kvm-tec.com/de/support. Each update file contains a detailed
description of the update process. For further information please
refer to the update chapter
2. Connect the USB stick to the CON (REMOTE) Unit (wait a few seconds
until the USB stick is connected to the CON Unit).
3. Then open the update menu with the „U“ key.
4. Press the „ U“ key to start the update on the remote (CON) unit.
5.
Call the file with „S
6.
The firmware is shown on the display under „Configuration found“,
7. Press the „U“ key to start the update on the remote (CON) unit
SETTINGS
By pressing the „G“ key or selecting the arrow keys you will have access to the Settings menu,
where you can access all Extender settings.
Screen „Settings „


