background image

7

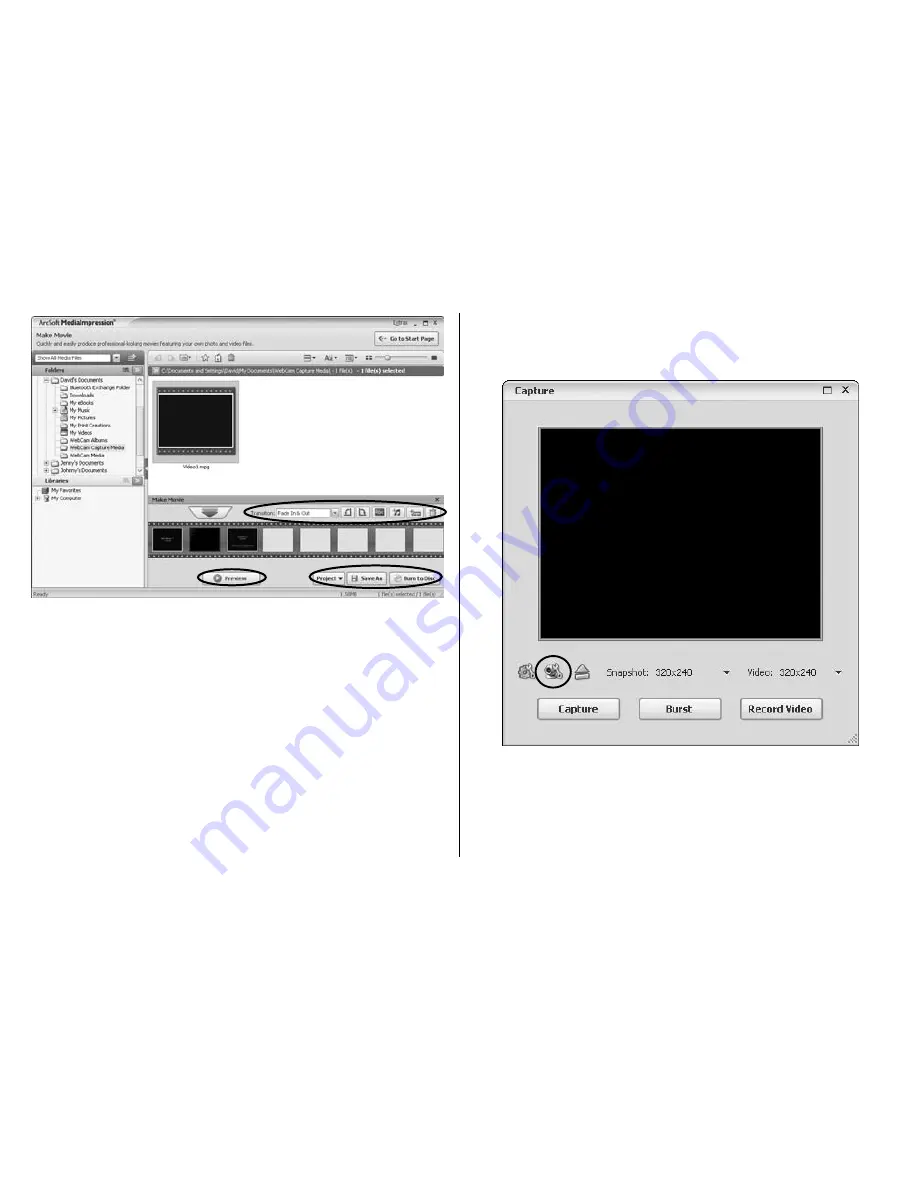
Add and remove video and still shots as desired to 

4. 

compose your movie.
Change the movie options as desired. 
Click 

Preview

 to view the movie.

When done and ready to publish, save the project by 

5. 

clicking 

Project > Save

.

To save a copy of the final movie, click 

Save As

To burn your movie to a DVD or VCD, click 

Burn to Disc

.

change video settings

To change video settings and access other webcam settings, 

click the 

webcam settings

 icon in the Capture window.

Summary of Contents for MyLife HW310NS

Page 1: ...ted lifetime warranty Before using your product please thoroughly read and follow the instructions inside this manual If you still need help see the back page for other support options If you want to know more about our products visit us online at www life works com system requirements Windows XP Service Pack 2 or Windows Vista USB port a USB 2 0 port is required for optimal performance CD ROM dri...

Page 2: ...tures 5 capture still shots or videos 6 change video settings 7 zoom 8 remove video flicker 8 turn on face tracking 9 use special effects 9 product operating tips 10 troubleshooting 10 features 5 0 megapixel maximum resolution motion tracking 3 digital zoom built in microphone adjustable notebook mount user manual in your hands right now ArcSoft MediaImpression and driver installation CD MyLife no...

Page 3: ...e 1 screen that appears click install driver MyLife notebook webcam www life works com 2008 LifeWorks Technology Group LLC iHome is a trademark of SDI Technologies Inc used under license Model IH W310NS IH W311NN IH W312NP IH W313NR exit install driver ArcSoft MediaImpression An 2 InstallShield Wizard dialog box displays Click Next After the driver has been installed an 3 InstallShield Wizard Comp...

Page 4: ...age then click 2 OK An 3 InstallShield Wizard dialog box displays Click Next Click 4 Yes to accept the license agreement then Next to accept the default installation location A 5 Select Program Folder dialog box displays Click Next After the application has been installed an 6 Associated File Formats dialog box displays Click Next An 7 InstallShield Wizard Complete dialog box displays Click Finish...

Page 5: ... webcam You can start using your webcam immediately for video conferencing with one of the many video conferencing services available over the internet Additional features are available through the ArcSoft MediaImpression software advanced features Click Start All Programs ArcSoft MediaImpression MediaImpression to open the Start Page Access all advanced features from this menu ...

Page 6: ...the webcam To record a video clip click Record Video When done click Stop Recording To improve the quality of your videos see change video settings on page 7 When capture is complete close the Capture window 2 The Media Browser displays showing all stills and video captured and the directory in which they were saved To turn a video clip into a movie click 3 Make Movie The Make Movie screen display...

Page 7: ...o view the movie When done and ready to publish save the project by 5 clicking Project Save To save a copy of the final movie click Save As To burn your movie to a DVD or VCD click Burn to Disc change video settings To change video settings and access other webcam settings click the webcam settings icon in the Capture window ...

Page 8: ...ebcam properties dialog box displays Select the Stream Property tab Click and drag the 3 Zoom slider to change the zoom level left to zoom out and right to zoom in Click 4 OK remove video flicker Video flicker is when the image is not steady and often appears as a series of bands moving up or down the screen To remove video flicker Click the 1 webcam settings button in the Capture window see chang...

Page 9: ...cam settings icon in the Capture window see change video settings on page 7 The 2 webcam properties dialog box displays Select the Face Tracking tab Select the 3 Face Tracking option Click 4 OK use special effects A number of effects can be applied to a photo or video To apply an effect Click the 1 webcam settings icon in the Capture window see change video settings on page 7 The 2 webcam properti...

Page 10: ...ssion for more details on how to use the application with your webcam troubleshooting situation try this no video is displayed Ensure the webcam is connected to the computer Use a different USB port Connect the webcam to a USB port on the computer not a USB hub Uninstall and reinstall the driver To uninstall the driver click Start Control Panel Add or Remove Programs select MyLife Notebook Webcam ...

Page 11: ...he receiving antenna Increase the separation between the equipment and the receiver Connect the equipment into an outlet on a circuit different from that to which the receiver is connected Consult a service representative for help Properly shielded and grounded cables and connectors must be used in order to comply with FCC emission limits LifeWorks is not responsible for any radio or television in...

Page 12: ...ted in China 2008 LifeWorks Technology Group LLC iHome is a trademark of SDI Technologies Inc used under license Windows Vista is a registered trademark or trademark of Microsoft Corporation in the United States and or other countries All other brands and logos are trademarks of their respective companies for model numbers IH W310NS IH W311NN IH W312NP IH W313NR document version number 0811 0 ...

Reviews: