11
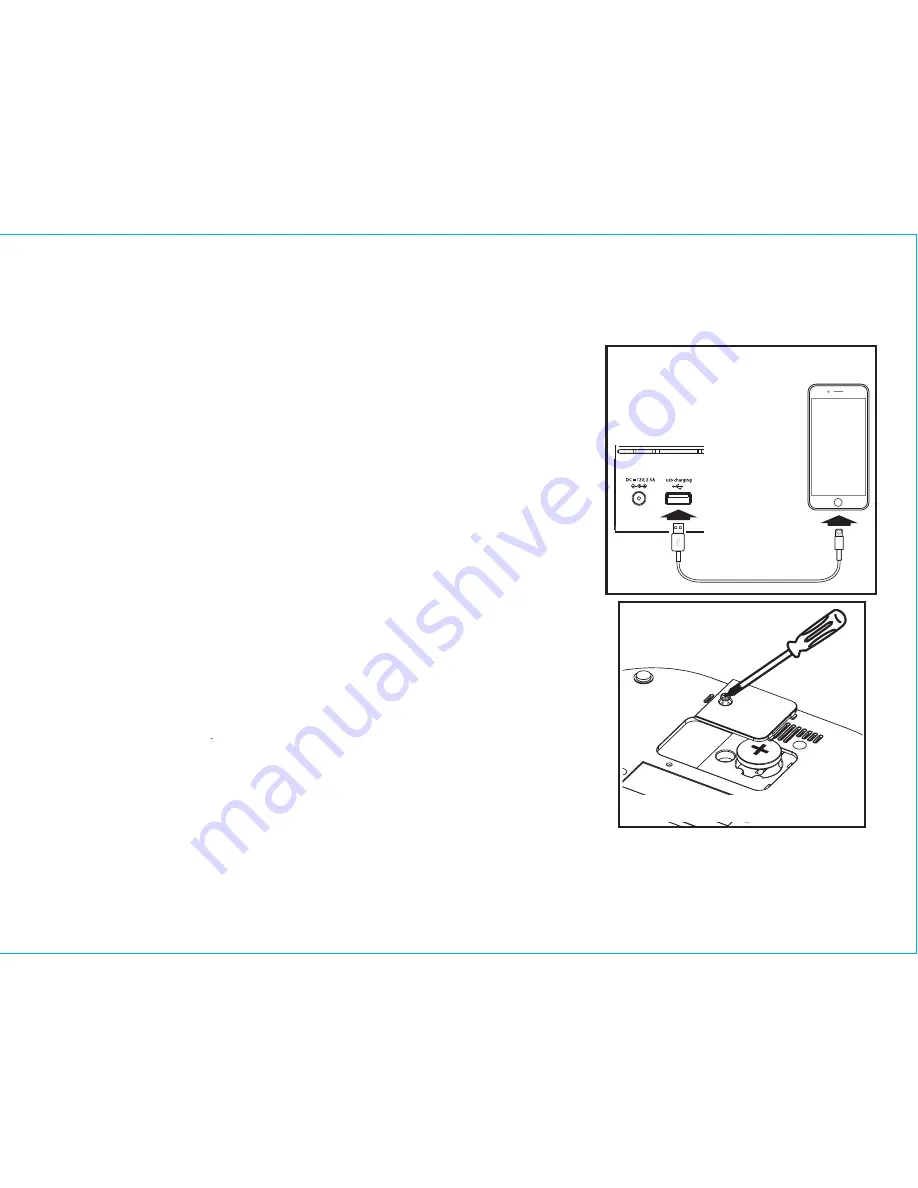
Charging Devices via USB Port
1. Connect the standard size end of a USB cable (not
included) to the USB Port on back of the unit and connect
the other end to the charging port on your device.
2. Monitor the charging on your device. Some devices use a
proprietary charging method and will not charge using the
USB Port. If this happens, you must charge your device
using the charger that came with it.
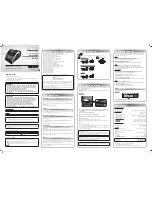
Replacing and Installing Clock Backup Battery
The unit comes with 1 CR2450 back-up battery installed to
provide continuous alarm operation and clock settings in the
event of a power failure.
Remove the battery pull tab before use.
When the Battery Low Icon located on the lower right of the
display is flashing, it is time to replace the back-up battery. The
battery compartment is located on the bottom of the unit.
1.
Please make sure the AC adaptor is connected, otherwise all
settings may be lost during battery replacement.
2. Use a Phillips screwdriver to remove the battery
compartment cover located on the bottom of the unit.
3. Remove exhausted battery. Insert 1 CR2450 battery
checking that the + side is facing you. Replace the
compartment door. Do not over tighten.
Note: Make sure you dispose of battery properly (see your local
regulations).
WARNING:
Lithium batteries can explode or cause burns if disassembled, shorted, recharged, exposed to water,
fire,or high temperatures. Do not place loose batteries in a pocket, purse, or other container containing metalobjects,
mix with used or other battery types, or store with hazardous or combustible materials. Store incool, dry, ventilated
area. Follow applicable laws and regulations for transport and disposal.
Using the
iBTW38
NOTE: Unit must be
plugged into working
outlet to charge devices
Replacing Backup Battery


