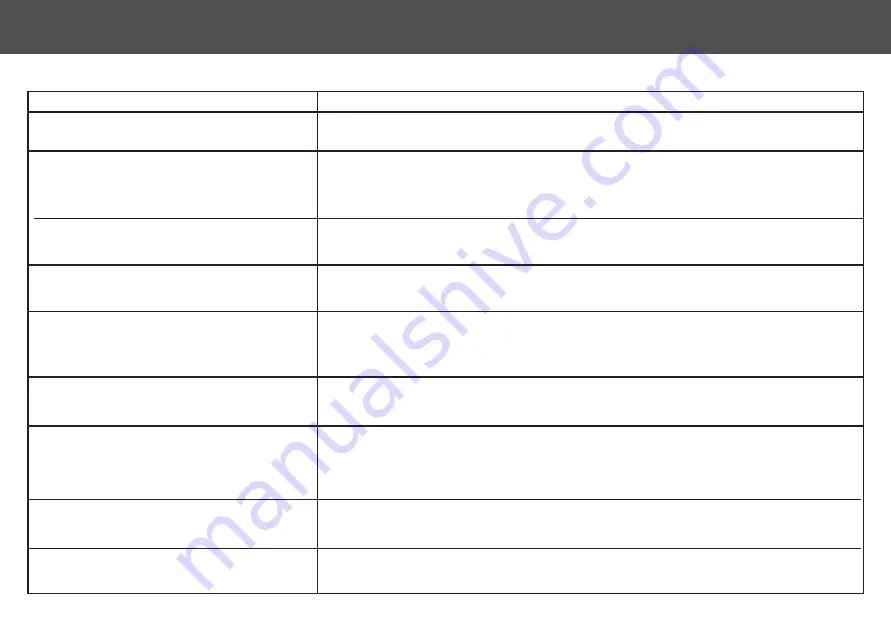
iHome AUTOVAC ECLIPSE iHRV10 Owner'S Manual Download Page 20

PROBLEM

SOLUTION

Unable to power on

Unable to start cleaning

Unable to return to charging dock

Abnormal behavior

Abnormal noise during cleaning

Decrease in cleaning ability or dust falling out 
from dustbin.

Unable to connect to Wi-Fi

Eclipse is not returning to the charging dock 

after spot cleaning or after moving it far from 

the charging dock.

Unable to charge after docking

Scheduled cleaning not working

Please charge before use. This is commonly caused due to low battery.

Please charge before use. This is commonly caused due to low battery.

• There are too many obstacles near the charging dock. Please make sure there is a clear 
area 2 FT of space on either side and 5 FT in front of the charging dock. 
• Eclipse is out of range of the charging dock. Move the Eclipse closer to the charging 
dock to re-establish connection.

Please make sure the areas to be cleaned are well illuminated. Clean the lens with a clean soft cloth, 
and make sure the sensor is not blocked. Avoid using any detergent or cleaning spray while cleaning

Main brush, side brush or left/right wheel may be obstructed, Check underneath the Eclipse to make 

sure it is clear from any obstruction. If there is an obstruction clear it and restart the Eclipse.

• The dustbin is full, please empty the dustbin.

• Check and clean the HEPA filter.
• Check that the brush is clear from obstruction.

Wi-Fi signal is not good , please check that there is a strong Wi-Fi connection while paring. Make 
sure the network is 2.4G and not 5G or dual band.

After spot cleaning or moving the Eclipse far from the charging dock the Eclipse will
re-generate the map. If the Eclipse is far from the charging dock it may not be able to
locate it. Please manually dock the Eclipse to the charging dock to recharge.

Make sure there is no obstruction or heavy dust on both the Eclipse and charging dock

charging contacts.

Please confirm that the Eclipse is connected to your Wi-Fi network.If the Eclipse is not
connected to the network you cannot synchronize the scheduled cleaning task.

18

AUTOVAC ECLIPSE TROUBLESHOOT

Summary of Contents for AUTOVAC ECLIPSE iHRV10

Page 1: ...A U T O VA C E C L I P S E Owner s Guide Model iHRV10 For support content and the latest digital copy of this manual scan the QR code above or visit iHomeclean com ...

Page 2: ...tbin Overview 4 Using The Remote 11 Main Brush Maintenance 15 In The Box 2 AUTOVAC Indicators 5 Using the iHome Clean App 9 Maintaining the Dustbin Filters and Mop 16 Product Overview 3 Setting up the Charging Dock 6 7 Using Your AUTOVAC 10 Using Powermop Scrub 12 14 Side Brush and Sensor Maintenance 17 AUTOVAC Eclipse Troubleshoot 18 ...

Page 3: ...product is an indoor household product Do not use outdoors Do not use this product in wet environment i e bathroom Before using this product please clear the floor of all objects other than furniture as some small objects may obstruct get caught in or damage the Eclipse Please use and store Eclipse in room temperature environments only FCC Information 1 This device complies with Part 15 of the FCC...

Page 4: ...tomer Service Web Email iHomeclean com Phone 877 370 4580 1 Charging Dock 2 Powermop Scrub Attachment 3 Autovac Eclipse 4 Charging Adapter 5 Remote 6 Extra HEPA Filter 7 Extra Mop Pad 8 Cleaning Tool 9 Extra Side Brush 1 2 3 4 5 9 6 7 8 ...

Page 5: ...on 2 Power Button 3 Infrared Sensors 4 Charging Indicator 5 Charging Contacts 6 Bin Release Button 7 2 IN 1 Dustbin Mop Tank 8 Powermop Scrub Attachment 9 Side Brush 10 Omnidirectional Wheel 11 Charging Contacts 12 Detection Sensors 13 Left Wheel 14 Right Wheel 15 Main Brush 16 2 IN 1 Dustbin Mop Tank ...

Page 6: ...1 Water Fill Cap 2 Filter Door Latch 5 Screen Filter 6 Washable Mop Pad 7 Powermop Scrub Attachment 8 Dustbin Latch 3 Bin Release Button 4 HEPA Filter 1 4 5 3 8 2 6 7 4 DUSTBIN OVERVIEW ...

Page 7: ...light Fully charged Flashing red light Error state Light off Off sleeping Press to return to charging dock for recharging POWER BUTTON POWER HOME LED STATES WIFI INDICATOR STATES CHARGING INDICATOR LED STATES HOME BUTTON CHARGING INDICATOR WIFI INDICATOR Flashing white light Network configuration mode Solid white light Wifi connected Light off Wifi disconnected Network configuration failure LED wi...

Page 8: ...UTOVAC The following pages outline the complete setup process For your convenience we created a step by step video to help guide you through setup Please scan the QR code to access the video and other support content 6 ...

Page 9: ...ry to prevent obstructions when the Eclipse returns to charge Avoid using a power source that may inadvertently be switched off e g power strip outlet controlled by a light switch GFCI Plug the power adapter into the port on the bottom of the charging dock and secure the cable into the channel Choose a location on a hard floor surface near a power outlet Place the charging dock against the wall as...

Page 10: ...ess the button The Eclipse will navigate to the charging dock and beep when properly docked The Home icon will flash green while charging and turn solid green when finished STEP 1 STEP 2 NOTE Allow Eclipse to fully charge up to 5 hours before first use The indicators on your robot will turn solid green when fully charged 8 SETTING UP THE AUTOVAC ...

Page 11: ...TE Connecting Eclipse to Wi Fi is not required but highly recommended Using the iHome Clean app you can follow the steps to connect your Eclipse to Wi Fi The app will let you manage Eclipse from anywhere set cleaning schedules view cleaning history access support and more 9 USING THE IHOME CLEAN APP An iPhone iOS 10 or later OR Android 4 4 or later Make sure that your phone is connected to your de...

Page 12: ...ire surface Once cleaning is finished the Eclipse will automatically return back to charge Powermop Scrub Fill the water tank and connect the Powermop Scrub attachment Eclipse will automatically mop and vacuum your floor area If you prefer mopping only use the iHome Clean App to turn off vacuum suction during a Powermop cycle Manual Control Using the navigational D Pad on the remote control or in ...

Page 13: ...remote control range is 10 20 feet 10 20 FT Home Button return to charge Mute Robot Audio Notifications Spot Clean Powermop Scrub Suction Power Adjustment Manual Navigation Directional Keys Start Pause Button Starts an Auto Clean Cycle OR pause resume an existing cleaning cycle 11 USING THE REMOTE ...

Page 14: ...itiate wet mopping with your Autovac Place the mop pad onto the mop attachment and secure it to the Velcro strips Slip corners of the mop pad over the plastic tabs at the rear of the mop attachment 1 Slide mop attachment onto dustbin as shown in figure below until you hear a click confirming that it is locked in place 2 12 USING POWERMOP SCRUB ...

Page 15: ...e Eclipse with the mop attachment still installed Open the water fill cap on the dustbin and fill with water then close the cap Please ensure that the mop attachment is connected before filling water 3 4 13 USING POWERMOP SCRUB ...

Page 16: ...ctivate Powermop Scrub mode in the app or using the remote control Install the dustbin with the mop attachement still installed into the Eclipse according to the figure below 5 6 14 USING POWERMOP SCRUB ...

Page 17: ...remove the cover 2 Remove the main brush and clean with the included cleaning tool as seen in the figure below 3 Replace the main brush and snap the cover back into place NOTE It is recommended to replace the main brush every 6 12 months depending on use Main Brush Cover Main Brush MAINTENANCE SCHEDULE PART Main Brush Once a month Replace every 6 12 months Side Brushes Once a month Replace every 6...

Page 18: ... surface with a dry cloth or use the cleaning tool Rinse the primary filter with water and let dry completely before using Remove the mop pad to wash machine washable Clean the inside of the dustbin thoroughly with a dry cloth 1 2 3 4 Primary filter Mop Pad HEPA filter 16 MAINTAINING THE DUSTBIN FILTERS AND MOP ...

Page 19: ...ps screwdriver to unscrew the side brush screw and remove the side brush 2 Remove dirt and debris and reinstall using Philips screwdriver 3 It is recommended to wipe dust from the charging pins on your robot and charge dock regularly NOTE It is recommended to replace the side brush every 6 12 months depending on use Charging Pins ...

Page 20: ...loth and make sure the sensor is not blocked Avoid using any detergent or cleaning spray while cleaning Main brush side brush or left right wheel may be obstructed Check underneath the Eclipse to make sure it is clear from any obstruction If there is an obstruction clear it and restart the Eclipse The dustbin is full please empty the dustbin Check and clean the HEPA filter Check that the brush is ...

Reviews: