background image

Service 

D8-3_EN 

– V1.0 

14/14 

Status and Error Messages 

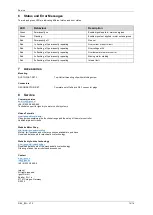
The red and green LED are indicating different status and error states. 
 

LED 

Behaviour  

Description 

Green 

Permanently on 

Enable signal applied - motor energised 

Green 

Flashing 

Enable signal not applied - motor not energised 

Red 

Permanently off 

No error 

Red 

1x flashing, off; permanently repeating 

Overcurrent or short circuit 

Red 

2x flashing, off; permanently repeating 

Overvoltage at V± 

Red 

3x flashing, off; permanently repeating 

Overtemperature motor control 

Red 

4x flashing, off; permanently repeating 

Missing motor winding 

Red 

5x flashing, off; permanently repeating 

Internal fault 

Accessories 

Mounting  

DLE-TOPHAT-SET-1 


Top-Hat rail mounting clip with matching screw 


Connectors 

D8-CONNECTOR-SET 


Complete set off all dryve D8-1 connector plugs 

Service 

Customer service 

[email protected]


+49 (0) 2203-9649-845 
Technical support for igus dryve motor control systems 


Videos/Tutorials 

www.igus.eu/dryve/tutorial 

Video guides explaining the functional range and the setup of the motor controller 
Additional product videos 


Website Motor Shop 

http://www.igus.eu/motorshop


Motors, limit switches and other accessories available to purchase 
Download data sheets for electrical drive technology 


Website drylin drive technology 

www.igus.eu/drivetechnology


Download data sheets of the mechanical drive technology 
Ordering of axes, linear robots and accessories 


Contact 

www.igus.eu


[email protected]


+49 (0) 2203-9649-0 
 
 
Imprint 
All rights reserved: 
igus

®

 GmbH 

Spicher Str. 1a 
51147 Cologne, Germany 
© 2022 

Summary of Contents for motion Plastics D8-3

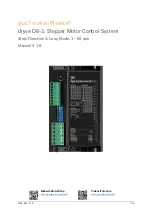
Page 1: ...V1 0 1 14 igus motion Plastics dryve D8 3 Stepper Motor Control System Step Direction Loop Mode 1 60 rpm Manual V 1 0 Website MotorShop http www igus eu motorshop Videos Tutorials www igus eu dryve t...

Page 2: ...2 1 4 Environmental conditions 6 3 Installation 7 3 1 Mechanical Installation 7 3 2 Electrical Installation 7 3 2 1 Pin Assignment 8 3 2 2 Connection Scheme Signal In Output 8 3 3 Integration into Saf...

Page 3: ...sonal injury or damage to property resulting from misuse or unauthorised technical modification of the motor controller igus reserves the right to make changes and improvements to the product or the t...

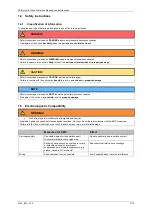
Page 4: ...nt or property damage NOTE Safety instructions marked with NOTE indicate a potential hazardous situation Disregard of the notice may possibly result in property damage 1 5 Electromagnetic Compatibilit...

Page 5: ...dditional switches and sensors Simple control With the loop mode a continuous movement between 2 limit switches can be executed without the need for a master controller The movement is executed at a f...

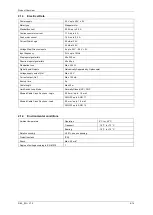
Page 6: ...n 50 s Dissipation Loss Max 264 W Digital Inputs Outputs Galvanically Separated by Optocoupler Voltage supply output Out Max 30 V Current output Out Max 100 mA Boot up time 2 s Cable length Max 30 m L...

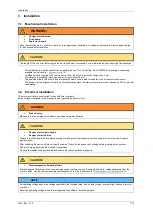
Page 7: ...stallation The motor controller is constructed for use with direct currents Every voltage mentioned in this manual can be regarded as direct current WARNING Risk of injury Make sure that an emergency...

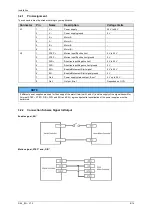
Page 8: ...t Negative limit 5 V to 24 V 4 DIR Direction input Negative limit ground 0 V 5 EN Enable Movement Start signal 5 V to 24 V 6 EN Enable Movement Start signal ground 0 V 7 Out Power supply status output...

Page 9: ...urrent No voltage free status of the motor Switching off the enable signal EN Direct de energisation of the motor Uncontrolled coasting of the motor Motor could remain energised in a fault condition S...

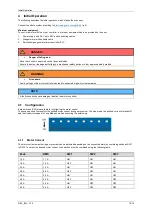
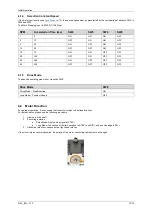
Page 10: ...are available for configuring the motor control These can be used to preselect the emitted motor current during a movement the step mode the emitted current at standstill and the fixed motor speed in...

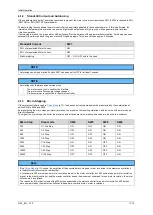
Page 11: ...1 3 Micro Stepping If the motor controller is used in Pulse Mode p 13 the desired micro step mode must be preselected by the combination of switch SW4 to SW6 and SW 8 By preselecting the micro steps p...

Page 12: ...FF OFF OFF OFF 4 1 5 Drive Mode The desired operating mode is set via switch SW8 Drive Mode SW8 Pulse Mode Step Direction ON Loop Mode Constant Speed OFF 4 2 Motor Direction For a proper operation it...

Page 13: ...e connected to the STEP input and the negative to DIR To start the continuous motion sequence a 5 V to 24 V signal must be applied to input EN After applying the signal a movement towards the positive...

Page 14: ...SET 1 Top Hat rail mounting clip with matching screw Connectors D8 CONNECTOR SET Complete set off all dryve D8 1 connector plugs 8 Service Customer service de dryve igus net 49 0 2203 9649 845 Technic...

Reviews: