background image

Commissioning 

8/13 

Manual i.Sense CF.D - V 1.1 


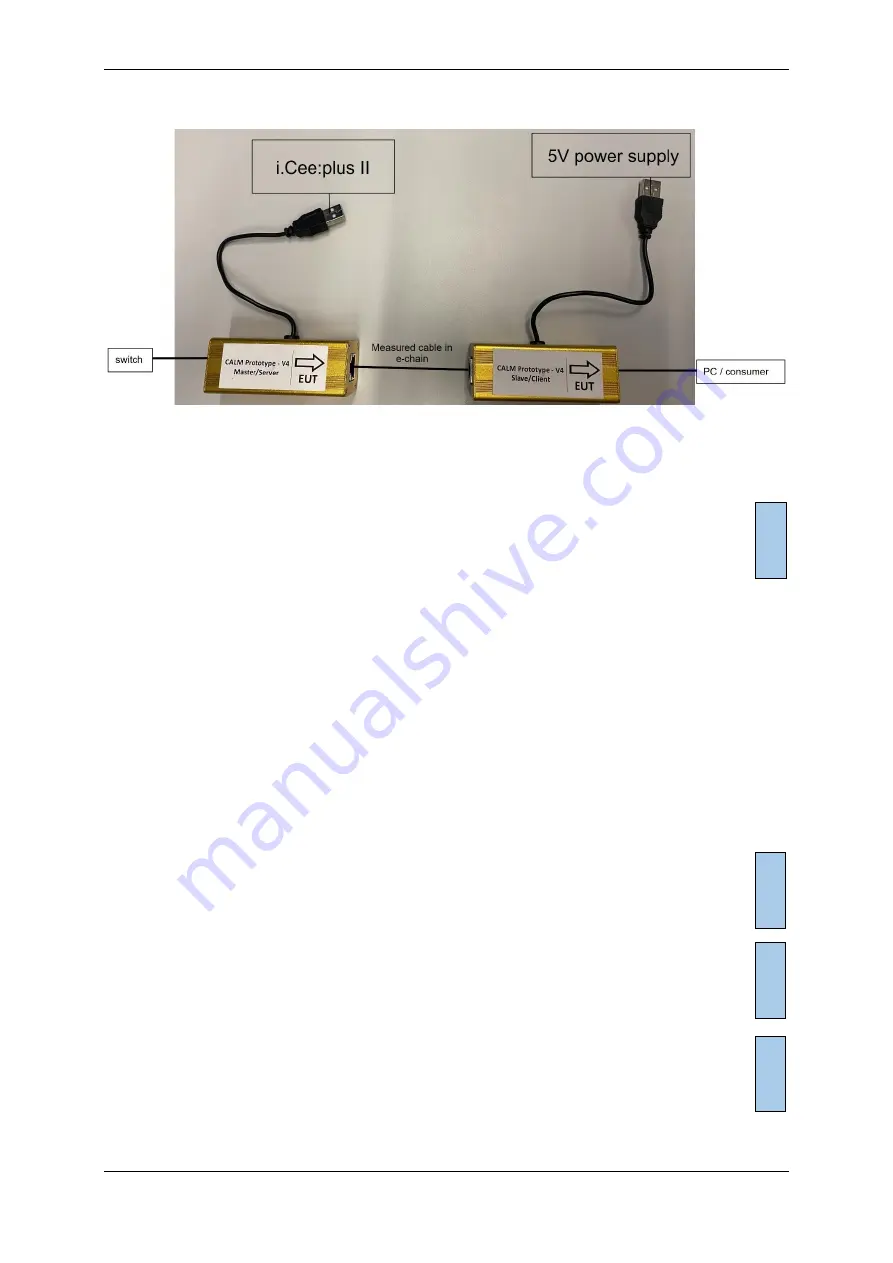
Installation scheme 


5  Configuration mode 

1) 

Press and hold the button for about 10 seconds until LED magenta lights up 

2) 

Connecting the phone/PC to the WiFi network "Master-Calm-xxxx" or "Client-
Calm-xxxx".  

3) 

Wait for a pop-up browser to open with the web page and portal 

4) 

In the portal there is a menu hidden behind the icon with the three horizontal 
lines. Within this menu there are four options. Three of them are directly visible, 
one is hidden for the time being. 

a. 

New Connection:  

Lists  WiFi  networks  in  range.  After  entering  the  correct  password,  the  module  connects  to  the 
network.  If    the  connection  is  disconnected,  reload  the  page  or  perform  the  same  step  again.   
Although this does not help, the distance from module to WLAN access point may be too large,  
reduce distance 

b. 

Saved Networks: 

Lists the networks that have already been connected and allows you to connect to them faster. 

c. 

Exit:  

Closes the portal and resumes normal operation of the sensor. 

d. 

Update:  

Only visible when the module is connected to a WiFi network that contains an Internet connection. 
List of available updates  appears,by  clicking these and the update button the update is loaded. A 
progress bar appears. After a successful update, the device returns to measuring mode. 

6  Commissioning 

Connecting the master module to i.Cee:plus II via USB 

Power the client module 

Setting the baud rate etc. 

Commands: 

o


Overview list 

o


one-time measurement 

o


15 

start permanent measurement 

o


Stop 100 permanent measurements 

o


Set 200 transmit power 

o


Set 300  measurement intervals 

o


Set 400  transmission channel 

o


500 

Overview of settings made 

Start measurement, Works with i.Cee:plus II via plug and play 

Adjusting the threshold in Grafana  


When  using  multiple  CF.  D 
Sets 

in 

the 

immediate 

vicinity,  the  radio  channels 
must be adjusted. 

N

O

T

E

!


By  default,  the  set  returns 
new values once per second. 
This can be adjusted up to a 
maximum  value  of  once  a 
day. 

N

O

T

E

!


When  using  long  cables,  an 
adjustment  of  the  power  is 
necessary. 

N

O

T

E

!


If  no  connection  to  the 
network  is  possible,  reduce 
the distance until connection 
is possible. 

N

O

T

E

!


Summary of Contents for i.Sense CF.D

Page 1: ...1 13 Manual i Sense CF D V 1 1 igus smart plastics i Sense CF D Manual V1 1 Instruction manual German version...

Page 2: ...6 4 Installation 7 4 1 Mechanical installation 7 4 2 Electrical installation 7 4 2 1 Selection of power supply 7 4 2 2 Plug assignment and sensor connection 7 5 Configuration mode 8 a New Connection 8...

Page 3: ...with the notice may lead to a serious or even fatal accident or damage to property WARNING Safety instructions marked with CAUTION indicate any dangerous situation Failure to comply with the notice m...

Page 4: ...Qualified personnel igus GmbH assumes no liability for personal injury or property damage resulting from incorrect use or unauthorized technical changes to the i Sense CF D igus GmbH reserves the rig...

Page 5: ...alves with interference suppression combination or spark extinguishing elements e g diodes varistors RC links Reduce mutual interference coupling Wiring Keep cables as short as possible Avoid capaciti...

Page 6: ...on An operating voltage above the voltage specified in the technical data destroys the i Sense CF D Select an operating voltage that is within the voltage range specified in the technical data Be awar...

Page 7: ...in the system Secure the power supply against re activation After turning off wait at least 5 minutes for the capacitors to discharge Check the absence of voltage before working in the system Occurre...

Page 8: ...es normal operation of the sensor d Update Only visible when the module is connected to a WiFi network that contains an Internet connection List of available updates appears by clicking these and the...

Page 9: ...6 1 Adjusting the threshold value i Cee plus II user interface 1 Login Grafana 2 Change the numeric color display on the right red box by clicking On Edit 3 Confirm by clicking on Apply and Save Login...

Page 10: ...Commissioning 10 13 Manual i Sense CF D V 1 1 4 Change alerting rule 5 Adjust threshhold...

Page 11: ...tton LED Device boots up red Button LED An error has occurred Magenta Button LED Device is in configuration mode Off Button LED controller is not working properly None Device is disconnected from powe...

Page 12: ...and client module 10 FAQs How do you retrieve the determined sensor data o Under Sensorics History of the i Cee plus II user interface Is it possible to download the data from the user interface o In...

Page 13: ...ps www igus de info isense cf d ohne opferadern Download manuals FW updates and certificates Website smart Plastics https www igus de info vorausschauende wartung smart plastics Possibility to order s...

Reviews: