Homeguard CMS PC Client Software
MENU - Do What
Access with User ID
Choose ‘User name login’, enter your App username and password to login. You should see all your
devices.
Step1:
Click “Tools”
→
“Internet Options”
→
“Security”
→
“Internet”
→
“Custom Level”
Step2:
Scroll down until you see ACTIVEX CONTROLS AND PLUG-INS.
(lf you have Internet Explorer 9 or 11, change ALLOW ACTIVEX FILTERING to DISABLE. Other
versions of IE will not have this option.)
Step3:
Change the follow ACTIVEX controls to PROMPT:
Download signed ACTIVEX controls
Download unsigned ACTIVEX controls
Initialize and script ACTIVEX controls not marked as safe for scripting
Step4:
When done click OK, and exit the Security Settings Menu.
Excepted for IE, you can also download and install the CMS software on your PC to view the system.
The CMS software can found at included CD.
NVR
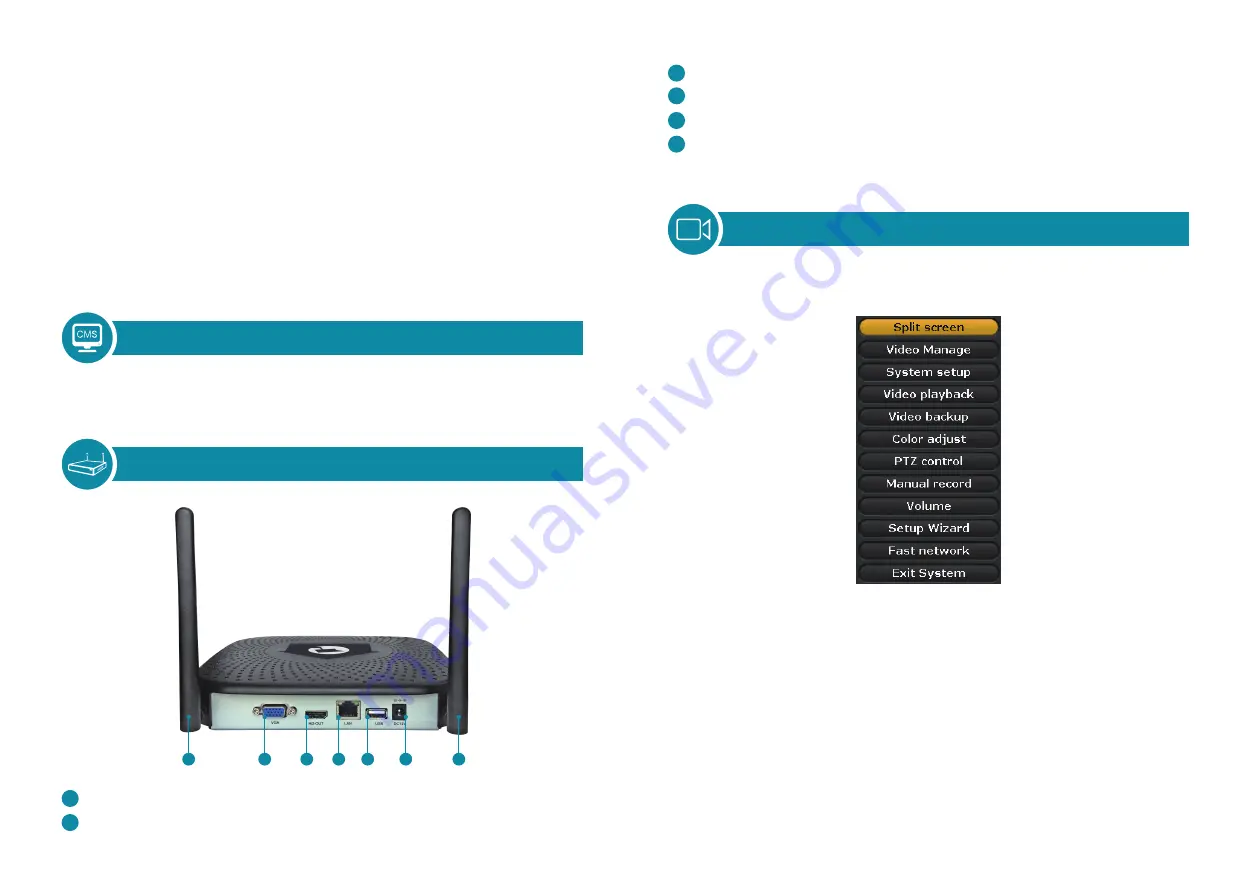
Click right button you can enter the main menu; click right button again you can exit the current menu
or return.
•
Split screen:
change status of live view. You can choose to view multiple cameras or any single camera.
•
Video Manage:
manage IP cameras and NVR channels
•
System setup:
All system settings
•
Video playback:
playback recorded videos
•
Video backup:
backup recorded videos
•
Color adjust:
adjust the image settings of each camera
•
PTZ control:
Control PTZ cameras or preset them. (works only for PTZ cameras)
•
Manual record:
shortcut to change the record settings
•
Volume:
Adjust volume of audio cameras(works only for audio cameras)
•
Setup Wizard:
step by step guide of 1st time general settings
•
Fast Network:
shortcut to network settings
•
Exit System:
logout, reboot, close screen output and shut down the system
WiFi Antenna Ports: Double antennas to extend WiFi range
VGA Port: For viewing on VGA monitor
HDMI Port: For viewing on HDTV
LAN Port: Connect your NVR to the Internet
USB Port: For mouse and backup
Power Input
1
2
3
4
5
6
1
2
3
4
5
6
1
11
12


