PCIE-Q57A PICMG 1.3 CPU Card
Page 45
Step 2:
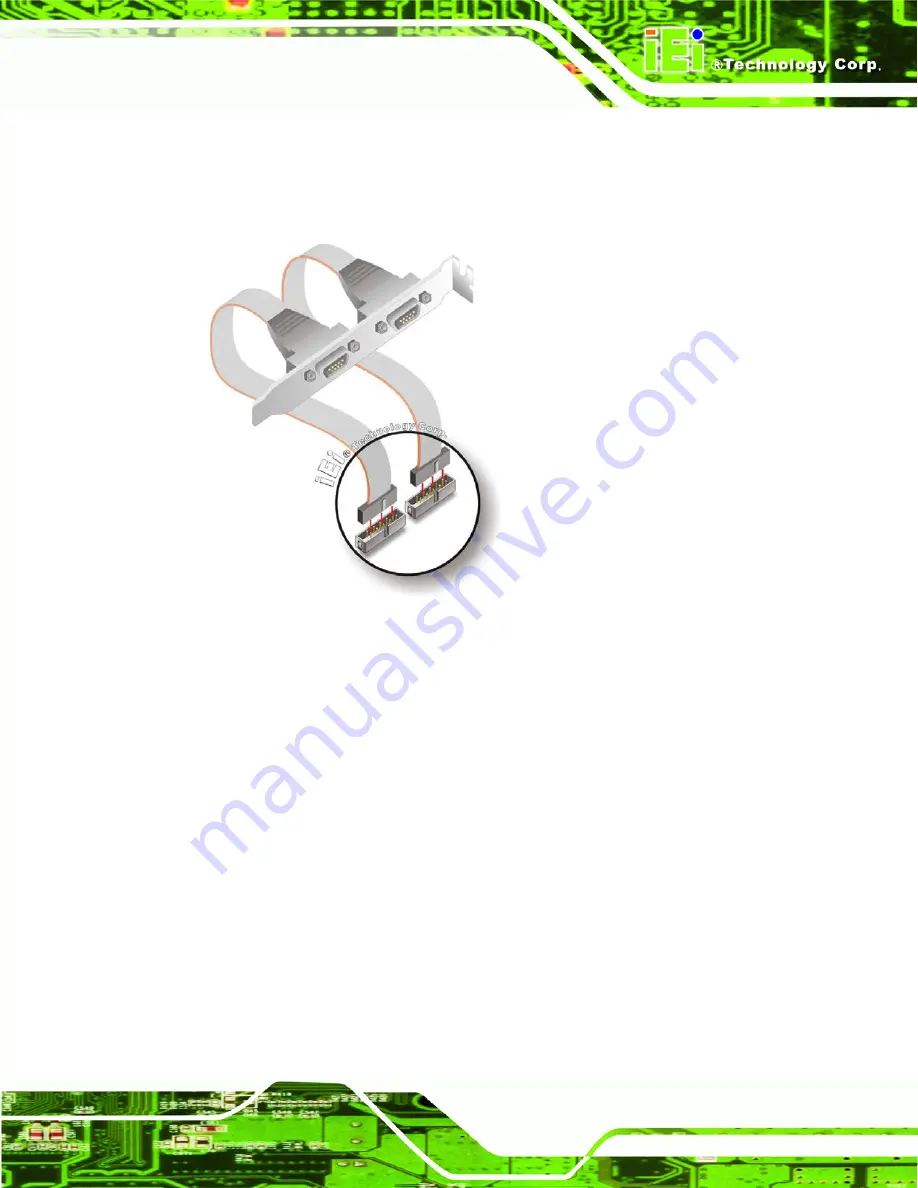
Insert the cable connectors
. Insert one connector into each serial port box
headers. See Figure 4-9. A key on the front of the cable connectors ensures the
connector can only be installed in one direction.
Figure 4-9: Dual RS-232 Cable Installation
Step 3:
Secure the bracket
. The dual RS-232 connector has two D-sub 9 male
connectors secured on a bracket. To secure the bracket to the chassis please
refer to the reference material that came with the chassis.
Step 0:
4.7.2 SATA Drive Connection
The PCIE-Q57A is shipped with two SATA drive cables and one SATA drive power cable.
To connect the SATA drives to the connectors, please follow the steps below.
Step 1:
Locate the connectors
. The locations of the SATA drive connectors are shown
in
Chapter 3
.
Step 2:
Insert the cable connector
. Press the clip on the connector at the end of the
SATA cable and insert the cable connector into the on-board SATA drive
connector. See Figure 4-10.
Summary of Contents for PCIE-Q57A
Page 13: ...PCIE Q57A PICMG 1 3 CPU Card Page 1 1 Introduction Chapter 1 ...
Page 21: ...PCIE Q57A PICMG 1 3 CPU Card Page 9 2 Unpacking Chapter 2 ...
Page 25: ...PCIE Q57A PICMG 1 3 CPU Card Page 13 3 Connectors Chapter 3 ...
Page 44: ...PCIE Q57A PICMG 1 3 CPU Card Page 32 4 Installation Chapter 4 ...
Page 66: ...PCIE Q57A PICMG 1 3 CPU Card Page 54 5 BIOS Screens Chapter 5 ...
Page 111: ...PCIE Q57A PICMG 1 3 CPU Card Page 99 Appendix A A Intel AMT Configuration ...
Page 116: ...PCIE Q57A PICMG 1 3 CPU Card Page 104 Appendix B B BIOS Menu Options ...
Page 120: ...PCIE Q57A PICMG 1 3 CPU Card Page 108 Appendix C C One Key Recovery ...
Page 148: ...PCIE Q57A PICMG 1 3 CPU Card Page 136 Appendix D D Terminology ...
Page 153: ...PCIE Q57A PICMG 1 3 CPU Card Page 141 Appendix E E Watchdog Timer ...
Page 156: ...PCIE Q57A PICMG 1 3 CPU Card Page 144 Appendix F F Hazardous Materials Disclosure ...


