KINO-780AM2 Motherboard
Page 41
Step 7:
Spread a proper amount of thermal paste
onto the bottom of the cooling fan
heat sink. The thermal paste between the CPU and the heat sink is important for
optimum heat dissipation.
Step 8:
Properly orient the cooling kit.
Be sure the cooling kit is properly oriented
before installing the cooling kit into the preinstalled cooling kit bracket.
Step 9:
Install the cooling kit into the preinstalled cooling kit bracket.
See Figure
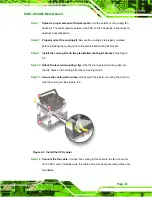
Step 10:
Attach the levered mounting clips.
Slip the four levered mounting clips into
the clip holes on the cooling kit bracket. See Figure 4-5.
Step 11:
Secure the cooling kit in place.
Gently push the plastic mounting clip down to
lock the cooling kit. See Figure 4-5.
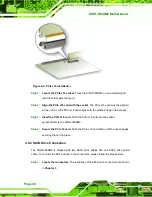
Figure 4-5: Install the CPU cooler
Step 12:
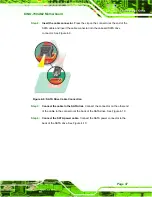
Connect the fan cable
. Connect the cooling kit fan cable to the fan connector
on the CPU card. Carefully route the cable and avoid heat generating chips and
fan blades.
Step 0:
Summary of Contents for KINO-780AM2
Page 12: ...KINO 780AM2 Motherboard Page xii...
Page 13: ...KINO 780AM2 Motherboard Page 1 Chapter 1 1 Introduction...
Page 16: ...KINO 780AM2 Motherboard Page 4 Figure 1 3 KINO 780AM2 Dimensions mm...
Page 20: ...KINO 780AM2 Motherboard Page 8 Chapter 2 2 Packing List...
Page 24: ...KINO 780AM2 Motherboard Page 12 Chapter 3 3 Connectors...
Page 45: ...KINO 780AM2 Motherboard Page 33 Chapter 4 4 Installation...
Page 70: ...KINO 780AM2 Motherboard Page 58 Chapter 5 5 BIOS...
Page 114: ...KINO 780AM2 Motherboard Page 102 Appendix A A BIOS Options...
Page 117: ...KINO 780AM2 Motherboard Page 105 Load Optimal Defaults 100 Load Failsafe Defaults 101...
Page 118: ...KINO 780AM2 Motherboard Page 106 Appendix B B Terminology...
Page 122: ...KINO 780AM2 Motherboard Page 110 Appendix C C Digital I O Interface...
Page 125: ...KINO 780AM2 Motherboard Page 113 Appendix D D Watchdog Timer...
Page 128: ...KINO 780AM2 Motherboard Page 116 Appendix E E Hazardous Materials Disclosure...

