background image

2

Before reading this manual

This manual contains basic instructions on installing and using Digital Video Recorder, an IDIS product. 
Users who are using this product for the first time, as well as users with experience using comparable products, 
must read this manual carefully before use and heed to the warnings and precautions contained herein while using 
the product. Safety warnings and precautions contained in this manual are intended to promote proper use of the 
product and thereby prevent accidents and property damage and must be followed at all times.
Once you have read this manual, keep it at an easily accessible location for future reference.

 • The manufacturer will not be held responsible for any product damage resulting from the use of unauthorized parts and 

accessories or from the user's failure to comply with the instructions contained in this manual.

 • It is recommended that first-time users of Digital Video Recorder and individuals who are not familiar with its use seek 

technical assistance from their retailer regarding product installation and use.

 • If you need to disassemble the product for functionality expansion or repair purposes, you must contact your retailer and 

seek professional assistance.

 • Both retailers and users should be aware that this product has been certified as being electromagnetically compatible for 

commercial use. If you have sold or purchased this product unintentionally, please replace with a consumer version.

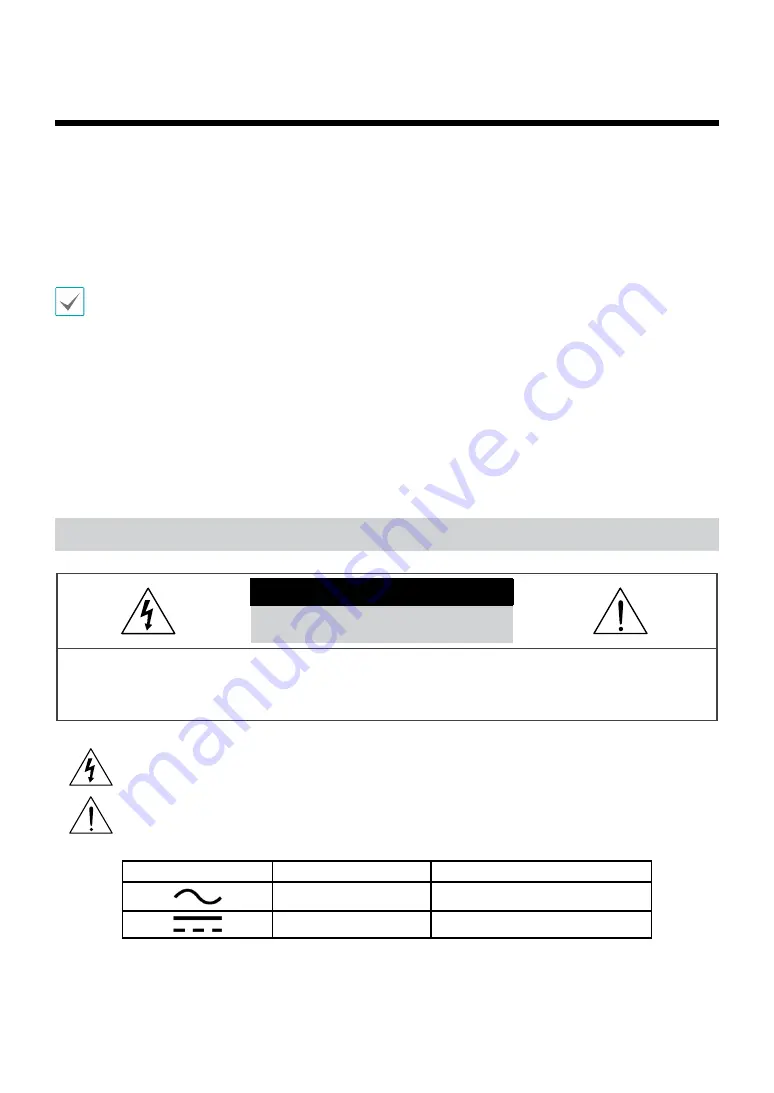
Safety Precautions

CAUTION

RISK OF ELECTRIC SHOCK

DO NOT OPEN

CAUTION: TO REDUCE THE RISK OF ELECTRIC SHOCK,

DO NOT REMOVE COVER (OR BACK).

NO USER-SERVICEABLE PARTS INSIDE.

REFER SERVICING TO QUALIFIED SERVICE PERSONNEL.

The lightning flash with arrowhead symbol, within an equilateral triangle, is intended to alert the user to the 
presence of uninsulated "dangerous voltage" within the product’s enclosure that may be of sufficient magnitude to 
constitute a risk of electric shock.

The exclamation point within an equilateral triangle is intended to alert the user to the presence of important 
operating and maintenance (servicing) instructions in the literature accompanying the appliance.

Symbol

Publication

Description

IEC60417, No.5032

Alternating current

IEC60417, No.5031

Direct current

Summary of Contents for TR-4100 Series

Page 1: ...Digital Video Recorder Installation Manual TR 4108 TR 4116 TR 4108R TR 4116R ...

Page 2: ...heir retailer regarding product installation and use If you need to disassemble the product for functionality expansion or repair purposes you must contact your retailer and seek professional assistance Both retailers and users should be aware that this product has been certified as being electromagnetically compatible for commercial use If you have sold or purchased this product unintentionally p...

Page 3: ...ug this equipment from the wall outlet and refer servicing to qualified service personnel under the following conditions A When the power supply cord or the plug has been damaged B If liquid is spilled or objects have fallen into the equipment C If the equipment has been exposed to rain or water D If the equipment does not operate normally by following the operating instructions adjust only those ...

Page 4: ...NCE AT THEIR OWN EXPENSE WARNING CHANGES OR MODIFICATIONS NOT EXPRESSLY APPROVED BY THE PARTY RESPONSIBLE FOR COMPLIANCE COULD VOID THE USER S AUTHORITY TO OPERATE THE EQUIPMENT THIS CLASS OF DIGITAL APPARATUS MEETS ALL REQUIREMENTS OF THE CANADIAN INTERFERENCE CAUSING EQUIPMENT REGULATIONS WEEE Waste Electrical Electronic Equipment Correct Disposal of This Product Applicable in the European Union...

Page 5: ...rs The information in this manual is believed to be accurate as of the date of publication even though explanations of some functions may not be included We are not responsible for any problems resulting from the use thereof The information contained herein is subject to change without notice Revisions or new editions to this publication may be issued to incorporate such changes The software inclu...

Page 6: ...oduction 7 Product Features 7 Accessories 9 Overview 10 Dimension 10 Front Panel 11 Rear Panel 14 Rear Panel Connections 15 Remote Control 19 Part 2 Appendix 22 System Log Types 22 Error Code Types 23 Troubleshooting 24 Specifications 25 ...

Page 7: ...nu control controls camera menu using coax cable Fast and easy search feature Time Lapse Event log Motion Text In Simultaneously survey record play back and transmit data in real time Graphic User Interface GUI and multilingual Multiple recording modes Schedule Event Pre Event and Panic Continuous Recording in Disk Overwrite Mode Two USB 2 0 ports for connecting peripherals upgrading software and ...

Page 8: ...number of cameras that can be displayed For simplicity the illustrations and descriptions in this document refer to the 16 channel model iRAS WebGuard ATM POS Audio input 1 4 Cameras 1 16 HDMI Monitor VGA Monitor USB HDD Sensors 1 16 Flash Drive Flashing Light Siren Alarm Output Network Mouse Remote Keyboard Digital Video Recorder IR Remote Control Audio Output eSATA HDD SPOT Monitor ...

Page 9: ...k the contents inside to ensure that all the following accessories are included Digital Video Recorder Power Cable Quick Guide Manual and IDIS Center Program CD Optical USB Mouse IR Remote Control SATA2 cables Rack mount Kit Assembly Screws for Adding Hard Disk Drives ...

Page 10: ...Part 1 Introduction 10 Overview Dimension Front 430 88 6 5 94 5 Side 94 5 412 8 424 ...

Page 11: ...e more than one function Remote control sensor is located on the middle of the front panel Ensure that the sensor remains unobstructed at all times If obstructed the sensor might not be able to receive remote control signals Placing a Wi Fi Bluetooth or any other wireless communication device near the DVR may interfere with remote control signal transmission Access various windows and menus using ...

Page 12: ... holding the Menu button for 3 seconds activates Edit Group mode 4 PTZ Button Pressing the PTZ button initiates PTZ mode allowing you to control PTZ cameras In PTZ mode use the arrow buttons to move the camera up down left and right Zoom In Zoom Out Focus Near Focus Far Preset View Preset Set 5 Bookmark Button Add the current playback point to the bookmark list or move to the registered bookmark p...

Page 13: ...an ethernet USB Ports Storage Device Connection Connect an external USB hard drive or a USB flash memory device to one of the USB ports for use with the Clip Copy feature The external storage device should be placed as close to the DVR as possible It is recommended that you use a connection cable that is no longer than 180cm in length Use the connection cable included with your external storage de...

Page 14: ...el Flash Memory Mouse USB HDD IR Remote Control Rear Panel 1 2 4 5 6 3 7 8 9 0 1 Video Input 2 Alarm Connection Ports 3 RS 485 Port 4 RS 232 Port 5 eSATA Port 6 Factory Reset Button 7 SPOT HDMI VGA Out Port 8 Network Port 9 Audio In Out 0 Power In Port ...

Page 15: ... the GND connector All connectors marked GND are common connectors NC NO Relay Alarm Outputs This DVR is capable of activating deactivating buzzers lights and other external devices Connect the device to the C and NO Normally Open connectors NC NO is a relay output which sinks 2A 125VAC and 1A 30VDC For more information on alarm out setup refer to the Alarm Out in the operation manual ARI Alarm Re...

Page 16: ...the eSATA device and then power the eSATA device first and then DVR back on To disconnect an eSATA device first turn off the DVR and unplug the power cable Turn off the eSATA device and then disconnect the eSATA connection cable Factory Reset Located right next to the HDMI Out port on the rear of the DVR is a switch that once activated will reset the DVR to all its initial factory settings A facto...

Page 17: ...ure a built in audio amplifier unit and therefore requires the user to purchase a speaker system with a built in amplifier separately It s possible to connect an amplified audio source to the DVR but microphones that do not have a built in amplifier will not function properly if connected to the DVR directly If this is the case connect the microphone to the DVR via a pre amp Check your local laws ...

Page 18: ... Introduction 18 Connections on the Rear Panel Microphone Speaker VGA Monitor HDMI Monitor Sensor Keyboard Power Alarm POS IDIS Center Remote Monitoring Analog Camera Network SPOT Monitor eSATA Storage Device ...

Page 19: ...Button 4 SEQUENCE Button 5 FREEZE Button 6 ALARM Button 7 Camera Buttons 8 TRIPLEX Button 9 AUDIO Button 0 BOOKMARK Button CLIP COPY Button FOCUS NEAR FAR Button PRESET SET VIEW Button ZOOM IN OUT Button MENU Button PTZ Button Arrow Buttons Enter Button ZOOM Button PANIC Button a Playback Buttons ...

Page 20: ...back at the same time 9 AUDIO Button Enable disable audio 0 BOOKMARK Button Adds a bookmark to the current playback position CLIP COPY Button Pressing the CLIP COPY button allows you to copy video clips FOCUS NEAR FAR Button Used in PTZ mode to shift focus between a nearby point and a far away point PRESET SET VIEW Button Press the SET button while in PTZ mode to save the current position as a pre...

Page 21: ... the qbutton during playback pauses the video and displays on the screen Plays the video in normal speed and displays r on the screen Scans backward through the video at a fast rate Press to cycle through and the speed Scans forward through the video at a fast rate Press to cycle through and the speed Skips to the previous screen while in paused state Skips to the next screen while in paused state...

Page 22: ...Search End Login Clip Copy Begin Logout Clip Copy End Setup Begin Clip Copy Cancel Setup End Clip Copy Failure Remote Setup Change Clip Copy User Remote Setup Failure Clip Copy Begin Setup Import Clip Copy Finished Setup Import Failure Clip Copy Duration of Video Setup Export Clip Copy Camera Setup Export Failure Callback Failed Setup Export Canceled Factory Reset Schedule On Print Begin Schedule ...

Page 23: ...onnected 103 LILO Execution Failure 404 USB Storage Device in Use 104 Reboot Failure 405 Unsupported File System 105 Improper File 500 Clip Copy in Progress Upgrade Not Available 300 Remote Connection Failure Clip Copy Error Codes No Type No Type 0 Unknown Error 11 Save Failure 1 Device Error 12 Disk Error 2 Device Connection Failure 13 Clip Player Execution File Not Found 4 Incorrect Media 14 Cli...

Page 24: ...neral in the operation manual icon is shown but video is not being recorded If the Pre Event is enabled the and icons appears when recording is not inprogress or the and icons appear when an event occurs and recording is in progress For more information refer to the Schedule in the operation manual The DVR keeps on rebooting during a system upgrade without completing the upgrade Check the upgrade ...

Page 25: ...hms Monitor Out HDMI 1 HDMI VGA 1 SPOT 1 BNC 1 Vp p 75 Ohms Video Resolution HDMI 1920x1080 1440x900 1280x1024 VGA 1920x1080 1440x900 1280x1024 Composite SPOT 704x480 NTSC 704x576 PAL Recording Speed IPS Real time 480ips Full HD Playback Speed IPS Full Duplex 120ips Full HD I O Alarm In 8 or 16 TTL NC NO programmable 2 4V NC or 0 3V NO threshold 5V DC Alarm Out 4 relay outputs NC NO programmable 2...

Page 26: ...e Primary Storage SATA hard disk drive up to 4 Secondary Storage eSATA hard disk drive RAID USB hard disk drive or flash drive Some hard disks may not function properly when mounted on to this product Refer to the compatibility chart below before mounting any additional hard disk on to the product Hard disk compatibility chart is subject to change without notice Contact your retailer for the lates...

Page 27: ...IDIS Co Ltd For more information please visit at www idisglobal com ...

Reviews: