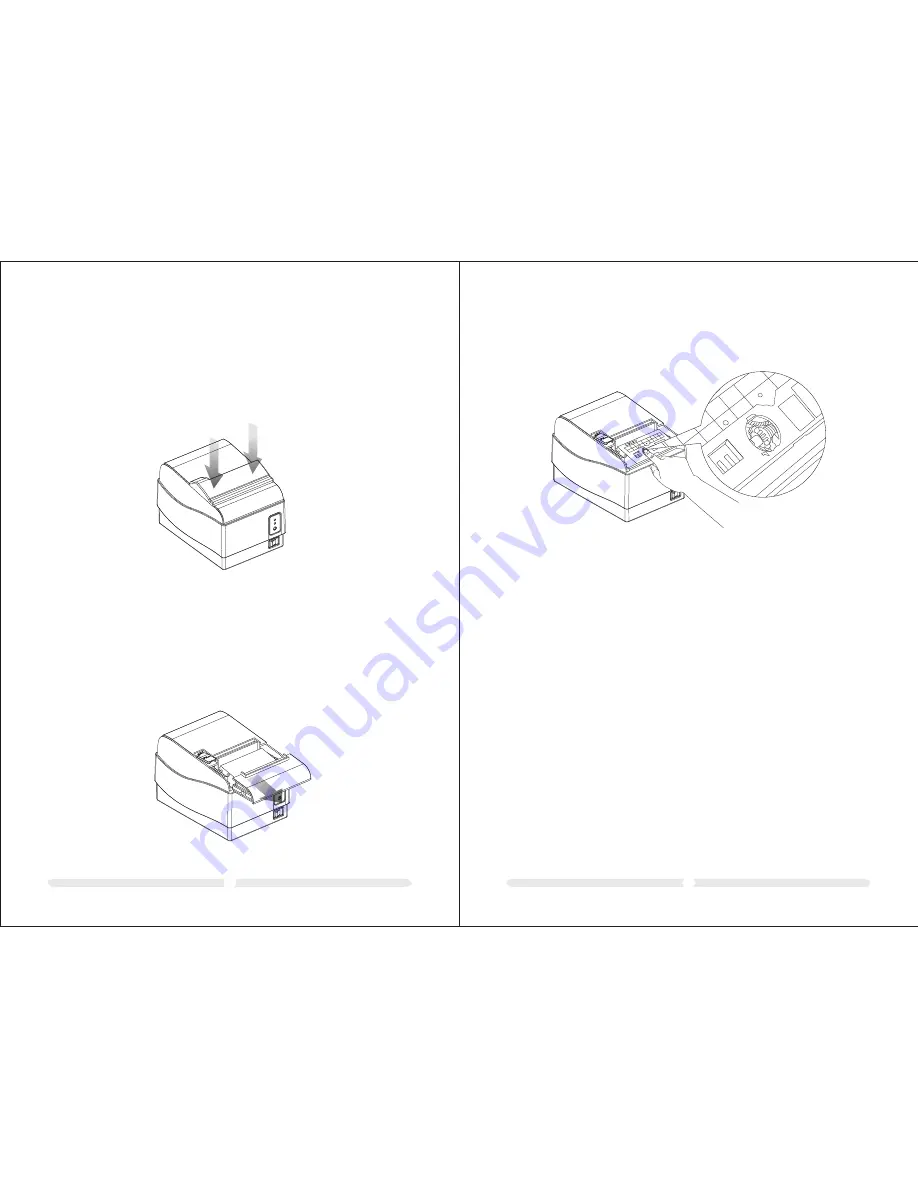
background image

06

07

4.7

4.8

4.9

4.4 

The printer is an Oil Proof Cover supplied. It’s used to prevent water 
splashing into the inside of the printer and not oil-water corrosion and 
oxidation protection to the internal electronic components, which 
extends the life of the printer.

Installation method:

Put the Oil Proof Cover onto the printer cover as the picture4.7 shows.


Installing Oil Proof Cover

4.5 Paper Jam Caused By Cutter

1. If the paper is thick or sudden lack of power when cutting, paper jam might 
    appear.(cutter cannot reset)
2. Normally the cutter will reset when repowered, if the cutter did not reset, 
    users could follow below steps to solve the problem.
    

① 

Take away the cutter cover as below picture4.8 shows.


② 

Stir the cutter gear till the cutter moves to the Initial position as picture4.9 

         shows.

4.6 Self-Test and DUMP Mode

1. Press "FEED" button and hold on when powering on the printer, the 
    printer will perform self-test.
2. Power off the printer and take out the paper roll. Then press "FEED" 
    button and hold on and power on the printer. Then put in the paper 
    roll and close the printer cover. The printer will print out "DUMP". 
    That means the printer enters in DUMP mode. All data will be printed 
    out in raw hex format.

Back to normal mode: 

restart the printer could put the printer in normal 

mode.

Summary of Contents for AB-88H

Page 1: ...MANUAL R E VIS ION E N 1 1 MINI T hermal P rinter US E R S M ANUAL A B 8 8 H...

Page 2: ...ter work Please don t touch the print head or touch the motor shell in case scalded NOTICE Do not fall the printer down and avoid vigorously impact Do not plug or unplug with your hands wet You may be...

Page 3: ...el 04 4 3 Installing the Roll Paper 05 4 4 Installing Oil Proof Cover 06 4 5 Paper Jam Caused By Cutter 06 4 6 Self Test and DUMP Mode 07 4 7 DIP Switch 08 4 8 Interface Explanation Interface Explanat...

Page 4: ...Method Printing Speed Resolution Paper Supply Mode Language Interface Pringing width Character Size Character Per Line Barcodes Driver Sensor Receive Buffer Size Mass W D H Paper type Width Diameter P...

Page 5: ...printer cover installs not well or Online error FEED Press the FEED button once to advance paper one line You can also hold down the FEED button to feed paper continuously 4 3 Install the Roll Paper...

Page 6: ...will reset when repowered if the cutter did not reset users could follow below steps to solve the problem Take away the cutter cover as below picture4 8 shows Stir the cutter gear till the cutter mov...

Page 7: ...ection Below are lists of DIP configurations Baud rate adjusting 4 7 DIP Switch 1 Unscrew the screw on bottom of printer and take away the metal cover as the picture 4 10shows 2 Users will find the DI...

Page 8: ...USB Interface USB port uses Type B plug and support USB1 0 and USB2 0 Signals are as below PIN 1 2 3 4 Signal Name VCC D D GND Direction 5V DC Data Data Ground Ethernet port uses RJ45 port with 10M ab...

Reviews: