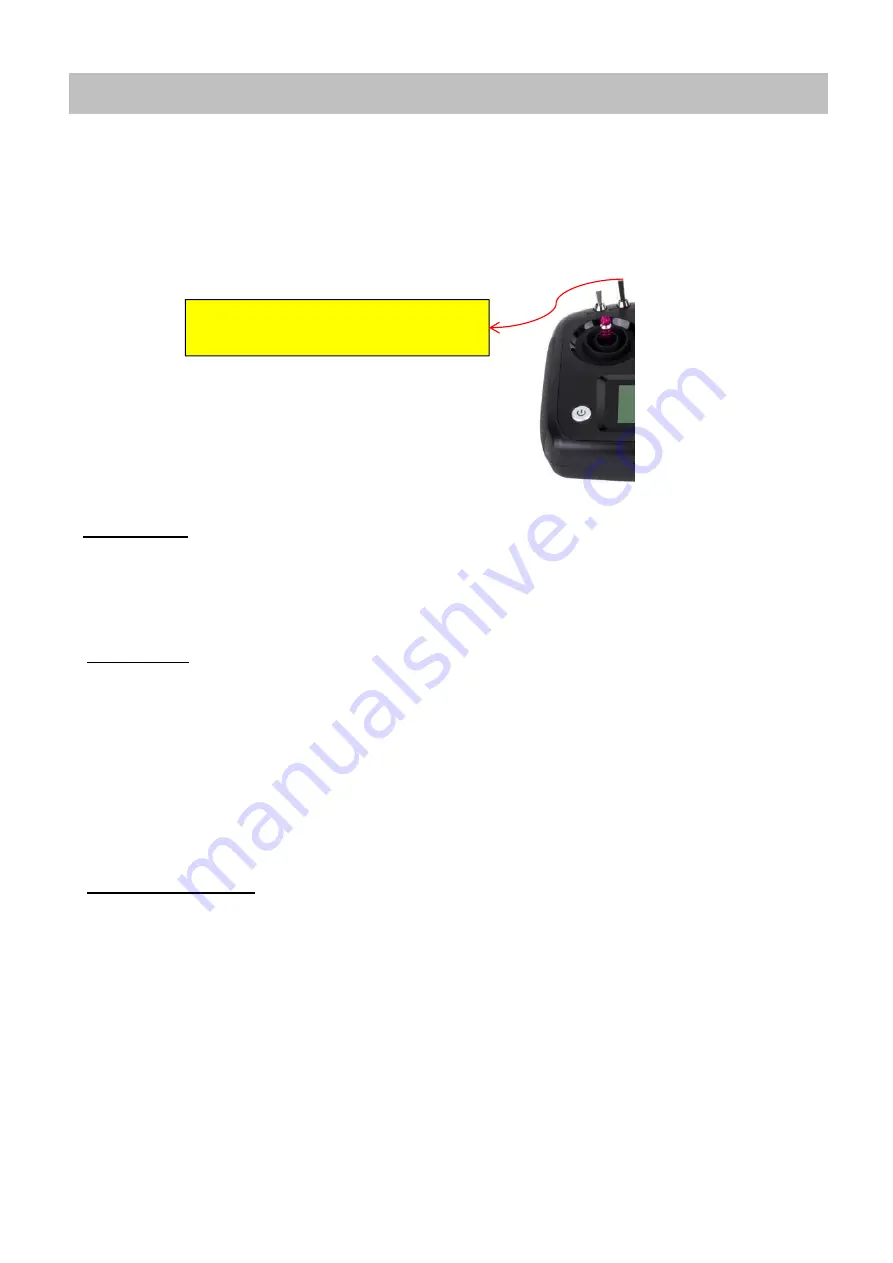
background image

Ch

14

Flight Modes

The Flight Mode Switch on the Remote Control is very important to ensure safe flight at all

times. Listed below are the THREE Flight Modes available on your new Poseidon. It is
recommended that you familiarize yourself with all of them.

GPS HOVER.

This is the Flight Mode that you will generally remain in while you are flying your drone. All Sensors are

switched on and therefore your drone is easiest to fly in this mode.

STABILIZE.

This Flight Mode Setting is also known as Attitude or Manual Mode. It Should only be used in Emergencies or

by those experienced Pilots. This is because putting your Drone into Stabilize turns off several of the important
sensors that the drone relies on for safe flight. For this reason, putting your drone into Stabilize mode allows it to
drift with the wind and will NOT hold GPS Position.
Stabilize mode is often used by Fishing Drone Pilots if the Drone becomes unstable in flight or is not responding to
Joystick controls. By Switching to this mode quickly might allow you to regain control of your Aircraft.

RETURN TO HOME

.

In “Return to Home” MODE, The Drone will go into Autopilot and Initiate a return to it’s original take-off

point. This is very useful for a Fisherman as it means once you have dropped your bait, switching on this Flight
Mode will allow the Poseidon to Automatically Fly home and land itself without fisherman intervention.

Note: “Return to Home” Mode should NOT be used in emergencies. If the Drone is experiencing issues while

in flight – Please use the “Stabilize” Flight Mode instead.

Flight Mode Switch

Summary of Contents for Poseidon Pro II Black

Page 1: ...Poseidon Pro II Black User Manual...

Page 2: ...read this manual carefully and ensure you understand it Once you use this drone you will be deemed to have read accepted the contents of this manual Please strictly follow the user manual to install...

Page 3: ...s This quadcopter can be extremely dangerous and cause personal injury Be careful when flying and operating it Please follow the contents of this manual and comply with relevant laws and regulations w...

Page 4: ...4 Items in box Included in your box A B C D E F G H I...

Page 5: ...Bait drop 4K camera Single axis gimbal X 1 1355 propeller X 2 pairs 6S 8000 mAh high voltage battery X 1 Digital battery capacity checker X 1 USB flash drive X 1 Carry case X 1 Note The USB flash dri...

Page 6: ...oller Otherwise the aircraft remote controller will not work The picture of remote control below in Mode 2 Factory Setting Note When switching on the remote control ensure the switches are set to the...

Page 7: ...and assemble the Poseidon pro II Black and to learn more about the flight characteristics of the Poseidon pro II Black It is recommended that you read this chapter carefully and follow the steps in t...

Page 8: ...de of the drone These should easily slide into the metal supports Don t worry about any slight movement as the legs will not come out 1 Ensure the drone is placed on a flat surface Install a fully cha...

Page 9: ...our phone APP Screen including calibration status when you encounter an error When the drone voltage is too low red LED flashing Armed below Means the Drone has just been Powered On but not yet ready...

Page 10: ...APP and click the Setting icon as shown by the BLUE ARROW in figure A Click the Start Calibration button as shown by the BLUE ARROW in figure B and click the start calibration icon to start the magne...

Page 11: ...brated on six sides by spinning the drone in a Clockwise Direction as shown below A B C D E F 4 IMPORTANT After the Drone compass calibration is completed please switch off the Drone then the Remote C...

Page 12: ...gure below shows the spin of the propellers while in flight To attach the propellers you need to reverse the Spin of the Propeller shown in the image below to screw it on correctly Propellers need to...

Page 13: ...hed above 10 the drone will automatically enter thedisarm mode and the propeller will automatically stop after about 5 seconds Do NOT attempt to take off with any less than 13 Satellites as shown on t...

Page 14: ...he drone relies on for safe flight For this reason putting your drone into Stabilize mode allows it to drift with the wind and will NOT hold GPS Position Stabilize mode is often used by Fishing Drone...

Page 15: ...ation Controls 3 Main Operation using Joysticks Mode 2 Factory Setting Remote control Joystick position Drone THROTTLE Takeoff Lift Descend PITCH Forward Backward ROLL Fly left Fly right YAW Rotate Le...

Page 16: ...trol Switched on you will need to connect the Phones WIFI to the Remote Control WIFI In the WIFI Settings on your phone Please search for the Poseidon Drone you are looking for Idftech XXXXXX XXX in y...

Page 17: ...e APP OR the controls on the Remote Control IMPORTANT Please pay close attention to the Important Telemetry Information displayed on the APP Screen as shown in the image above in particular the Drone...

Page 18: ...r both the drone battery remote control battery 1 Connect the Battery Charger to a Wall Outlet 2 Connect the Battery to the charger as shown in the image below and Power On the Charger 3 Adjust the ch...

Page 19: ...to be first removed from the Rear of the Remote Control before charging First remove the rear cover of the Remote then carefully remove the battery DO NOT use any sharp instruments to remove the batt...

Page 20: ...distance 1000m Diagonal size without propeller 480mm Propeller blade size 1355 Motor mode 4218 ESC parameters 40A Maximum rising speed 6m s Maximum falling speed 4 5m s Maximum horizontal flight spee...

Reviews: