background image

40

41

STEP 2

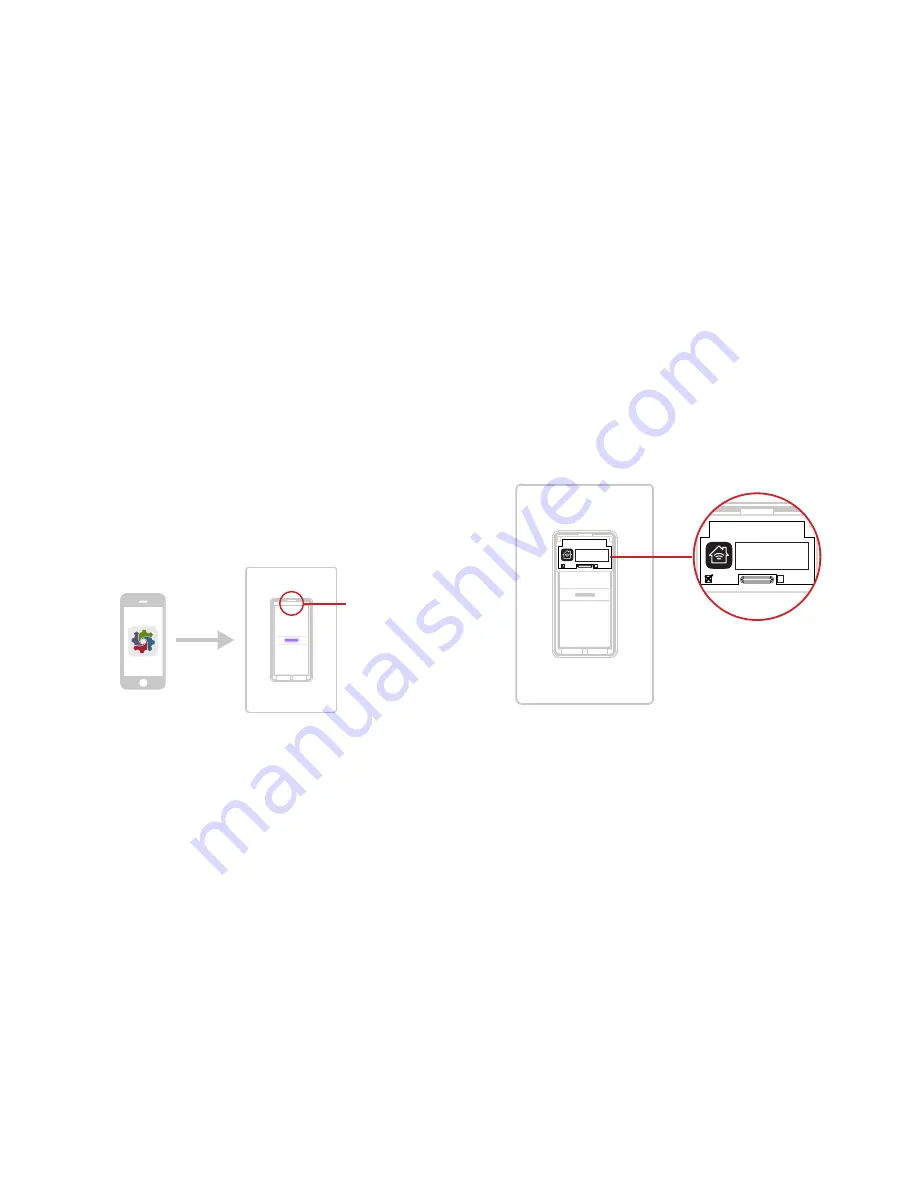
Launch the iDevices

®

 Connected app and you will be guided 

through the process of connecting your wall switches. For iOS 
devices, you will need the HomeKit

 setup code on the pull out tab 

of your 

Primary

 Wall Switch. 

One Color

Icon

Basic

Connected App Icon

Optimized Small Versions

.75pt Additional

.5pt Additional

Pull out tab

Wall Switch - Model: IDEV0008

Primary

Secondary

XXX-XX-XXXX

HomeKit™ setup code is located on the 
pull out tab of the iDevices

®

 Wall Switch. 

Wall Switch - Model: IDEV0008

Primary

Secondary

XXX-XX-XXXX

Summary of Contents for IDEV0008

Page 1: ...1 INSTALLATION SETUP GUIDE FOR SINGLE POLE 3 WAY CONFIGURATIONS IN WALL SOLUTIONS...

Page 2: ...a circuit that uses aluminum wires The iDevices Wall Switch must be installed in a manner that conforms to all applicable national state and local building codes The iDevices Wall Switch is intended...

Page 3: ...r to the circuit you are working on at your home s breaker or fuse panel Where ever possible install the iDevices Wall Switch in a non metallic gang box and use a non metallic faceplate as metal gang...

Page 4: ...ab Refer to this when prompted to enter your HomeKit setup code during the setup on a iOS device Also used to document the Wall Switch as the Primary or Secondary in a 3 way or 4 way configuration Dev...

Page 5: ...rom the gang box STEP 3 Confirm that each gang box contains a neutral wire typically white If there are no neutral wires present you may need to run additional wires please consult a qualified electri...

Page 6: ...with the provided wire nuts Note If you have more than 2 wires connected to your switch not including the bare copper or green coated ground wire please see the 3 way 4 way installation instructions...

Page 7: ...he breaker Using your voltage detector identify which of the 2 wires you removed is energized This is the Line wire The wire that is not energized is the Load wire Note these two wires for future refe...

Page 8: ...14 15 STEP 6 Turn the power back Off at the breaker and install the iDevices Wall Switch according to the diagram Ensure all wire nuts are securely fastened LOAD LINE NEUTRAL LINE LOAD GROUND...

Page 9: ...7 Install the Wall Switch into the gang box and install the faceplate STEP 8 Turn the power back On at the circuit breaker and confirm that the LED on the Wall Switch lights up purple LED will light...

Page 10: ...nsure power breaker is turned back on and the LED on the Wall Switch is solid purple STEP 2 Press and hold 6 for 5 seconds and release when the LED rapidly flashes blue Next tap 2 to begin the Wi Fi c...

Page 11: ...es you will need the HomeKit setup code on the pull out tab on your Wall Switch One Color Icon Basic Connected App Icon Optimized Small Versions 75pt Additional 5pt Additional Pull out tab Wall Switch...

Page 12: ...EP 3 Confirm that each gang box contains a neutral wire typically white If there are no neutral wires present you may need to run additional wires please consult a qualified electrician NOTE Your home...

Page 13: ...mmon terminal on both of the existing switches and cap with the provided wire nuts Note The common terminals usually have a screw that is either black or copper in color LINE LOAD NEUTRAL NEUTRAL TRAV...

Page 14: ...ire Mark this wire as the Secondary S Switch Position You will need to refer to this during the Pairing and Setup Process The common wire that is not energized is the load wire Mark as the Primary P S...

Page 15: ...the wire nuts are securely fastened Ensure you install a wire nut on the red lead on the secondary switch as well as on both ends of the traveler wire typically red wire LINE SECONDARY SWITCH LOAD PRI...

Page 16: ...TEP 9 Extend the pull out tab on the front of the Wall Switch connected to the Line wire identified in step 5 Using a pen put a X in the box on to indicate that this is the Secondary Switch Wall Switc...

Page 17: ...tep 5 Using a ball point pen put a X in the box on to indicate that this is the Primary Switch STEP 11 Turn the power back on at the circuit breaker and confirm that the LED on both Wall Switches ligh...

Page 18: ...First you will pair the Primary Switch to the Secondary Switch then you will add the Primary Switch to your Wi Fi network PAIRING THE PRIMARY TO THE SECONDARY SWITCH STEP 1 Ensure power breaker is tu...

Page 19: ...eat the steps above on the Secondary Switch by holding 6 until the LED rapidly flashes blue 5 seconds then release Next tap 1 to begin the pairing mode The LED will flash blue slowly The secondary Wal...

Page 20: ...ECTING TO THE WIRELESS NETWORK STEP 1 On the Primary switch press and hold 6 for 5 seconds and release when the LED rapidly flashes blue Next Tap 2 to begin the Wi Fi connection process Ensure LED is...

Page 21: ...it setup code on the pull out tab of your Primary Wall Switch One Color Icon Basic Connected App Icon Optimized Small Versions 75pt Additional 5pt Additional Pull out tab Wall Switch Model IDEV0008 Pr...

Page 22: ...Blue To reinitiate the pairing mode hold the Pairing Button 6 down for 3 seconds and the LED will turn solid blue LED State Description Green Flash When Wall Switch joins a Wi Fi network i e the link...

Page 23: ...44 45 SUPPORT If at any time you require assistance please contact our Customer Experience Team Call 888 313 7019 Email Support iDevicesinc com Visit iDevicesinc com Support...

Page 24: ...s been tested and found to comply with the limits for a Class B digital device pursuant to Part 15 of the FCC Rules These limits are designed to provide reasonable protection against harmful interfere...

Page 25: ...Le pr sent appareil est conforme aux CNR d Industrie Canada applicables aux appareils radio exempts de licence L exploitation est autoris e aux deux conditions suivantes 1 l appareil ne doit pas produ...

Page 26: ...e Inc Controlling HomeKit enabled accessories away from home requires an Apple TV 3rd generation or later with Apple TV software 7 0 or later and an iPhone iPad or iPod touch with iOS 8 1 or later Ama...

Reviews: